12 13DM16/DM12 Quick Start Guide
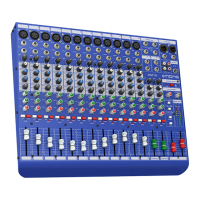
5. Connectors
To ensure the correct and reliable operation of the equipment, only high quality
balanced, screened, twisted pair audio cable should be used. XLR connector
shells should be of metal construction so that they provide a screen when
connected to the console/snake and, where appropriate, they should have Pin 1
connected to the cable screen.
1. Line output audio connector. Female XLR plug and male XLR chassis
connector with the following pinouts: 1 = ground; 2 = hot; and 3 = cold.
2. Mic/line input audio connector. Male XLR plug and female XLR chassis
connector with the following pinouts: 1 = ground; 2 = hot; and 3 = cold.
3. RCA connectors (2 track/record out). Male RCA plug and female RCA
chassis connector with the following pinouts: 1 = ground; 2 = signal.
4. ¼" TRS jack plug (inserts). Male ¼" TRS plug and female TRS chassis
connector with the following pinouts: 1 (tip) = send; 2 (ring) = return;
3 (sleeve) = ground.
5. ¼" TRS jack plug (input, output, phones). Male ¼" TRS plug and
female TRS chassis connector with the following pinouts: 1 (tip) = hot;
2 (ring) = cold; 3 (sleeve) = ground.
6. Operation
Basic Operation
1. Make sure the power to all devices is turned o !
2. Connect all appropriate power and audio cables to the mixer.
3. Set the controls with all knobs centered and all faders down/o .
4. Turn the mixer on.
5. Set the GAIN for each channel. (See the Gain Setting section for details.)
6. With the MAIN MIX faders and LOCAL MONITOR knobs all the way down, turn
on your PA system or monitors.
7. Slowly raise the MAIN MIX faders or LOCAL MONITOR knob to the
desired level.
8. Adjust the relative level of each channel by raising each CHANNEL FADER.
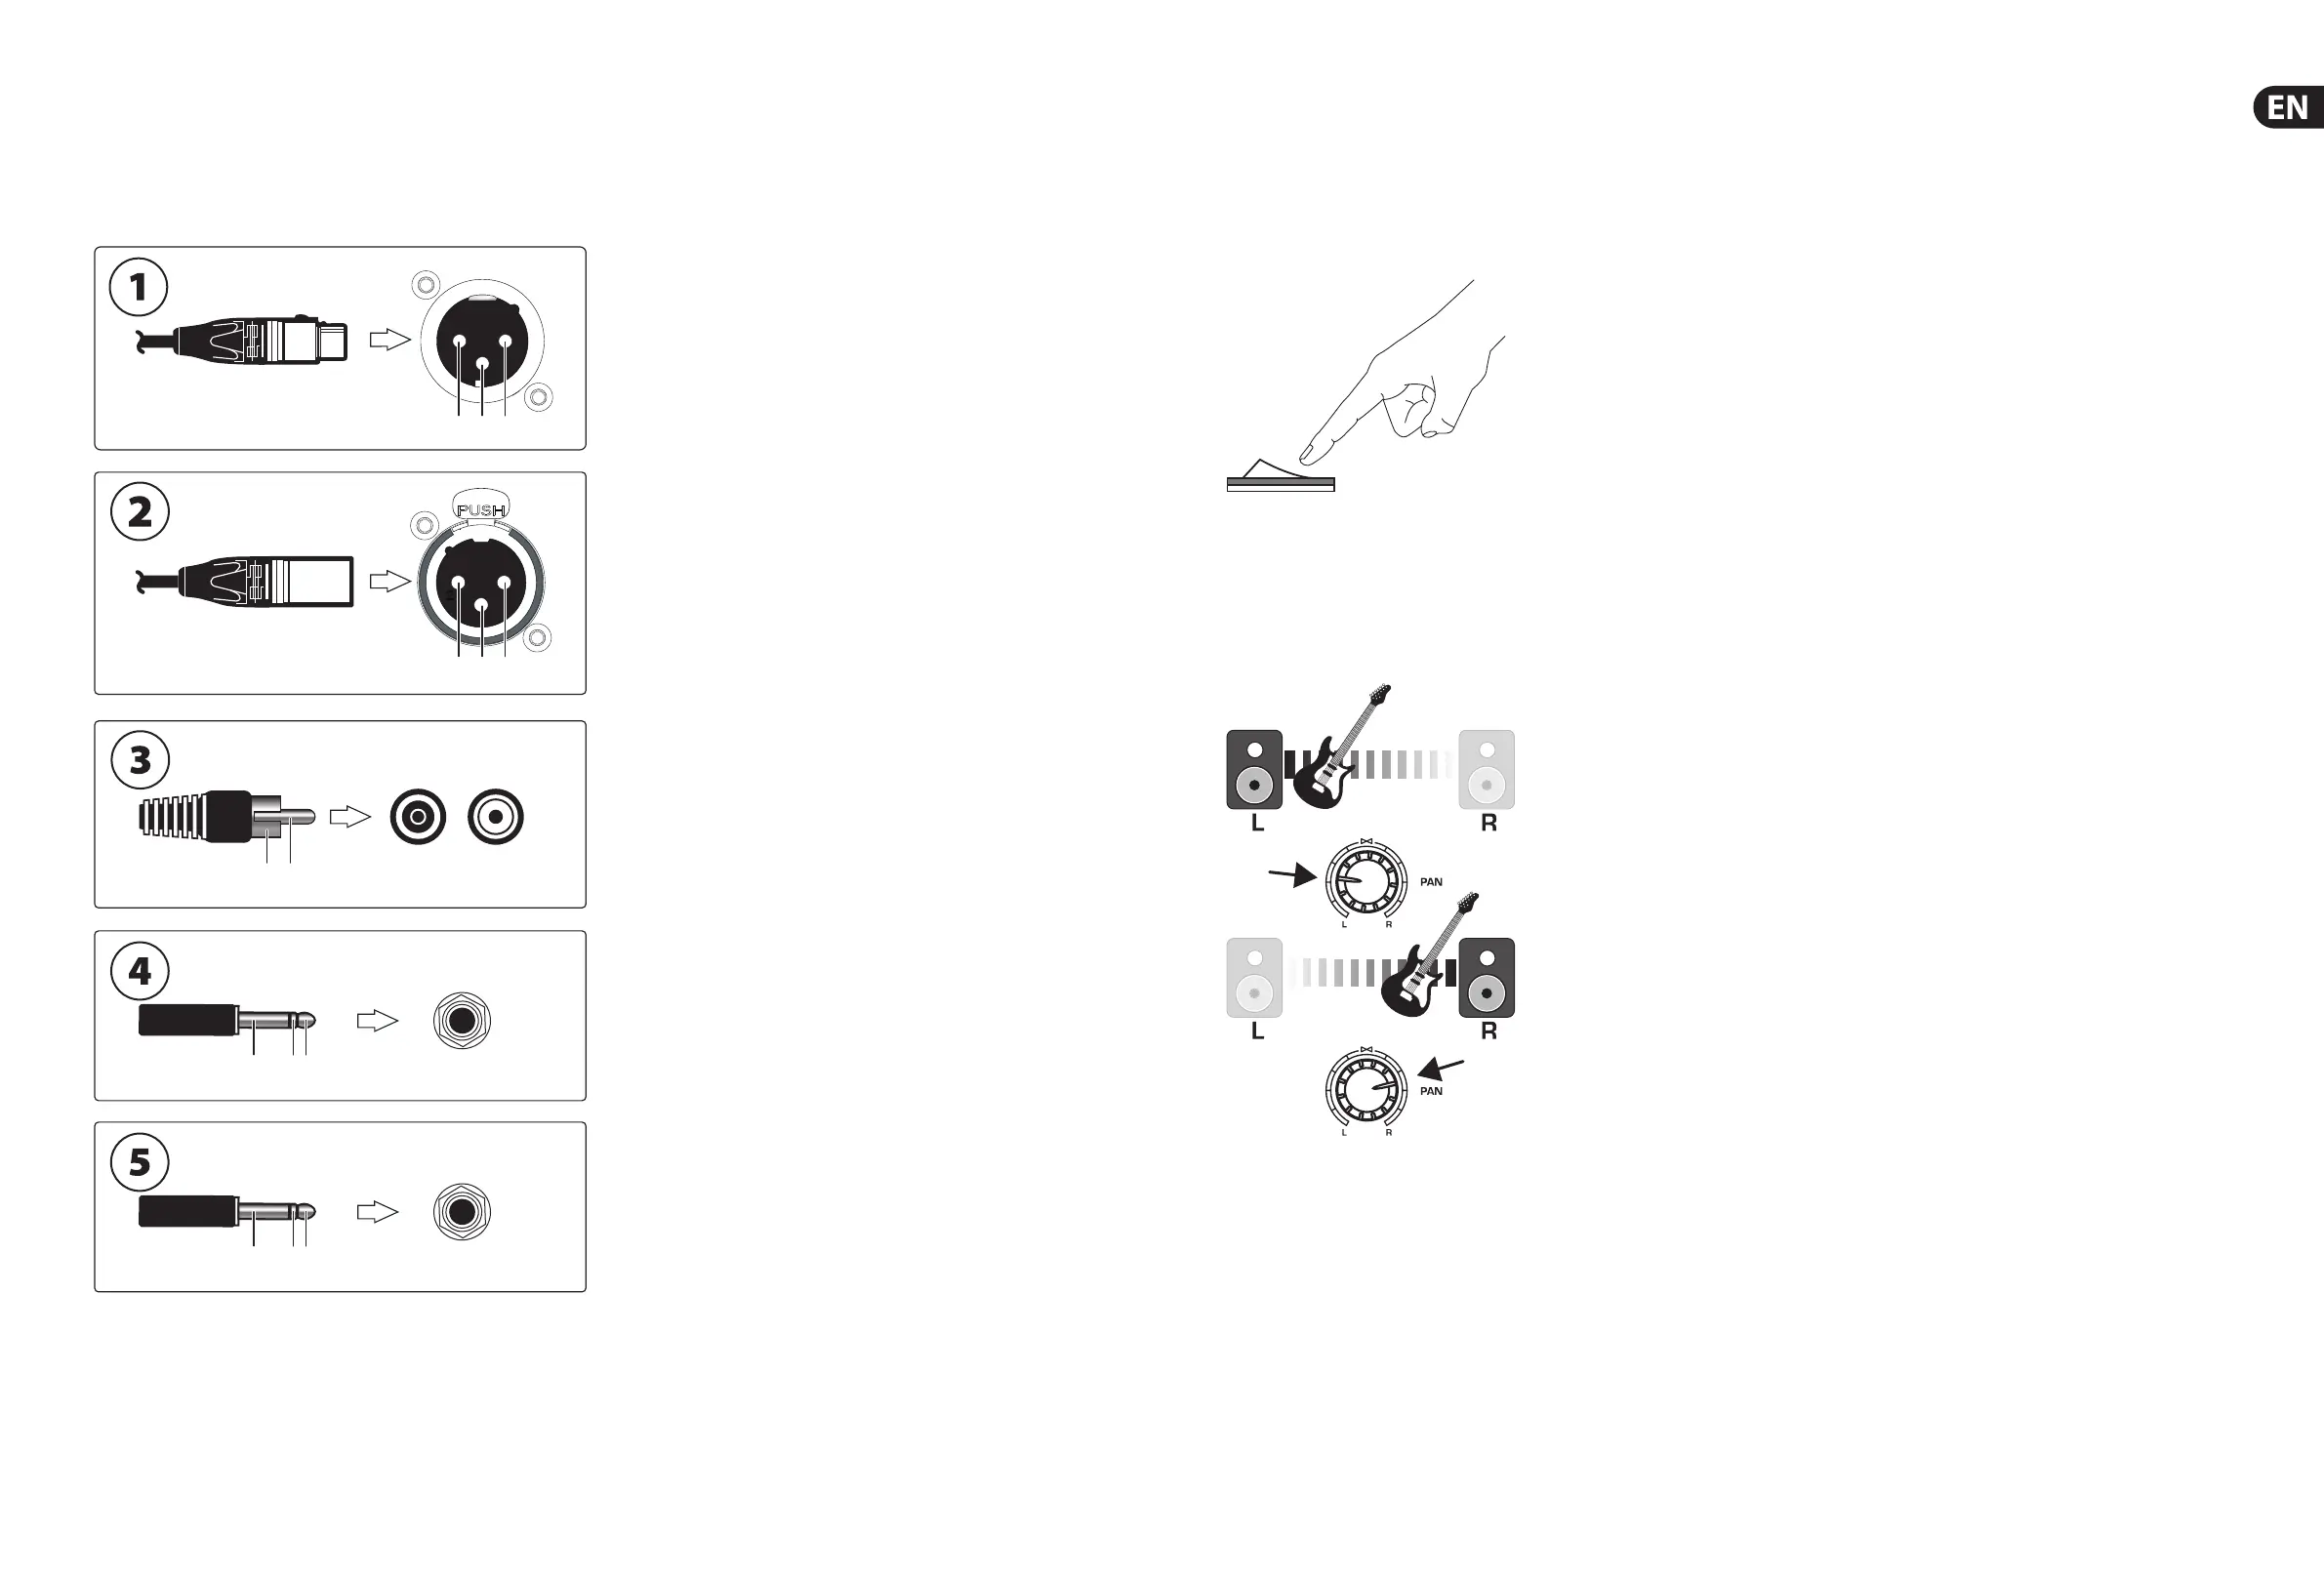
9. Adjust the left-right position of a channel in the stereo eld if necessary by
turning the channel’s PAN or BAL knob.
10. For live applications, adjust the overall output from the mixer to the power
amp or powered speakers by raising the MIX faders. If the red +10 or +16
LEDs on the MASTER METERS light, lower the MIX faders.
11. Use the AUX 1 and AUX 2 knobs to send the channel signals out to an e ects
processor or stage monitor connected to the AUX OUT jacks. If used for
e ects, route the signal back from the processor to the STEREO 1 or STEREO
2 inputs.
Gain Setting
1. Press the Channel 1 PFL (Pre-Fader Listen) button to solo the channel for
gain setting using the MASTER METERS. The PFL LED in the MASTER METERS
section will light up.
2. Sing, speak or play at a normal level through the microphone or instrument
connected to Channel 1.
3. While singing or playing, turn Channel 1’s GAIN control. The MASTER METERS
will display the signal level. Set the GAIN control so that the loudest peaks
reach 0 on the MASTER METERS.
4. Press the Channel 1 PFL button again to deactivate Pre-Fade Listen mode for
that channel.
5. Repeat Steps 1-4 for any other channels that will be used.