This document serves as the Owner's Manual for the DLFSAA and DLFLAA Air Handler Unit Ductless System, covering sizes 24 to 48. It provides essential information for the safe and efficient operation, maintenance, and troubleshooting of the air handler unit.
Function Description
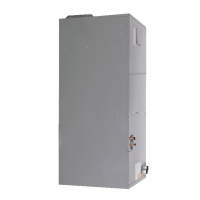
The Air Handler fan coil unit is designed to provide quiet and maximum comfort within a space. Its primary functions include cooling and/or heating, filtering, and dehumidifying the air when matched with an outdoor condensing unit. This system works to maintain a comfortable indoor environment.
The unit operates through four distinct modes:
- FAN ONLY: In this mode, the system circulates and filters the room air without altering its temperature.
- AUTO: This mode allows the system to automatically cool or heat the room based on a user-selected set point. It's recommended for single-zone applications. In multi-zone setups, using Auto changeover might cause an indoor unit to enter STANDBY mode (indicated by "--" on the display) until all indoor units are in the same mode (COOLING or HEATING). HEATING is the system's priority mode, and simultaneous HEATING and COOLING is not permitted.
- HEATING: In this mode, the system heats and filters the room air.
- COOLING: In this mode, the system cools, dries, and filters the room air.
The unit features an AUTO START function. If power is interrupted during operation, the unit stores its current operating conditions and automatically resumes operation under those conditions once power is restored.
A built-in 24V Interface Standard allows the air handler to be controlled by a third-party thermostat, which is field-supplied.
Usage Features
The Air Handler fan coil unit can be set up and operated using the provided wireless remote control. The remote control is primarily intended for use by the installation contractor to adjust airflow settings according to static pressure curves detailed in the installation manual.
The Display Panel, located inside the Control Box, acts as an infrared receiver for the wireless remote controller. It's used by the installation contractor to set the airflow. The display panel includes a manual button, operation indicator, timer indicator, LED display, infrared receiver, alarm indicator, and a PRE-DEF (pre-heating/defrost) indicator.
For optimal energy efficiency, several recommendations are provided:
- Select a comfortable thermostat setting and maintain it, avoiding frequent adjustments.
- Keep the air filter clean; frequent cleaning may be necessary depending on indoor air quality.
- Utilize drapes, curtains, or shades to block direct sunlight on hot days.
- Use the TIMER function to limit the unit's run time.
- Ensure the air intake on the front panel is not obstructed.
- Turn on the air conditioning unit before the room becomes excessively uncomfortable.
- Avoid setting the unit to extreme temperature levels.
- Close curtains during cooling to prevent direct sunlight.
- Keep doors and windows closed to maintain conditioned air within the room.
- Do not place objects near the air inlet and outlet of the unit.
- Clean the air filter every two weeks.
- Adjust the louvers to direct airflow properly.
Maintenance Features
Regular care and maintenance are crucial for the longevity and efficient operation of the air handler unit.
Cleaning the Indoor Unit:
- Always turn off the unit and disconnect its power supply before cleaning or maintaining it.
- When removing the filter, avoid touching metal parts inside the unit, as sharp edges can cause cuts.
- Do not use water to clean the inside of the indoor unit, as this can damage insulation and lead to electrical shock.
- Do not expose the filter to direct sunlight when drying, as it can cause shrinkage.
- For general cleaning, use a soft, dry cloth. For dirtier surfaces, a cloth soaked in warm water can be used.
- Avoid using chemicals, chemically treated cloths, benzene, paint thinner, polishing powder, or other solvents, as these can crack or deform the plastic surface.
- Do not use water hotter than 104°F (40°C) to clean the front panel, as it can deform or discolor the panel.
- Never wash the unit under running water, as this creates an electrical hazard.
- Clean the unit with a damp, lint-free cloth and neutral detergent, then dry it with a dry, lint-free cloth.
Cleaning the Filter:
- The filter prevents dust and other particles from entering the indoor unit. Dust buildup reduces efficiency.
- Clean the air filter every two weeks, or more frequently in dusty environments.
- Replace heavily clogged or un-cleanable filters with new ones.
- In households with animals, periodically wipe down the grille to prevent animal hair from blocking airflow.
- To clean, remove the filter cover, then remove the air filter.
- Clean the air filter by vacuuming its surface or washing it in warm water with mild detergent. If using water, the inlet side should face down and away from the water stream. If using a vacuum cleaner, the inlet side should face the vacuum.
Maintenance - Pre-Season Inspection:
Before periods of frequent use (e.g., at the start of a season), perform the following checks:
- Check for damaged wires.
- Clean all filters.
- Check for leaks.
- Ensure nothing is blocking the air inlets and outlets.
Maintenance - Long Periods of Non-Use:
If the air conditioner will not be used for an extended period, perform these steps:
- Clean all filters.
- Turn on the FAN function until the unit dries out completely.
- Turn off the unit and disconnect the power.
Troubleshooting:
The manual includes a troubleshooting section to address common issues. If any of the following conditions occur, immediately turn off the unit: damaged power cord, burning odor, loud or abnormal sounds, blown fuse, frequently tripped circuit breaker, or water/objects falling into/out of the unit. Do not attempt to fix these issues yourself; contact an authorized service provider.
The manual also lists common issues that are not malfunctions, such as the unit not turning on immediately (due to a 3-minute protection feature), changes in operating mode (e.g., COOL/HEAT to FAN mode to prevent frost), white mist emission (due to humidity or defrosting), and various noises (hissing, squeaking) which are normal during operation. If issues persist, contact a local dealer or customer service center with a detailed description of the malfunction and the unit's model number.