GD Midea Refrigerant Equipment Co. Ltd Service manual for Electrolux split Series
17
2.8 TEST RUNNING
1. Check that all tubing and wiring have been
properly connected.
2. Check that the gas and liquid side service
valves are fully open.
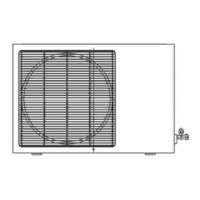
2.8.1 Settlement of outdoor unit
● Anchor the outdoor unit with a bolt and nut
(φ10mm) tightly and horizontally on a concrete or
rigid mount.
● When installing on a wall, roof or rooftop,
anchor the mounting base securely.
● In the case when the vibration of the unit is
conveyed to the connecting pipes, secure the unit
with an anti-vibration mount.
2.8.2 Prepare remote control
Notes:
● There are two methods to test the unit using
either the remote control or using the switch on
the indoor unit.
● It is recommended that you test the unit using
the switch on the indoor unit.
To use the remote control for test running, operate
as per the following instruction.
To use the switch on the indoor unit for test
running, skip the following instructions and move
to item “2.8.3”.
Prepare remote control
The remote control uses two alkaline dry cell
batteries (2 X AAA 1.5Volt).
(1) Slide the cover of the battery compartment (on
the rear of the remote control) off.
(2) Insert new batteries, making sure that the (+)
and (-) of battery are installed correctly.
(3) Slide the battery compartment cover back on.
NOTES:
● Always use 2 x AAA (1.5Volt) batteries. Do not
use rechargeable batteries.
● Remove the batteries from the remote control
if the system is not going to be used for a long
period.
2.8.3 Operating the unit with the switch on the
indoor unit
1. Open and lift the front panel up to angle until it
remains fixed with a clicking sound.
2. Press the AUTO/COOL button twice (For Size
A and Size B indoor units) or COOL button once
(For Size C indoor units) or Manual button twice
(For Size D and Size E indoor units), the unit will
work on test mode for cooling (Refer to page 3).
Note:
Cooling test mode running can only continue for
30 minutes. After this time it will automatically
change into AUTO mode with setting temperature
at 24
o
C.
If using the Remote Control for test running, set it
in COOL mode (Refer to User Manual). The unit
will not change into AUTO mode automatically. If
the ambient temperature is too low, the unit
cannot perform test running on COOL mode.
2.8.4 Evaluation of performance
Operate unit for 15~20 minutes, then check the
system refrigerant charge:
1. Measure the pressure of the gas side service
valve.
2. Measure the temperature of the intake and
discharge of air.
 Loading...