This document describes the Hiconics Lithium-Ion Battery Product Manual for models HEC2-MP69r1 and HEC2-SP69r1. It covers safety, product introduction, installation instructions, debugging, troubleshooting, maintenance, and product outage.
Function Description
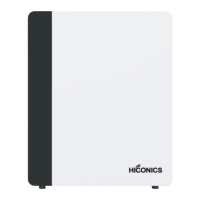
The Hiconics Lithium-Ion Battery system is designed to store and release electrical energy, integrating a power control module and battery cascading modules. It is a wall-mounted system consisting of a master control battery pack (HEC2-MP69r1) and slave control battery packs (HEC2-SP69r1). The master battery pack manages and controls the entire system and features an LED status indicator to display current electric quantity, running status, and fault information. The system is designed for high performance, reliability, and safety, with features like IP65 protection, adaptability to a wide temperature range, self-heating, and a long cycle life.
Important Technical Specifications
Models: HEC2-MP69r1 (Master Battery Pack), HEC2-SP69r1 (Slave Battery Pack)
Dimensions (LWH): 665mm * 540mm * 223mm (for both master and slave packs)
Weight:
- Master Battery Pack: 76.5 kg
- Slave Battery Pack: 74 kg
Electrical Specifications:
- Nominal Voltage: 96 V
- Operating Voltage: 76.5-106.5 V
- Battery Type: LFP (Li-ion)
- Nominal Capacity: 6.9 kWh (per pack)
- Usable Capacity: 6.2 kWh (per pack)
- Faradic Charge Efficiency: 99%
- Battery Roundtrip Efficiency: 95%
- Max Power: 4.8 kW
- Recommend Charge/Discharge Current: 36 A
- Max Charge/Discharge Current: 50 A
- Cycle Life (90% DOD): >6000 Cycles
Environmental Conditions:
- Charging Temperature: -20 to 60 °C
- Discharging Temperature: -20 to 60 °C
- Storage Temperature: -20 to 60 °C
- Humidity: 0 to 95%
- Altitude: Below 2000 m
- Protection: IP65
Communication Interfaces:
- System to Inverter: CAN2.0 (Note: Not included in slave battery pack)
- Battery to Battery/BMS: CAN2.0
- Program Update Port: RS485
Authentication & Compliance:
- CE, UKCA, UKNI, TUV NORD (IEC62619)
- TÜV (IEC62619), EU, CB, CE authentication
- Standards: IEC 62619, EMC IEC 61000, IEC 60529, IEC 63056, VDE-AR-E 2510
- Hazardous Materials Classification: Class 9
- Transport Testing Requirement: UN38.3, UN3840
System Configuration Options:
- Single master battery pack can connect with up to 4 slave packs in series.
- Dual master battery packs can be connected in parallel, with each master pack connecting to the same number of slave packs.
- Examples of configurations:
- 1 Master + 1 Slave: 13.8 kWh
- 1 Master + 2 Slaves: 20.7 kWh
- 1 Master + 3 Slaves: 27.6 kWh
- 1 Master + 4 Slaves: 34.5 kWh
- 2 Masters + 4 Slaves: 41.4 kWh
- 2 Masters + 6 Slaves: 55.2 kWh
- 2 Masters + 8 Slaves: 69 kWh
Usage Features
Safety Principles:
- Avoid strong collision, heavy pressing, or piercing.
- Keep away from heat sources or high-temperature places.
- Place in dry and ventilated areas.
- Keep inaccessible to children and animals to avoid electric shock.
- Keep away from electric conductors and public places.
- Do not touch with wet hands.
- Maintain a safety distance between battery and ground.
- Ensure appropriate fire extinguishers (Type D foam, water-based insulation, ABC, or carbon dioxide).
- In case of leakage, avoid direct contact with liquid/gas; seek medical assistance for inhalation, eye contact, or skin contact.
- If wet or damaged, contact professional personnel.
Installation:
- Wall-mounted design.
- Uses a positioning rack for simple and accurate installation, ensuring horizontal alignment.
- Ground clearance must conform to local laws and regulations.
- Requires qualified electricians for installation, adhering to local regulations and industrial laws.
- Personnel must wear protective devices (insulated gloves, goggles, dust mask, safety shoes).
- Unpacking involves checking for transport damage and ensuring all accessories are present.
- Tools required include percussion drill (12mm), torque socket wrench, torque wrench, diagonal pliers, wire stripper, torque screwdriver, rubber hammer, utility knife, cable cutter, crimping tool, cold pressing terminal clamp, and open-end wrench.
- Harness installation involves connecting master and slave battery packs, and parallel harnesses for multiple master packs. Unconnected communication ports must be protected with waterproof caps.
- The PTC-OUTPUT and series-OUTPUT interfaces of the final slave battery pack per cluster must be short-circuited using F and G short-circuit pieces.
- Optional accessories are available for inverter connection and parallel connection of master battery packs.
System Startup & Shutdown:
- Startup: Ensure all cables are connected, open the circuit breaker, and press the startup button for 2-3 seconds. The SOC power indicator will turn on, and the system will perform a self-check.
- Shutdown: Ensure the battery is not charging or discharging. Pull the circuit breaker to OFF. Do not remove power cables until the system is completely shut down (wait 30 seconds after shutdown to avoid arc discharge).
Status Indicators (Master Battery Pack):
- Power Level Indicator (LED #1-#6):
- Blue lamps indicate current electric quantity (100%, 80%, 60%, 40%, 25%).
- #6 lamp (Red/Blue):
- Steady red: Battery discharged to low level (25%SOC > current quantity > 10%SOC), charge/discharge allowed.
- Red light flashing: Low power protection, discharging disabled, charge immediately.
- Red and blue flash alternatively: Charging at low battery (25%SOC > current quantity > 10%SOC).
- Flickering during charging, progressively off during discharging.
- Running Status Indicator (LED #7):
- Off: Normal operation.
- Steady red: Battery fault, charge/discharge prohibited.
- Blinking yellow: WIFI communication error, charge/discharge allowed.
- Note: If the status indicator is steady red, the power status indicator will turn off completely.
Troubleshooting:
- Power status indicator off: Check cable connection and power.
- Running status indicator (power battery) steady red: Check PCS communication cable connection.
- Running status indicator (battery pack) flickering yellow: Check WiFi connection.
- Battery startup failure: Check cable connection.
- Battery operation failure: Check PCS cable connection and for PCS battery communication error alarms.
Maintenance Features
Warranty:
- Hiconics offers quality guarantee services within the warranty period if the product is installed and used according to the manual.
- Warranty expires if installation or operation violates the manual.
- Hiconics is not liable for direct or indirect losses due to force majeure, misuse, improper installation/debugging/operation, insufficient ventilation, corrosive environment, transport damage, unauthorized maintenance, poor device maintenance, external factors (abnormal physical/electrical pressure), incompatible frequency converter, or connection to unauthorized inverters.
Routine Maintenance (Recommended Period: 1 time/half a year for electric connection, 1 time/year for system running and environment):
- Electric Connection:
- Check for loose cables, terminal blocks, arc discharge traces, rust.
- Check for cable damage, especially scratches on metal contact surfaces.
- Check for falling insulation wrapping of cable terminal blocks.
- Ensure normal cable distribution.
- System Running and Environment:
- Visually inspect for device damage or deformation.
- Check for abnormal sounds during operation.
- Inspect humidity and dust in the ambient environment; check air inlet filters.
- Charge the battery to at least 50% SOC every 9 months if idle.
- Contact dealer for capacity evaluation before expanding the battery system.
- Note: Actual maintenance period may vary based on installation environment; shorten period and increase frequency in dirty environments.
Product Outage:
- Move the inverter switch to OFF.
- Turn off the master battery pack switch and disconnect its breaker.
- Disconnect cables between battery pack and inverter, then disconnect short-circuit plugs and cables on the last battery pack.
- Pack the BMS and battery module in original packaging or equivalent carton (for loads >80kg, with handle, completely wrapped).