Page 17
Installation
Instructions
NOTICE
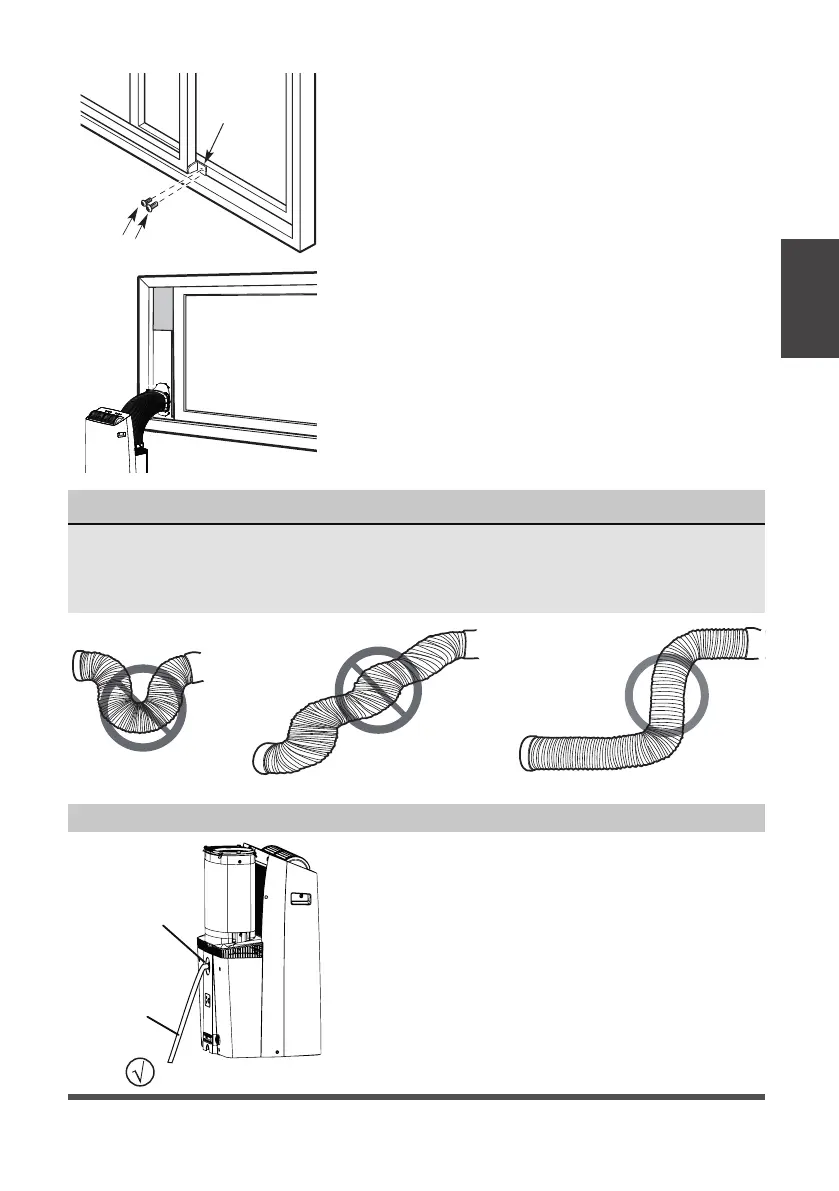
To ensure proper function, DO NOT overextend or bend the hose. Make sure that
there are no objects within 20in (~500mm) of the inlet and outlet hose.
All illustrations in this manual are for explanation purposes only, your air
conditioner may be slightly different than shown.
2 Screws
Security
Bracket
6. If desired, install the security bracket with 2
screws as shown.
7. Attach the Sliding Window Adapter to the hose
by lining up the circles on the adapter the hose.
Insert the window slider adapter into the hole of
the window slider.
Remove
the upper
drain plug
Continuous
drain hose
• During Dry modes, remove the upper drain plug
from the back of the unit and install the drain
hose.
For models without drain connector, just attach
the drain hose to the hole. Place the end of the
hose directly in the drain area you’re using.
Water Drainage