MCAC-UTSM-2014-01 R410A Mini Split Chiller 50Hz
55
5. After vacuuming, close the Lo-lever of manifold valve and turn off vacuum pump. When doing vacuuming
for more than 15 minutes, please confirm that the indicator of multi-meter points to-1.0X10⁵Pa(-76cmHg)
6. Totally open the Hi-stop valve and Lo-stop valve.
7. Remove the charge hose from the charging inlet of Lo-stop valve.
8. Fasten the valve bonnets on Hi-stop valve, Lo-stop valve and on the charging inlet of Lo-stop valve.
C. Expel air with refrigerant container
1. Connect the charge hose of refrigerant container with charging inlet of Lo-stop valve.
2. Fasten the joint nuts C, D and the joint nut of stop valve A.
3. Loosen the joint nut of stop valve B a little.
4. Open the valve of refrigerant container, after the refrigerant air is expelled from joint nut on Hi-stop valve
side for 10~15 seconds, fasten the joint nut of stop valve B.
5. Remove the charge hose from the connection of Lo-stop valve and push the air valve core with a screw
driver to discharge the refrigerant from piping until there is no noise. Then put back the air valve core at
once in case the air goes into the system.
6. Remove the valve bonnet and totally open the stop valve B on high-pressure side and the valve rod on
low-pressure side of the outdoor unit, then fasten the valve bonnet.
7. Make sure to fasten the valve bonnets of both Hi-stop valve and Lo-stop valve.
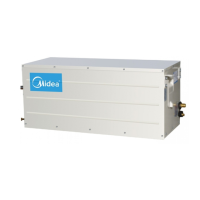
18.4 Installation of water pump box
18.4.1 Installation location
Please keep away from the following places:
● Such places where the temperature is high, water pump box can be installed outdoors. In other places,
please install it indoors, such as washroom and the places that prevents it from water.
● There is combustible gas leakage.
● There is much salty ingredients.
● There is caustic gas such sulfide in the air. (The copper tubes and welding parts will be rusted and
damaged, causing refrigerant to leak.)
● There is mineral oil, cooking oil or gasoline. (This may cause damage to plastic parts, looseness of
components and leakage.
● A place that is too weak to bear the weight of water pump box.
● There is equipment that produces electromagnetic wave. (It will disturb the controlling system of air
conditioner.)
18.4.2 Install the refrigerant piping
Check whether the height drop between water pump container and outdoor unit, the length of refrigerant
piping, and the quantity of the bends meet the following requirements:
The Max. Height drop 5m (if longer than 5m, outdoor unit should be above the water pump container.); The
length of refrigerant piping shorter than 10m;
The quantity of bends fewer than 15.
● Do not let air, dust, moisture or other impurities fall in the piping system during installation.
● Fix the outdoor unit and water pump box before installing the refrigerant piping.
● The refrigerant piping should not be installed until you check that the H-stop valve and Lo-stop valve or
outdoor unit have been closed.
18.4.3 The procedures for connecting pipe
1) Connect the water inlets and water outlets of water pump box and indoor unit with soft connection and
charge water into the pipe to check whether there is leakage. Then connect the outdoor unit piping. Bend
the piping carefully and do not damage them.
2) The stop valve of the outdoor unit should be closed absolutely (as original state). Every time you connect
it, remove the nut of stop valve then connect the flaring pipe immediately (with 5 minutes). Before
connecting, use refrigerant to expel the air in the pipe.
3) Connect the Hi-stop valve and Lo-stop valve of A and B system in outdoor unit to water pump box with
piping. Make sure that the connection of both outdoor unit and water pump box should be corresponding.

 Loading...