1. Determine the route to move the unit to the installation site.
2. First unseal and unpack the unit. Then, hold the seats of the
hanger (4 pcs) to move the unit. Refrain from exerting force on
other parts of the unit, especially the refrigerant piping, water
discharge piping, and the plastic parts.
1. Before Installation
1. Choose a site that fully complies with the following conditions and
user requirements to install the air conditioning unit.
Well ventilated.
Unobstructed airflow.
Strong enough to bear the weight of the indoor unit.
Ceiling has no obvious slant.
There is sufficient space for repair and maintenance work to be
carried out.
No leakage of flammable gas.
The length of the piping between the indoor and outdoor units is
within the permitted range (refer to the manual on installation of
the outdoor unit).
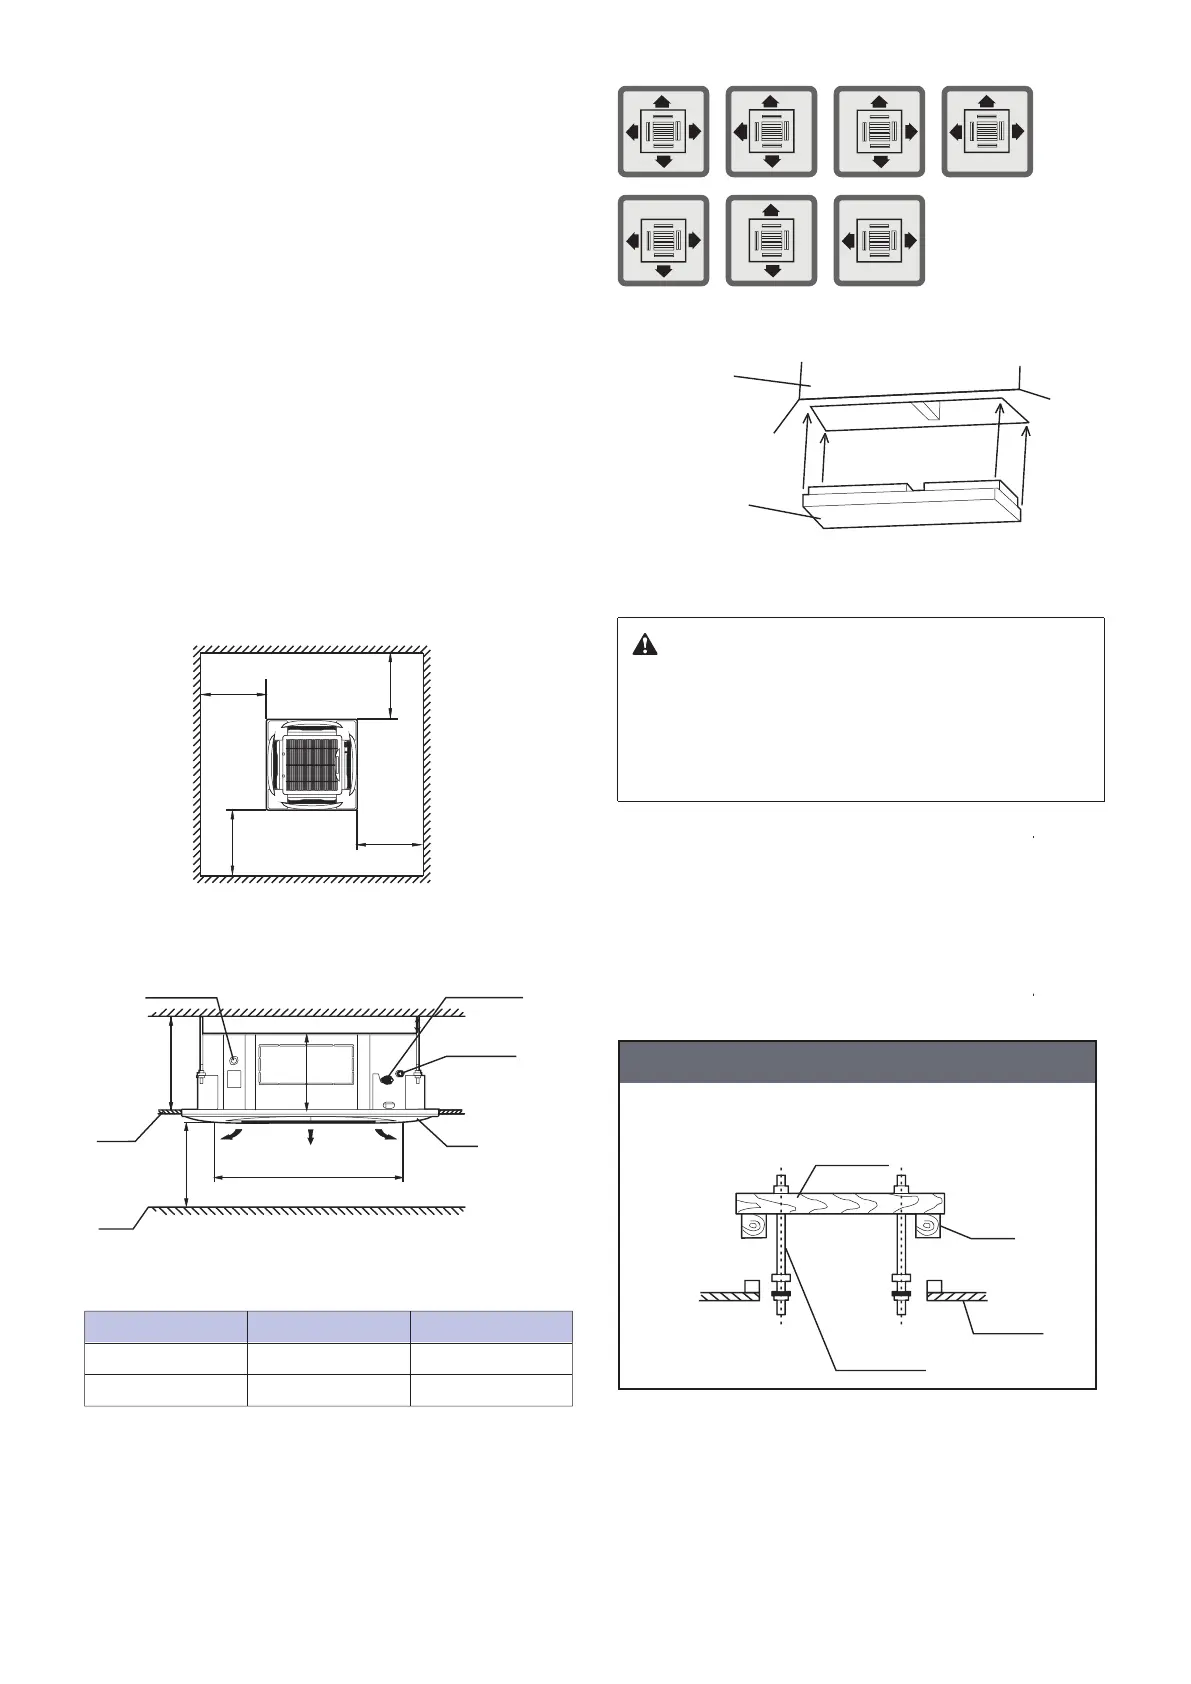
2. Mounting height
The mounting height is 2.5~3.5 metres (2.5~4 metres for model 140).
3. Mount using the mounting screws.
4. Space required for installation (unit (mm)):
5. Based on the shape of the room, determine the airflow directions
for the installation site. See Figure 2.3 for the schematic on the
direction of airflow. If part of the air vent must be blocked, you may
insert an air baffle at the vent of the unit body to block the air flow.
See Figure 2.4.
2. Choosing an Installation Site
Figure 2.1
Panel
Ceiling
910 mm (ceiling hole position)
Air inlet
Air outlet
Air outlet
Floor
Connect to water
piping outlet
Figure 2.2
Connect to
refrigerant
piping (liquid)
Connect to
refrigerant
piping (gas)
Table 2.1
Figure 2.3
Air baffle
Unit body
Figure 2.4
3. Indoor Unit Installation
Make sure that only specified components are used for the installation
works.
3.1 Installation with Lifting Bolts
Use different bolts for the installation depending on the installation
environment.
Square bar
material
Beam
Ceiling
Lifting bolt
Figure 3.1
Wooden structure
Secure the square rod on the beam to set the hoisting bolts.
• The air baffle is not included. Please contact the sales agent
to purchase the wind deflector.
• The air baffle must be installed in front of the installation panel.
If the panel is already installed, make sure you remove the
panel before you install the air baffle.
Model
≤8.0kW
≥9.0kW
A (mm)
230
300
H (mm)
≥260
≥330
A
H
>2500mm
≥30mm
>1000
>1000
>1000
>1000
4
Caution
 Loading...