组装方法
Assembly Instruction
使用说明
User Instructions
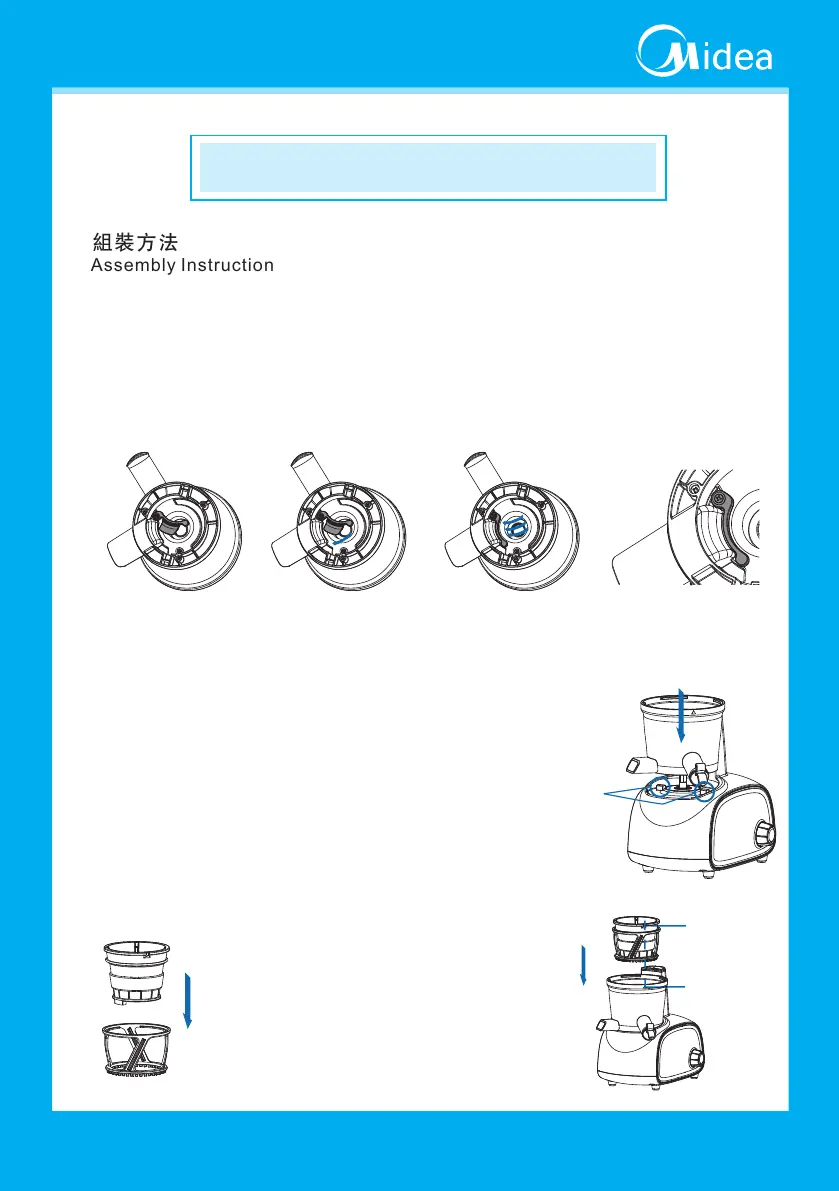
1.榨 汁杯底部橡胶垫片的组 装方法
将榨 汁底部橡胶垫片一边拔 出後,请按下图方向插入。
注意 :橡胶垫片必需安装到 位,否则会出现漏汁问题。
Pull out one side of the rubber gasket at the bottom of juicing bowl, and insert it in the direction shown
in the figure below.
How to assemble the rubber gasket at the bottom of juicing bowl
Note: The rubber gasket must be properly installed to avoid juice leakage.
榨汁 杯底部
橡胶 片插入方向
紧密 插入
完全 安装妥当状态
Bottom of juicing bowl Rubber gasket
insertion direction
Inserted tightly
Status after proper
installation
2.将榨汁杯安装在主体上
如下图将榨 汁杯插在主体 的 固定点处。
*向下 安装时榨汁杯上的标示线与主机上的标示线对齐
3.将 滤网放入刷架中
固定 点
Fixing points
As shown in the figure below, insert the juicing bowl onto the
base by aligning with the fixing points on the base.
During downward installation, please align the mark
line on the juicing bowl with that on the base.
Assemble the juicing bowl onto the base
Put the strainer into the brush rack
滤网 标示点
Mark point on
the strainer
榨汁 杯标示点
Mark point on the
juicing bowl
4.将组装好的榨汁筒和清洗架装入杯中
* 安装 时请按右图所示按滤网上标示点和
榨汁 杯上的标示点对齐。
Install the strainer and cleaning rack assembly
into the juicing bowl
During installation, please align the mark point
on the strainer with that on the juicing bowl, as
shown in the figure on the right.
7