Midea
V6R
Series Engineering Data Book
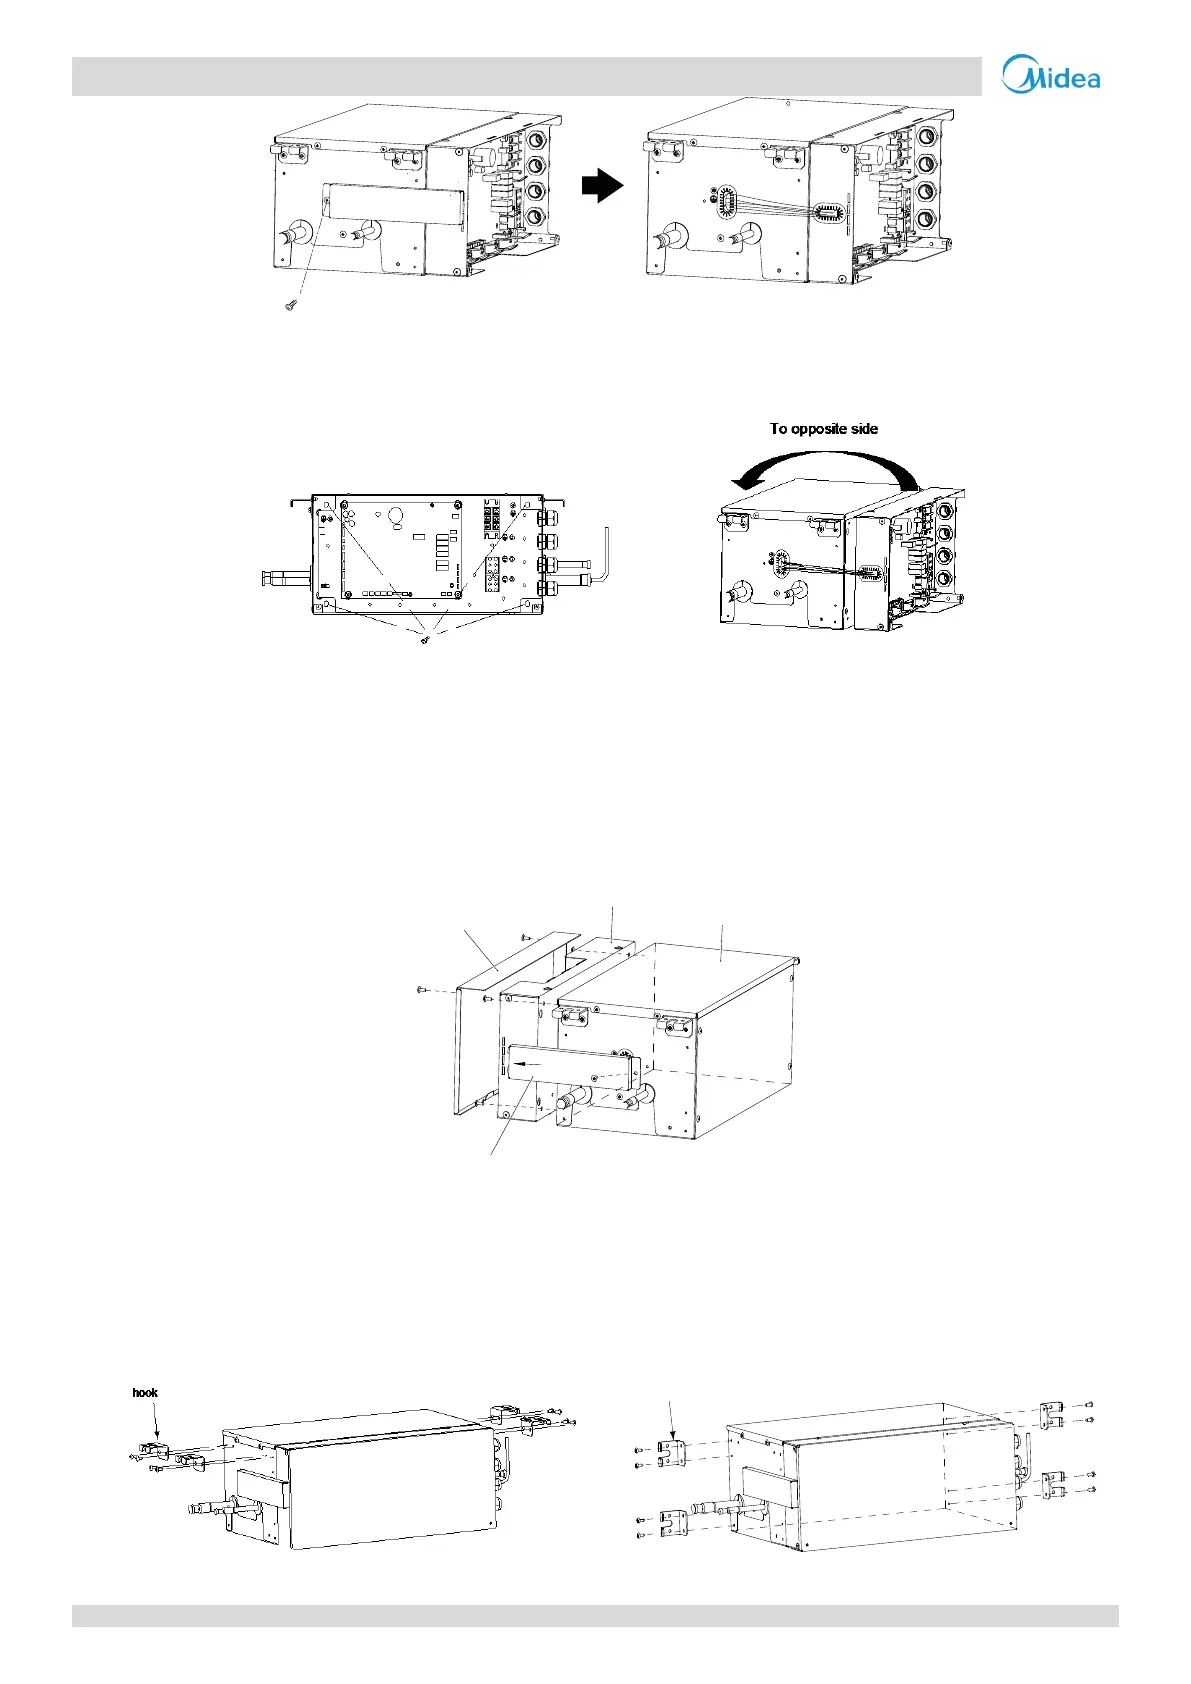
(3) Remove 4 screws shown in the figure on the below, remove the electrical box to the opposite side.
Figure 3-2.13: Step 3 for electric control box replacing
(4) Attach the electrical box and electrical box cover to the other side and secure them with the screws. Attach the
sealing plate with 1 screw.
Figure 3-2.14: Step 4 for electric control box replacing
Change to wall-mounted type
MS01 has two different installation types: ceiling-suspended type and wall-mounted type. The factory default installation
type is ceiling-suspended type, if the installation type must be changed to wall-mounted type, follow these steps (1) to (4):
(1) Remove the 8 screws shown in the figure and pull off 4 hooks.
(2) Attach the hooks shown in the figure with 8 screws from the previous step.
Figure 3-2.15: Step 1 for wall-mounted type replacing
Figure 3-2.16: Step 2 for wall-mounted type replacing
Electrical box
Top surface of the MS
Electrical box cover
Sealing plate
 Loading...