20
Fig.17A
INSTALLATION INSTRUCTIONS
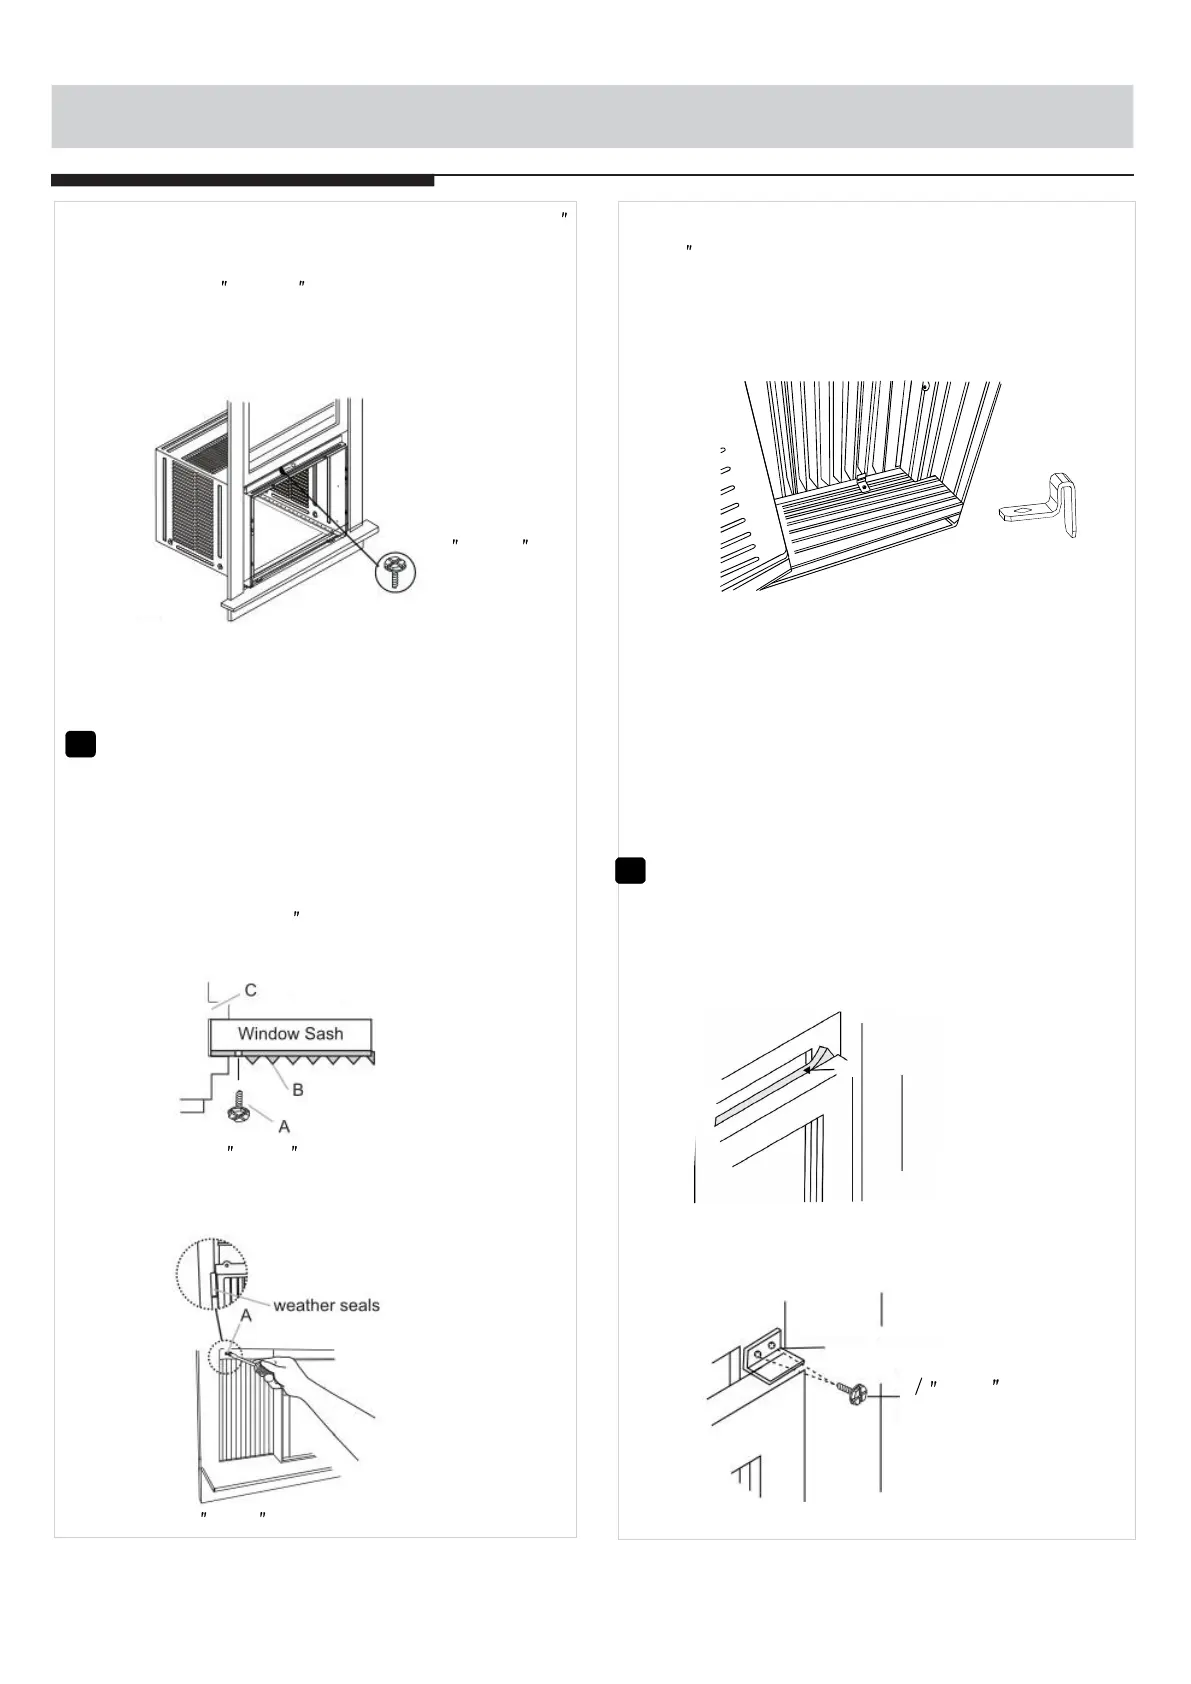
4. Attach the top angle to window frame: Use a 3/32
drill bit to drill one hole through the hole in the
middle of top angle into the window frame, and
drive one 3/ 4 (or 1/ 2 ) HEX-HEAD locking screw
through hole in the middle of top angle into the
window frame as shown (Fig.17A).
7
Attach Window Filler Panels to
Window Frame
1. Extend the window filler panels out against the
window frame.
2. Use a 1/8" drill bit to drill a starter hole through the
hole in the top leg of each window filler panel and
into the window sash (Fig. 18A and Fig. 18B).
Connect with one 3/ 4 (or 1/ 2") long hex head
screw.
8
1. Trim sash seal to fit window width. Insert into
space between upper and lower sashes(Fig.18).
Window Sash Seal
Fig.18
Install Window
Safety Lock
Sash Seal and
Fig.18A
A.3/ 4 (or 1/2 ) long hex head screw
B. Left-hand Window Filler
Panel Top Leg
C. Window channel
Fig.18B
A.3/ 4 (or1/2 ) long hex head screw
3/ 4 (or 1/ 2 ) long
HEX-HEAD
SCREW
Safety Lock
3 4 (or1 )Long
Hex-head Screws
/2
Fig.19
2. Attach right angle safety lock (Fig.19).
3. Attach the Lock Frames to the winow sill using two
3/ 4 (19mm) screws(Fig.18C)(on some models).
8
Fig.18C
 Loading...