Page 17
Installation
Instructions
Fig. 6
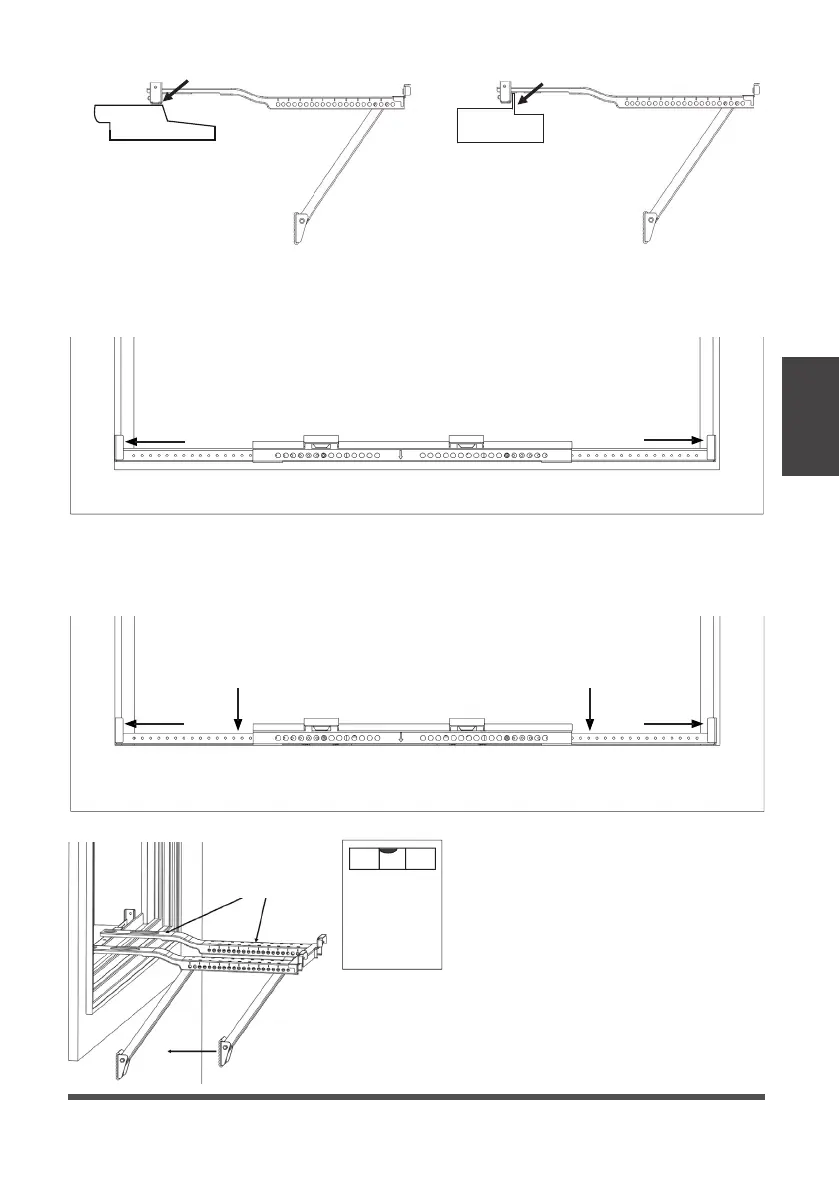
Vinyl Type Windows with a Lipped Sill
A1. Secure the bracket to the windowsill by drilling 1/8” pilot holes and installing the
1/2” Type A screws as shown in Fig. 6.
Wooden Windows
INSIDE
OUTSIDE
INSIDE
OUTSIDE
Vinyl-Clad Windows
Vinyl Lip
Fig. 5
Fig. 7
Wooden Type Windows with a Flat Sill
A2. Secure the bracket to the windowsill by drilling 1/8” pilot holes and installing the
1/2” and 1” Type A screws as shown in Fig. 7.
B. Move the Angled Support Arms
toward the exterior wall until
the feet touch the wall. Place
the level on the bracket and
adjust the Support Arms so that
it is level or tilted 1/4 bubble
downward and towards the
outside.
Here is what
1/4 bubble on
the level
should look
like.
Depending on the
level used, place at
either location below
to check level.
Fig. 8
1/2” Type A
1/2” Type A
1” Type A
1” Type A
1/2” Type A 1/2” Type A
 Loading...