Only use the provided Midland USB cable for charging.
Only use the provided Midland Li-Ion battery.
This radio does not support Alkaline Batteries. Do not mix Alkaline, Standard or Rechargeable Batteries.
CHARGING EXTERNAL DEVICES
Cell phones and USB-powered devices can be charged using the USB charge cable for that device. Connect the
charge cable to the port labeled USB on the side of the ER50. If the radio is on, it will automatically turn off and go
into charge mode. The radio should be fully charged before charging external devices.
Your ER50 will not receive weather alerts when charging an external device.
Midland Radio Corporation
5900 Parretta Drive
Kansas City, Missouri 64120
Phone: (816) 241-8500
Fax: (816) 241-5713
E-mail: mail@midlandradio.com
midlandusa.com
SELECTING A BAND
To select between AM, FM and weather band, press . Each press will cycle through the bands in the order listed.
ADJUSTING THE VOLUME
To adjust the volume up, press . Then adjust the volume down, press .
TUNING THE RADIO
Press to cycle through AM, FM and weather bands. Once the desired radio band is selected, tune to the desired
station using . Press and hold to automatically scan to the next radio station.
NOTE: For best FM and weather band reception, fully extend the telescopic
antenna and rotate until reception is clear
TURNING THE RADIO ON/OFF
The fi rst time you power on your ER50, you will need to remove and discard the yellow battery pull tab.
1. To turn the radio on, press and hold for three seconds.
2. To turn the radio off, press and hold for three seconds.
NOTE: When the radio is powered off, the LCD will display the clock,
battery status and weather alerts (if enabled).
The included rechargeable battery is in the battery compartment. The battery is a 3.7V DC, 2600 mAh lithium ion
cell (18650). There are three different ways to charge your ER50 radio:
• USB Charging – Use the provided cable and a USB power source to charge your radio. Insert the USB charge
cable into a USB power source and plug the micro USB connector into the micro-USB port. See Battery Level
Indicator section for directions on how to tell if your radio is fully charged.
• Hand Crank Charging – Charge your ER50 by rotating the hand crank. Speed of cranking and length of time
cranked will determine the charge of the Li-Ion battery. See Battery Level Indicator section for directions on
how to tell if your radio is fully charged.
• Solar Panel Charging – Charge your ER50 by placing the solar panel in direct sunlight. See Battery Level
Indicator section for directions on how to tell if your radio is fully charged.
NOTE: Before applying power to your ER50 ensure the yellow
battery pull tab has been removed.
Model ER50 Model ER50 Model ER50 Model ER50
QUICK START GUIDE
1. Turn the radio over and remove yellow battery pull tab.
Note: Ensure the battery pull tab is completely removed before attempting to power on the unit.
2. To power on the radio, press and hold for three seconds.
3. Press to cycle through AM, FM and WX bands.
4. To activate weather alerts, press . The WX icon on the LCD will fl ash when weather alerts are active.
5. To use the fl ashlight, press on the top of the radio. Use to cycle between low power mode, high power
mode, SOS morse code beacon and off.
6. To charge the internal battery, connect the included charging cable to a USB power source then connect the
radio’s micro-USB port to the charge cable.
7. To access the settings menu, hold down button for three seconds.
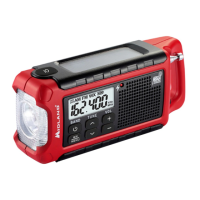
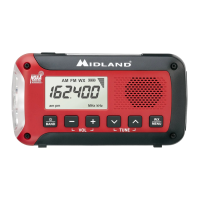
LCD DISPLAY
1. AM BAND
2. FM BAND
3. WEATHER BAND
4. BATTERY LEVEL AND CHARGING
5. VOLUME INDICATOR
6. FREQUENCY INDICATOR
7. CLOCK AND CHANNEL NUMBER
8. AM/PM ICON
1. FLASHLIGHT
2. FLASHLIGHT BUTTON
3. WEATHER ALERTS AND MENU BUTTON
4. TUNE BUTTONS
5. VOLUME BUTTONS
6. POWER AND BAND SELECTION BUTTON
7. HEADPHONE JACK
8. USB DEVICE CHARGING PORT (OUT)
9. MICRO-USB RADIO CHARGING PORT (IN)
10. SOLAR PANEL
11. TELESCOPIC ANTENNA
12. HAND CRANK
1
am
pm
AM FM WX
kHzMHz
1
2
2
12
3
10
4
11
5
456
6
7
8
1
3
7
8
9
CONTROLS/FEATURES
BAND
MENU
WX
–
+
OPERATING YOUR RADIO
POWERING YOUR RADIO
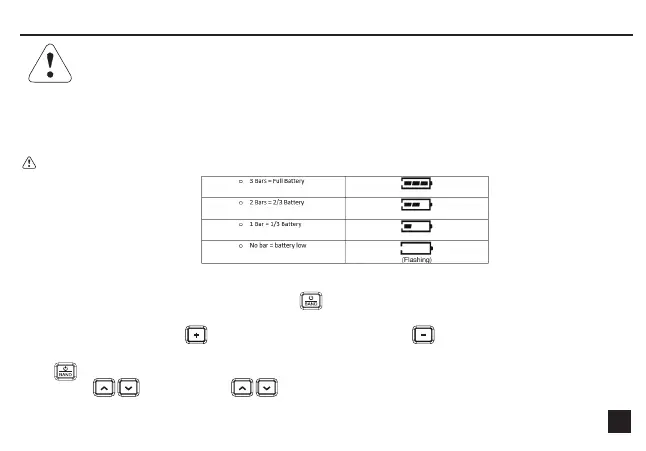
BATTERY LEVEL INDICATOR
2 3 4
• The device complies with Part 15 of the FCC Rules. Operation is subject to the following two conditions:
1) the device does not cause harmful interference, and (2) this radio must accept any interference that may
cause undesired operation.
• Note: the grantee is not responsible for any changes or modifi cations not expressly approved by the party
responsible for compliance. such modifi cations could void the user’s authority to operate the equipment
• This device complies with RSS-310 of Industry Canada. Operation is subject to condition that this device does
not cause harmful interference
When the ER50 is charging, the battery bars will cycle though no bar to three bars.
 Loading...