Do you have a question about the Miele H2265B and is the answer not in the manual?
| Energy efficiency class | A+ |
|---|---|
| Width | 595 mm |
| Oven volume | 76 l |
| Number of cooking functions/programs | 10 |
| Capacity | 76 l |
| Oven type | Built-in |
| Control type | Electronic |
| Cleaning system | Catalytic |
Defines proper domestic use and safety for users with reduced capabilities.
Provides critical safety guidelines for supervising and interacting with children around the oven.
Details safety measures for installation, electrical connection, and maintenance to prevent hazards.
Outlines correct operating procedures and hazards to prevent burns, fires, and damage.
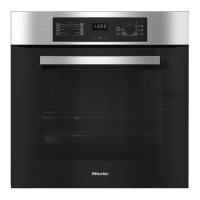
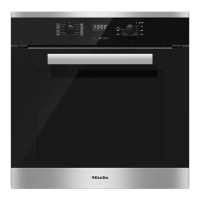
Identifies oven controls, browning element, catalytic panel, air inlet, runners, oven floor, frame, and door.
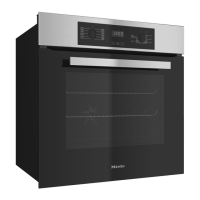
Identifies oven controls, browning element, catalytic panel, air inlet, runners, oven floor, frame, and door.
Selects oven functions and turns oven lighting on/off independently. Retractable.
Shows time of day and settings. Dims when inactive. Operated via display and sensor controls.
Sets the cooking temperature. Retractable. Marked on selector and control panel.
Responds to touch for navigation, time/setting modification, and function confirmation.
Warning: oven must be correctly installed before operation. Ensure selectors are released.
Step-by-step guide to setting the 24-hour clock format using display and sensor controls.
Procedure to heat empty oven for an hour to eliminate initial smells, with ventilation advice.
Offers time of day display, minute minder, auto switching, and settings alteration.
Explains symbols indicating minute minder, cooking duration, temperature light, and system lock.
Details button use for highlighting, modifying duration, accessing settings, and confirmation.
For timing other activities or as a reminder during cooking; max 99 min 59 sec.
Guide to setting minutes and seconds for the minute minder timer.
What happens when timer finishes: display counts up, buzzer sounds, confirmation stops it.
How to adjust the set duration by changing minutes and seconds.
Procedure to cancel the minute minder by setting duration to zero or dashes.
Enables setting a start and finish time for cooking processes, recommended for roasting.
Guide to setting hours and minutes for a cooking duration.
What happens when cooking duration ends: heating off, fan runs, buzzer sounds, confirmation stops it.
Procedure to set the desired cooking time in hours and minutes.
Procedure to set the desired finish time by adding cooking duration to current time.
Guide to adjusting the set cooking time by changing hours and minutes.
Procedure to cancel a set cooking duration by setting it to dashes.
How to cancel the set finish time for automatic cooking.
Troubleshooting dark display, 12:00 flashing, or 0:00 appearing unexpectedly.
Checks for power, selected function/temperature, and system lock activation.
F XX display indicates fault; cooling fan noise after cooking is normal.
Catalytic spots, improper baking, uneven browning troubleshooting.
Problem with sticky runners due to insufficient lubrication; use special Miele lubricant.
Troubleshooting steps for a faulty halogen lamp, including safety precautions.
Disconnect power before servicing; installation/repair by qualified technician only.
Ensure household supply matches data plate; consult electrician if in doubt.
Appliance must be grounded; plug into properly grounded outlet per local regulations.
Silver data plate on front frame lists voltage, frequency, load for electrical connection.
Details 208V and 240V connections, plug types, and maximum connected loads.
Details 208V and 240V connections, plug types, and maximum connected loads.
Provides dimensions for flush or proud installation and cut-out details for cabinets.
Diagrams showing dimensions and cut-out requirements for undercounter installation.
Diagrams illustrating dimensions and cut-out requirements for installing the oven in a tall cabinet.
Ensures proper cool air supply and no operation until correctly installed.
Check for power to socket and observe wiring diagram before proceeding.
Connect to supply, place in carcase, insert cooktop plug, secure cooker, refit door.
Ensures proper cool air supply and no operation until correctly installed in cabinet.
Ensure no power to socket and observe wiring diagram before installing.
Connect to supply, push into carcase, align, secure to walls, refit door.