Do you have a question about the Miele SEB 217-3 and is the answer not in the manual?
Observe basic safety precautions when using electrical appliances, including avoiding water, unplugging when not in use, and proper connection.
Avoid using with wet hands, flammable liquids, or liquids. Do not vacuum burning items or objects that can damage the roller.
Always unplug before cleaning/servicing. Use only Miele parts. Repairs should be done by authorized service agents.
Illustrations and identification of Miele electric hose models SES 100 through SES 130.
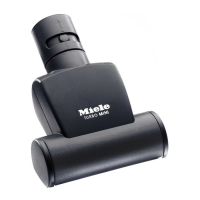
Description and illustration of the Miele Electric Wand SET 210 / SET 220, detailing its function and identification.
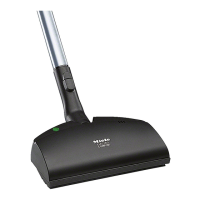
Diagram illustrating the connection of the SEB 217 powerbrush to an upright Miele vacuum cleaner.
Information on connecting powerbrushes to canister vacuums, referencing subsequent pages for specific combinations.
Step-by-step guide for connecting SEB 213 powerbrush with SES 100 or SES 105 hoses.
Step-by-step guide for connecting SEB 213-2 powerbrush with SES 113 hose.
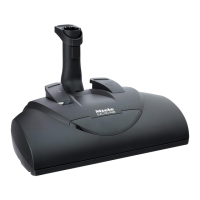
Illustrated instructions for connecting SEB 217-2 powerbrush with SET 220 wand and SES 118 hose.
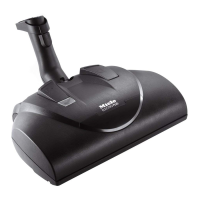
Illustrated instructions for connecting SEB 217-3 powerbrush with SET 220 wand and SES 116 hose.
Illustrated instructions for connecting SEB 217-3 powerbrush with SET 220 wand and SES 117 hose.
Illustrated instructions for connecting SEB 217-3 powerbrush with SET 220 wand and SES 119 hose.
Illustrated instructions for connecting SEB 217-3 powerbrush with SET 220 wand and SES 130 hose.
Guidelines for using the powerbrush on different carpet types and hard flooring, emphasizing manufacturer instructions.
Specific floor types and conditions to avoid for powerbrush use to prevent damage, such as uneven surfaces or knotted rugs.
Instructions on how to turn on the powerbrush for upright and canister vacuum cleaner models.
Technique for achieving best results by moving the powerbrush back and forth slowly over the carpet.
Explanation of the electrobrush warning light's double function (yellow for in use, red for blocked roller) and troubleshooting.
Always ensure the vacuum and powerbrush are disconnected from power before cleaning or servicing.
Procedure for cutting hair and threads wrapped around the roller brush using scissors.
Steps to remove stubborn tangles or objects by loosening screws, removing the roller cover, and releasing the roller brush.
Guidance on correctly orienting roller brush supports (single or double notch) for proper bristle protrusion.
Instructions for replacing the roller cover and tightening the lock screws after maintenance.
Detailed steps for replacing the drive belt, including removing covers, roller brush, and reassembling.
| Compatibility | Miele S 5000 |
|---|
| Width | 285 mm |
|---|