21 MM560 Installation Instructions
11
C
3
1
1
2
12
15
FUSE
BAT T+
BAT T-
1 2 3 4
ON
STATUS
LEARN RMT
RECEIVER
LEARN
MAST LIMIT
LEARN
SLV LIMIT
S3
S4
ALM
S2
OFF
SOFT START OFF
WARNING OFF
OPEN PULL
SLV OPEN DLY.
MODE1 OFF
MODE2 OFF
ON
ON
PUSH
SIMULT.
ON
ON
120 MIN MAX
CHARGING
PWR IN
GTO RCVR.
WHT
BLU
BRN
ORG
RED
BLK
GRN
WHT
BLU
BRN
ORG
RED
BLK
GRN
COM
GRN
BLK
RED
CYCLE
SAFETY
EXIT
SHADOW
OPEN
EDGE
COM
GTO
TRANSF
LOCK
PWR
AUX
RLY
POWER
INPUTS
CONTROL
INPUTS
MASTER CABLESLAVE CABLE
CONTROL INPUTS
AUTO CLOSE TIME STALL FORCE
CLOSE
EDGE
18 VAC
or
SOLAR
GTO
LOCK
AUX
1 2 3 4 5 6 7
DIAG
PORT
13
10”
BLK
CHARGING
PWR IN
WHT
BLU
BRN
ORG
RED
BLK
GRN
WHT
BLU
BRN
ORG
RED
BLK
GRN
COM
MASTER CABLESLAVE CABLE
1 2 3 4 5 6 7
POWER
INPUTS
LOCK
PWR
AUX
RLY
CONTROL
OUTPUTS
GTO 18VOLT
TRANSFORMER
OR SOLAR
POWER
INPUTS
LOCK
PWR
AUX
RLY
CONTROL
OUTPUTS
GTO 18VOLT
TRANSFORMER
OR SOLAR
14
WHT
BLU
BRN
ORG
RED
BLK
GRN
GRN
SLAVE CABLE
1 2 3 4 5 6 7
POWER
INPUTS
LOCK
PWR
AUX
RLY
CONTROL
OUTPUTS
GTO 18VOLT
TRANSFORMER
OR SOLAR
Correct
Wrong Wrong
15
16
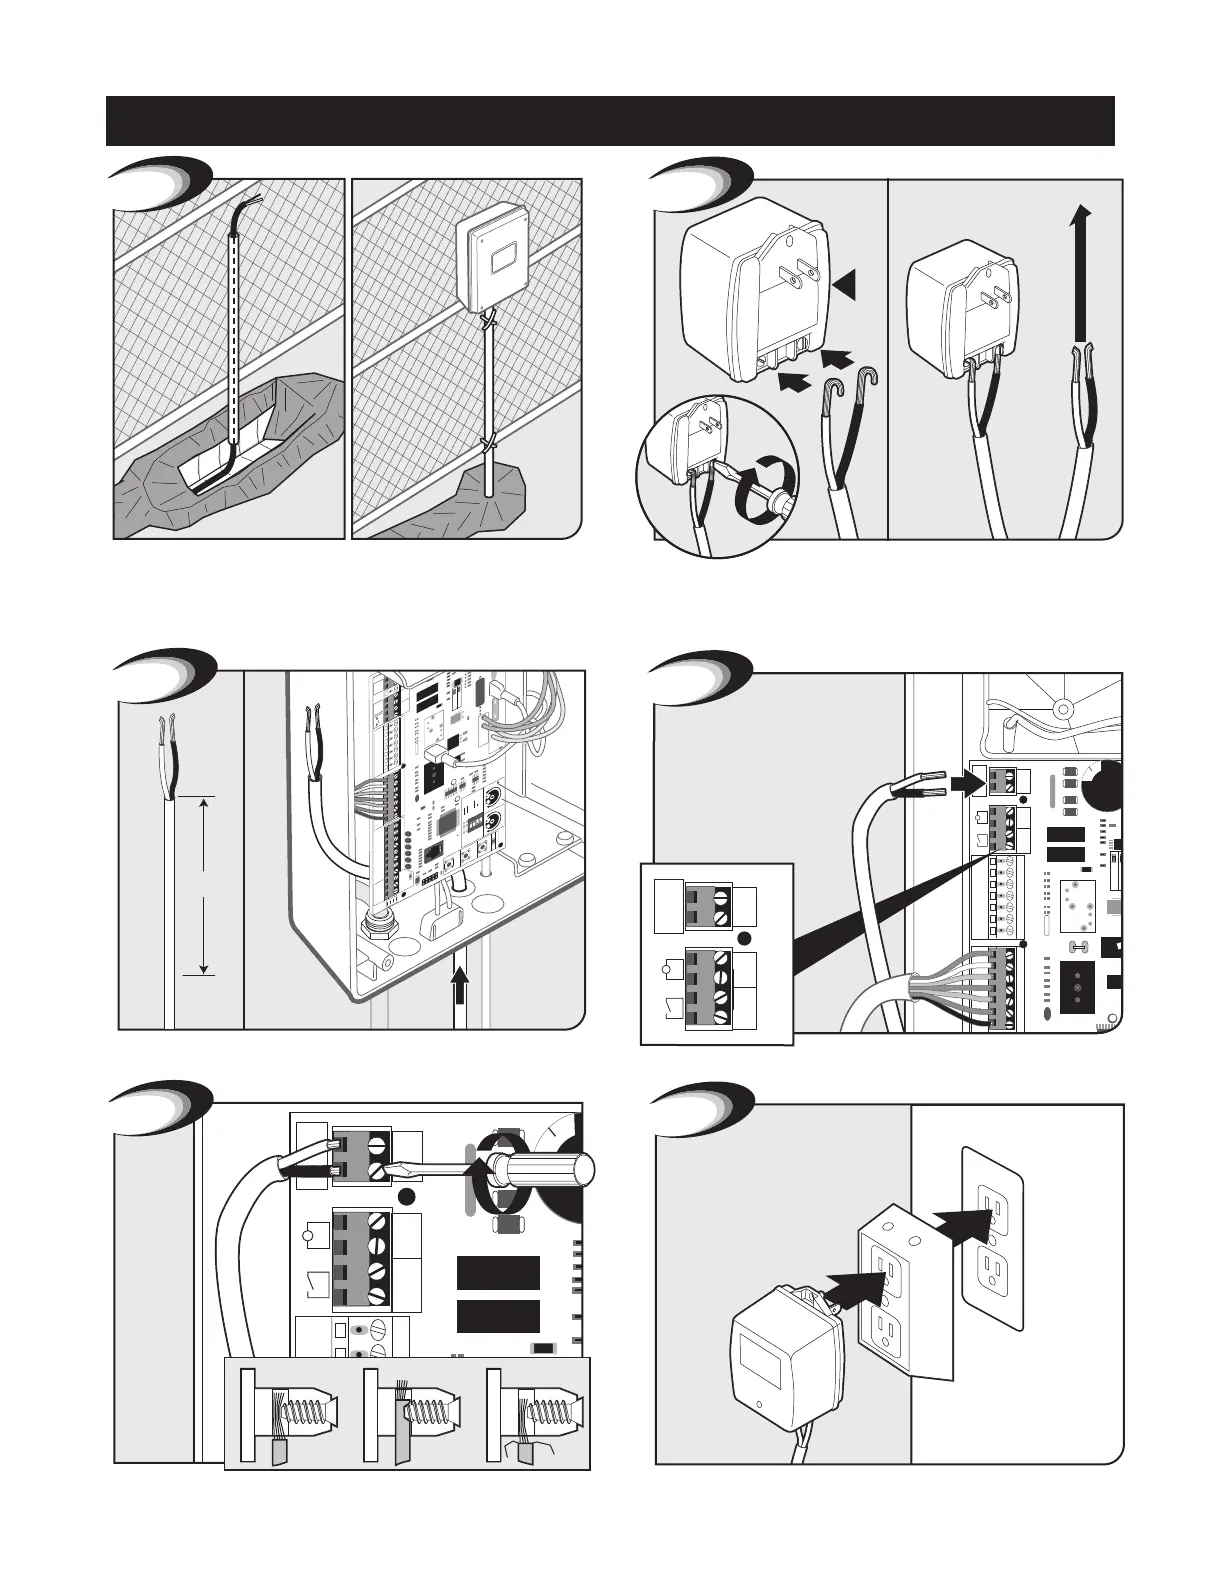
Plug in transformer to power outlet. (Use of a surge protector is
highly recommended. If outdoors use weatherproof box.)
Secure with terminal screws.
Feed other end of low voltage wire 10” into box through the
pre-drilled hole in the bottom of the control box.
Insert one wire into each 18VAC terminal. Colors do not matter.
Cut excess cable/strip 1/2” off 2 wires/twist ends. Attach wires
to transformer screw terminals. NOTE: The Mighty Mule power
input is not polarized. The wires can be inserted into either terminal
regardless of color.
Use PVC conduit from ground up to control box.
Transformer Wiring Installation
Control Box Installation