9
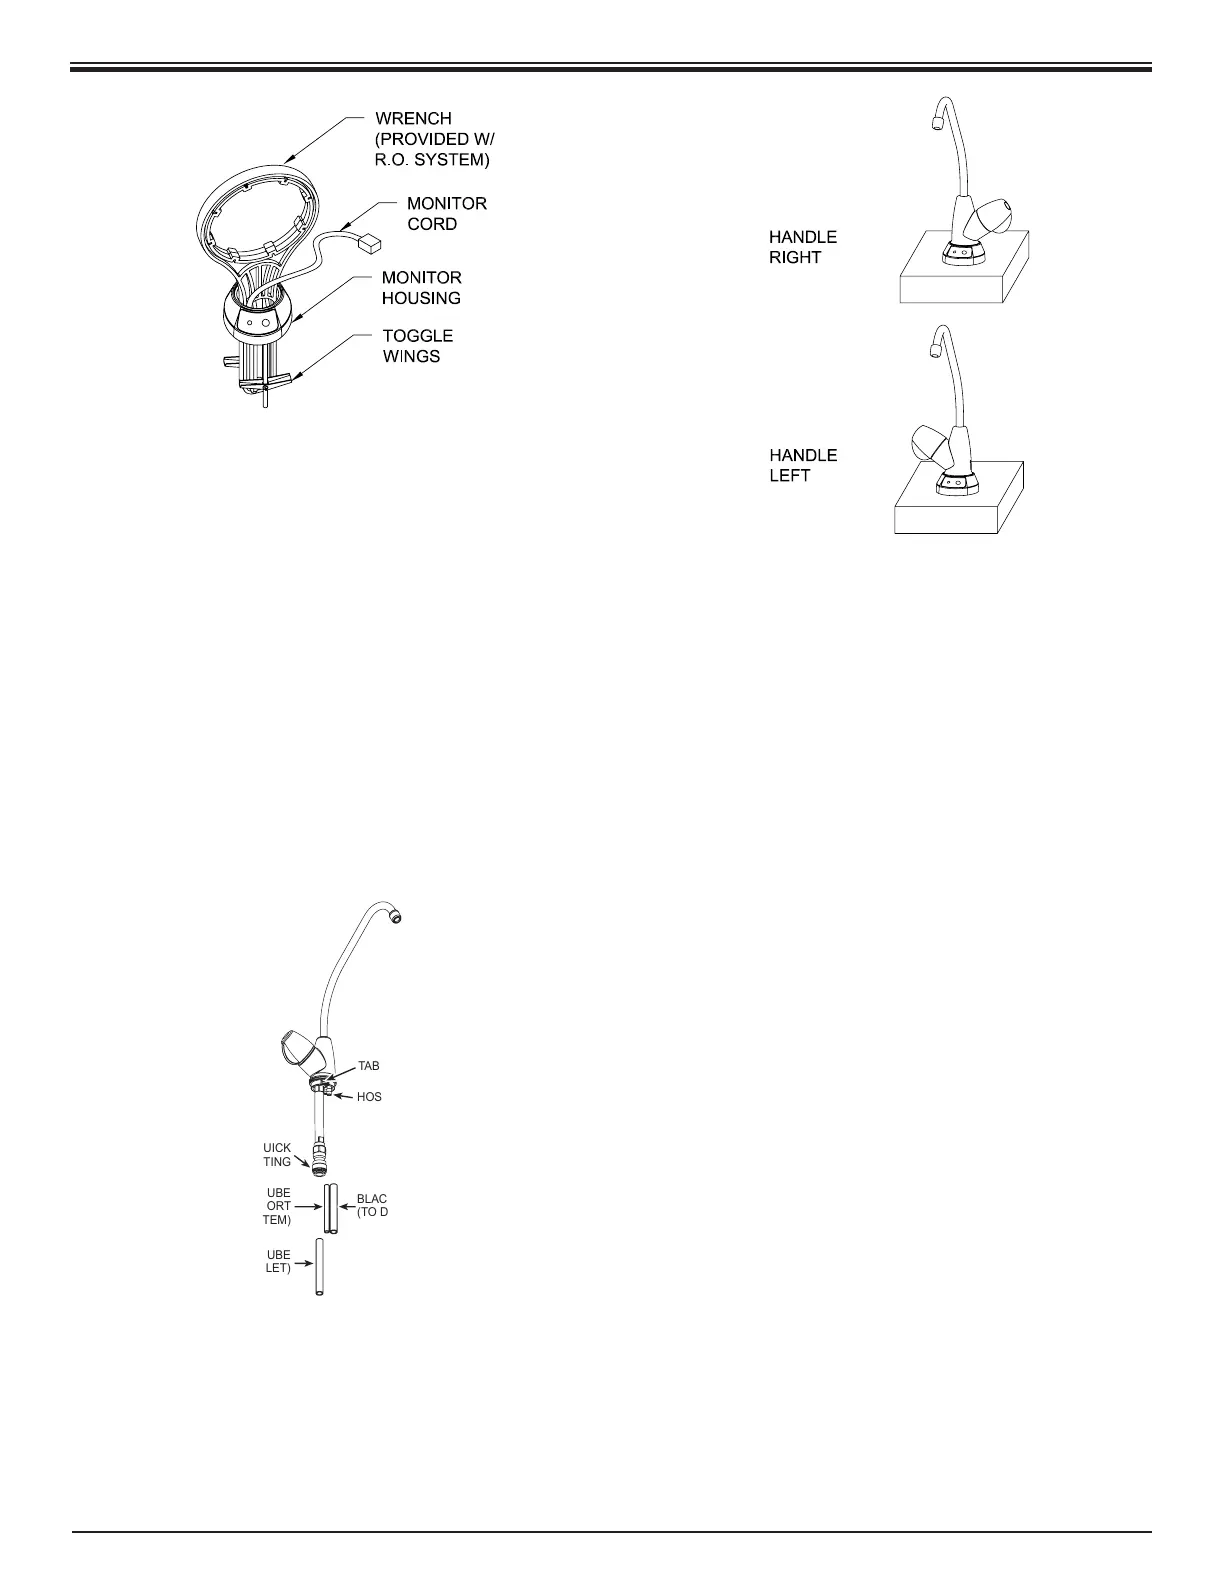
5. Place the Toggles of the Monitor Housing Assembly
through the mounting hole on the sink or counter top.
Drop the handle of the Wrench through the Monitor
Housing opening. This will separate and orient the
Toggle Wings. Position the Monitor Housing so that
the display is facing forward.
Tighten the
1
⁄8” Screws with a Phillips tip screwdriver.
When the Toggle Wings make contact with the
mounting surface, adjust the Monitor Housing to the
exact desired position. Tighten the
1
⁄8” Screws an
additional 2-3 turns while holding the Monitor Housing
in place.
Drop the Monitor Cord back through the Monitor
Housings opening.
TAB
HOSE BARBS
3/8” QUICK
CONNECT FITTING
BLACK 3/8” POLYTUBE
(TO DRAIN CLAMP)
BLACK 1/4” POLYTUBE
(TO DRAIN PORT
ON RO SYSTEM)
BLUE 3/8” POLYTUBE
(PRODUCT OUTLET)
6. Connect the tubing to the Faucet. Push the Blue
3
⁄8”
Polytube into the
3
⁄8” Quick Connect Fitting. Push the
Black
3
⁄8” Polytube onto the large Hose Barb. Push the
Black ¼” Polytube onto the small Hose Barb.
7. Determine which direction the handle should
face (right or left). With the handle facing the chosen
direction, slide the fastened Polytubes through the
Monitor Housings 1¼” diameter opening and slide the
Faucet Assembly into the Monitor Housing, lining up
the tabs of the Faucet with the slots on the Housing.
The Faucet Assembly may have to rotate slightly to
get the tabs into the slots. When aligned, apply rm
downward force to get the Faucet to fully seat. After
the Faucet Assembly is seated, lock it into place by
rotating it clockwise about 30 degrees.