Removing and Replacing the Quik-Lok® Cord
For instant field replacement, Catalog No. 6755-1 features the
exclusive MILWAUKEE Quik-Lok® Cord.
1. To remove the Quik-Lok® Cord, turn the cord nut 1/4 turn
to the left and pull it out.
2. To replace the Quik-Lok® Cord, align the connector key-
ways and push the connector in as far as it will go. Turn the
cord nut 1/4 turn to the right to lock.
Inserting Bits (Fig 1.)
1. To insert Bit Holders and Bits, unplug tool. Remove Locator
Assembly by pulling it away from the tool.
2. Push Insert Bit into Bit Holder until it snaps into place. Then
push Bit Holder into nose of the tool until it snaps into place.
3. Push Locator Assembly until it snaps into place.
Adjusting Locator Assembly (Fig 2.)
The Locator Assembly controls the driving depth of your tool.
Your MILWAUKEE Drywall Driver features a pop-off Locator
Assembly with a one-handed depth adjustment. Depth adjust-
ments can be made easily and quickly by using one hand to
turn the Locator. Detents inside the Sleeve “lock” the depth
you have selected with the Locator.
Start with about 1/16” clearance between the head of the screw
and Nose with the clutch disengaged as shown. The detents on
the inside of the Sleeve represent different depths. Every two
clicks of the Locator equal 1/64”. Continue adjusting the
Locator until you reach the depth needed for your job.
1. To adjust depth setting, simply rotate the Locator in the
direction labeled. “DEEPER “increases driving depth.
2. Turning Locator in the opposite direction decreases driv-
ing depth. The detents will “lock” the Locator in place, ensur-
ing an accurate depth setting.
The pop-off Locator Assembly allows you to remove the
assembly by simply pulling it away from the tool.
Reattachment does not alter your depth setting.
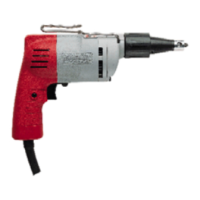
Milwaukee Tool
Heavy-Duty Drywall Screw Driver
Model Numbers: 6755-1, 6757-1, 6758-1
Operating Instructions
Page 1
RenTrain INC
RenTrain INC
To reduce the risk of injury, always unplug tool
before attaching or removing accessories. Use
only specifically recommended accessories.
Others may be hazardous.
WARNING!
ASSEMBLY
Fig. 1
1.
3.
1. Bit Holder
2. Insert Bit
3. Locater assembly
2.
Fig. 2
1.
1. Locater
1/16”