5
ASSEMBLY
Recharge only with the charger
specied for the battery. For spe-
cic charging instructions, read the operator’s
manual supplied with your charger and battery.
Inserting/Removing Battery Pack
Insert the battery pack by sliding battery pack into
the battery bay. Insert the battery pack until the bat-
tery latches lock.
To remove the battery pack, press in both battery
latches and slide the battery pack out of the battery bay.
Inserting/Removing Extension Cord
When not using the AC option, make sure the AC
doors are closed completely.
To operate the light on AC power, extend and lock
legs. Open the door and plug a suitable exten-
sion cord into the light. To disconnect the extension
cord, press the Power button to turn o the light,
then remove the cord from the outlet.
NOTE: When an extension cord is plugged into the
light, the light will automatically run on AC power.
To reduce the risk of injury, do not
stare at the operating light source.
To reduce the risk of injury, always
fully extend and lock legs into posi-
tion before raising the poles. Light may tip and
cause injury.
To reduce the risk of injury, keep hands clear of
the housing area when collapsing the extension
poles. Head may descend rapidly, pinching hands
and ngers.
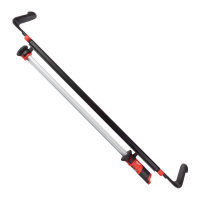
Extending/Collapsing the Legs
Always extend and lock legs before raising the poles.
1. Stand light upright.
2. Press the Leg Release Button and slide the legs
down using the Carrying Handle.
3. Lift up on the Upper Handle while sliding down the
Carrying Handle.
4. Lift until the Battery Bay lifts o the oor and the
legs lock into place.
5. To collapse, hold with upper handle, press the
Leg Release Button and slide in the legs using
the Carrying Handle. Keep hands clear of the legs
as they collapse.
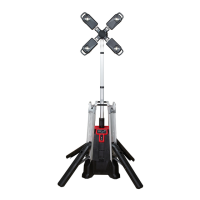
Extending/Collapsing the Extension Poles
Extend or collapse the two poles to set the light at
the desired height.
1. Extend and lock the legs.
2. Open the top extension latch and raise the head out
of the housing. Extend the pole to the desired height.
3. Fully close top extension latch.
4. If more height is needed, fully extend rst pole and
close latch before opening bottom latch.
5. Continue to raise the head to the desired height.
6. Fully close bottom extension latch.
7. Rotate the heads to the desired angle. The three
heads can be adjusted individually.
NOTE: Before collapsing the poles, the heads must
be returned to their upright angle.
USB Power Outlet
This outlet can be used to charge a cell phone, power
an MP3 player or any other device that uses less than
2.1 A of DC electrical current. To turn the USB on or
o, press the USB Power button.The USB port
will automatically shut o after two hours of inactivity.
NOTE: Any device that uses more than 2.1A of DC
electrical current will trip a self-resetting overload
and disable the output.
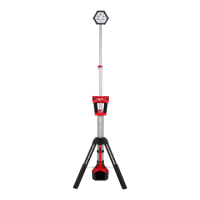
LIGHT OPERATION
To reduce the risk of injury, do not
stare at the operating light source.
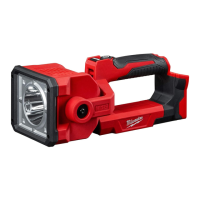
Using the Light
1. Insert battery pack or plug into AC power.
2. Press the Power button to turn on the light.
NOTE: When the light is running on battery, the
Battery Power Indicator will light. When
the light is running on AC power, the AC Power
Indicator will light.
3. Press the Increase + and Decrease − buttons to
cycle through High, Medium, and Low brightness.
NOTE: The light will default to the selected bright-
ness the next time it is turned on.
4. Press the Power button to turn the light o.
Always turn o power before unplugging the light.
BATTERY OPERATION
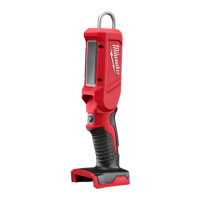
Fuel Gauge
Use the Fuel Gauge to determine the battery pack's
remaining run time. Press the Fuel Gauge button to
display the lights. The Fuel Gauge will light up for
2-3 seconds. When less than 10% of charge is left,
1 light on the fuel gauge will ash slowly.
78-100%
55-77%
33-54%
10-32%
Less than 10% if bottom light is ashing
Approximate Run
Time Remaining
NOTE: If the Fuel Gauge doesn't appear to be
working, place the battery pack on the charger and
charge as needed.
Compared to NiCd battery pack types, MILWAUKEE
Lithium-Ion battery packs deliver fade-free power for
their entire run time. The tool will not experience a
slow, gradual loss of power as you work. To signal
the end of discharge, 1 light on the fuel gauge will
ash quickly for 2-3 seconds and the tool will not run.
Charge the battery pack.
NOTE: Immediately after using the battery pack,
the Fuel Gauge may display a lower charge than it
will if checked a few minutes later. The battery cells
"recover" some of their charge after resting.
Battery Pack Protection
To protect itself from damage and extend its life, the
battery pack’s intelligent circuit monitors current draw
and temperature. In extremely high torque, binding,
stalling, and short circuit situations, the battery pack
will turn OFF the tool if the current draw becomes
too high. All the fuel gauge lights will ash. Release
the trigger and restart.
Under extreme circumstances, the internal tem-
perature of the battery could become too high. If
this happens, the fuel gauge lights will ash in an
alternating pattern and the tool will not run. Allow the
battery to cool down.