Do you have a question about the Milwaukee MX FUEL MXF316 and is the answer not in the manual?
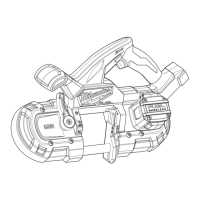
This document is an operator's manual for the Milwaukee MX FUEL™ 6" Green Concrete Saw, model number MXF316. It provides detailed information on the saw's function, technical specifications, usage, and maintenance.
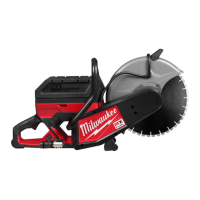
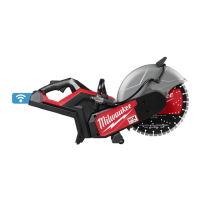
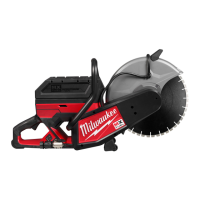
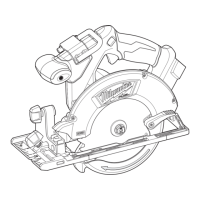
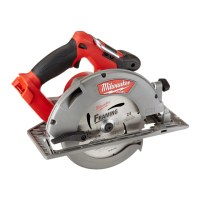
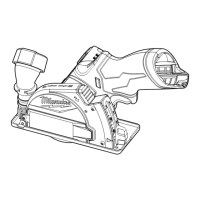
The Milwaukee MX FUEL™ 6" Green Concrete Saw is a battery-operated power tool designed for cutting green concrete. It utilizes diamond cut-off blades for efficient and precise cutting. The saw features a guide arm for aligning cuts, a blade depth adjustment mechanism, and a dust extraction connection for managing debris. It is equipped with a ONE-KEY™ indicator for wireless communication and security lockout features. The machine is designed for portability with a foldable handle and a roll cage for lifting and transport.
Arming the Machine: The saw must be armed before use. After inserting the battery pack, the Arm button must be pressed. The MX FUEL™ icon will light up, and the trigger will become armed in 2 seconds. After 15 minutes of inactivity, the machine enters sleep mode, and the MX FUEL™ icon turns off. To reactivate, press and hold the Arm button for 1 second. To unarm, press and hold the Arm button for 1 second. The machine can be armed while the power switch is on, but operation requires the power switch to be flipped off and back on again.
Operating the Machine: Before operation, ensure the blade block is installed, the clear cover moves freely, a skid plate is installed, the belt guard is in place, and the dust extractor is connected if working in dusty conditions.
Blade Depth Adjustment: Before adjusting blade depth, place the machine in transporting position. Pull the blade depth adjustment knob away from the machine and move it to the desired setting.
Handle Adjustment: The handle can be adjusted to one of two heights. Pull and hold the two adjustment levers, then push the handle up or down to the desired position. Release the levers to secure them.
Transporting: To roll the machine, grasp the handle and tilt it back onto the wheels. Push, do not pull. For vehicle transport, remove the battery pack, fold the handle down, and strap the machine down through the roll cage.
ONE-KEY™ Functionality: The saw supports ONE-KEY™ for wireless communication.
General Maintenance: Regularly inspect the machine, battery pack, and charger for issues like undue noise, misalignment, binding of moving parts, or breakage. Return damaged items to a MILWAUKEE service facility for repair. If the machine does not start at full power with a charged battery pack, clean the battery pack contacts.
Installing/Removing the Battery: To remove, push the battery latch lock and squeeze the lever, then pull the pack away. To insert, slide the pack into the machine until it latches securely. Always remove the battery pack before changing accessories.
Installing/Removing the Skid Plate: Always replace the skid plate when installing a new blade. To install, remove the battery pack, push the handlebar down, latch the front side of the skid plate onto the front blade block pin, then align the rear side with the rear blade block pin and secure with the clevis pin and hook. To remove, unclasp the clevis hook, remove the clevis pin, and push the front side away from the blade block pin.
Installing/Removing the Blade: Examine the blade for damage or wear before each use. Discard dull or chipped blades.
Folding/Unfolding the Handle: To fold, press the button at the top of the locking pins, pull them out, and fold the handle down towards the roll cage. Push the pins back in. To unfold, press the button, pull the pins out, unfold the handle up and away from the base, then push the pins back in.
Installing/Removing the Belt: Replace the belt if damaged or overworn, or every two years.
Cable Tensioning: To tighten loose guide arm lever and transport latch cables:
Lubricating the Blade Block Pins: Lubricate pins every two years using 14-46-9930 MILWAUKEE service grease.
Cleaning: Avoid getting liquid inside the motor housing, battery compartment, or trigger. Do not immerse the machine in liquid. Do not allow concrete to harden on the machine. Remove the battery pack, allow the motor to cool, then remove all concrete and debris. Use mild soap and a damp cloth. Avoid gasoline, turpentine, lacquer thinner, paint thinner, chlorinated cleaning solvents, ammonia, and household detergents containing ammonia. Do not spray the machine or battery. Keep the machine clean, dry, and free of oil or grease. Keep battery connections and surfaces free of debris.