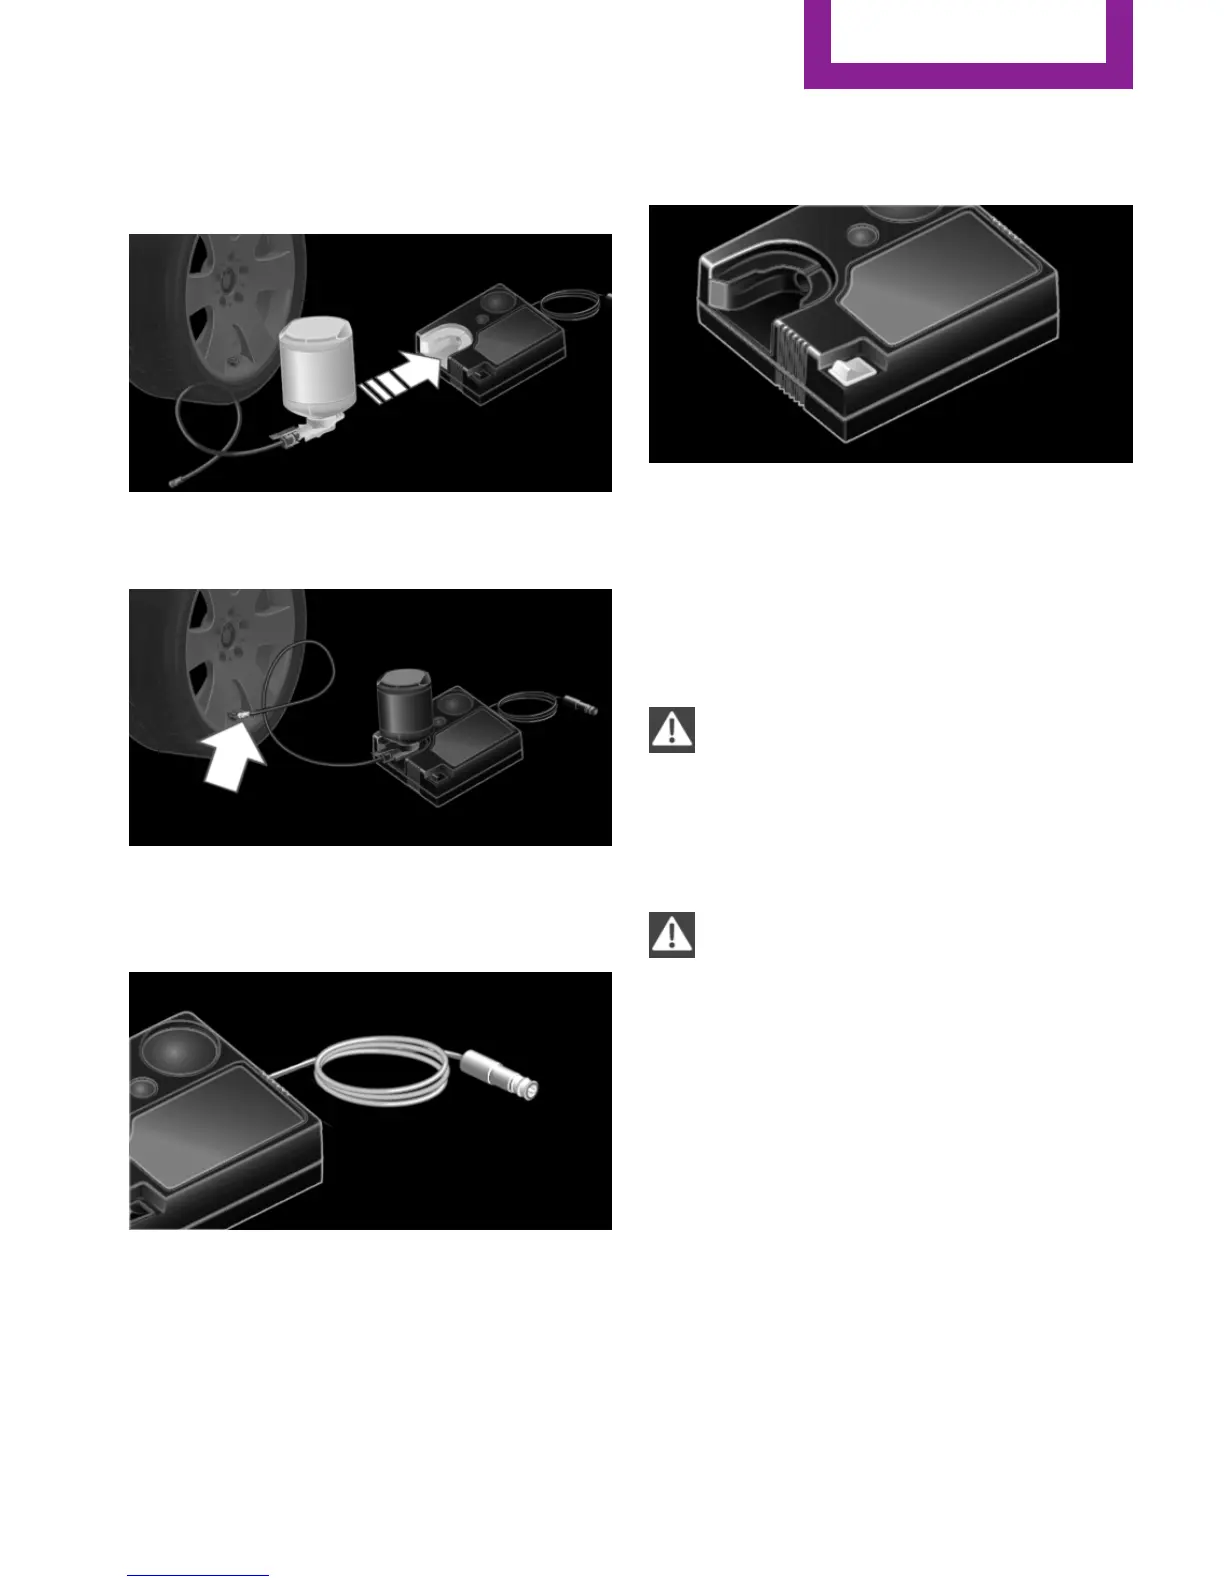
4. Slide the sealing bottle upright into the
holder on the compressor housing, ensur‐
ing that it engages audibly.
5. Screw the connection hose onto the valve
of the defective wheel.
6. With the compressor switched off, insert
the plug into a power socket inside the ve‐
hicle.
7. With the ignition turned on or the engine
running, switch on the compressor.
Let the compressor run for approx. 3 to 8 mi‐
nutes to fill the tire with sealant and achieve a
tire inflation pressure of approx. 2.5 bar.
While the tire is being filled with sealant, the in‐
flation pressure may sporadically reach approx.
5 bar. Do not switch off the compressor in this
phase.
Enclosed areas
Do not let the engine run in enclosed
areas, since breathing in exhaust fumes may
lead to loss of consciousness and death. The
exhaust gases contain carbon monoxide, an
odorless and colorless, but highly toxic gas.◀
Switch off the compressor after 10 mi‐
nutes
Do not allow the compressor to run longer than
10 minutes; otherwise, the device will overheat
and may be damaged.◀
If a tire pressure of 2 bar is not reached:
1.
Switch off the compressor.
2. Unscrew the filling hose from the wheel.
3. Drive forward and back to distribute the
sealant in the tire.
4. Inflate the tire again using the compressor.
If an inflation pressure of 2 bar cannot be
reached, contact your service center.
Seite 177
Wheels and tires
MOBILITY
177
Online Edition for Part no. 01 40 2 927 905 - II/14