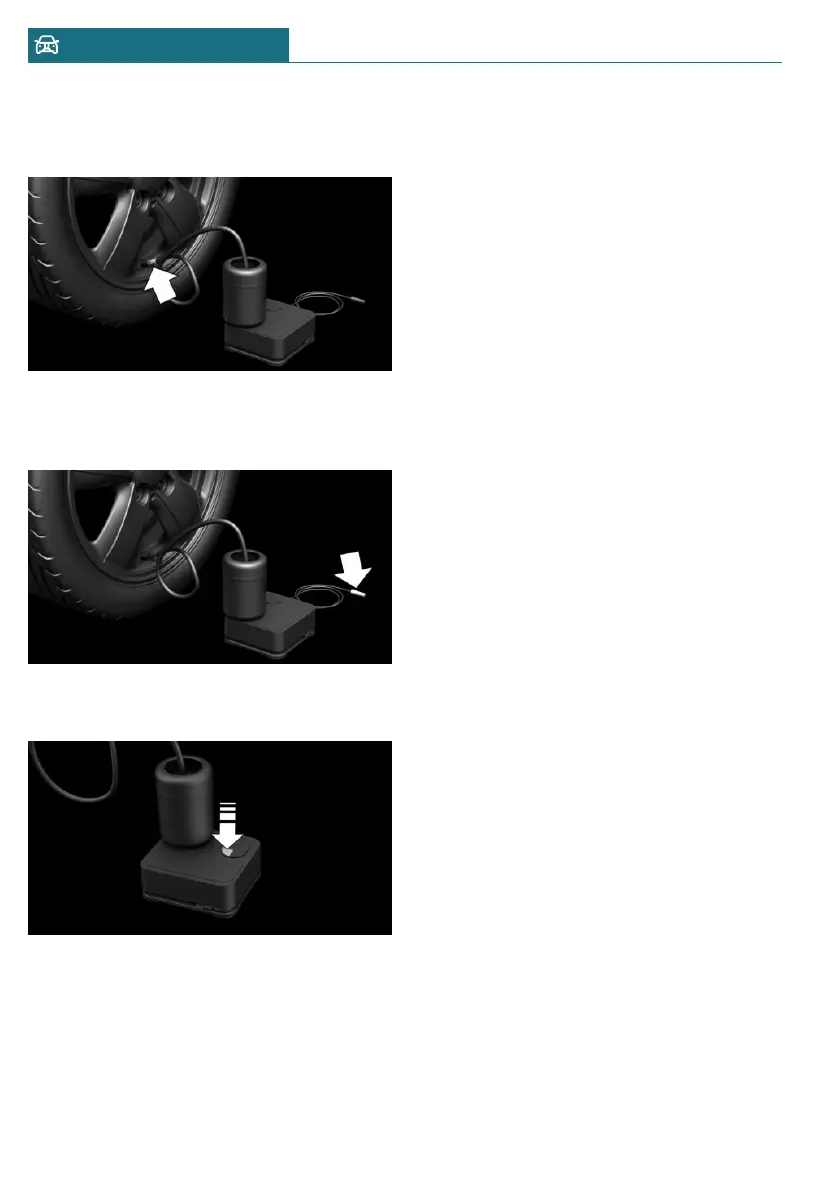
4. Screw the filler hose of the sealant bot-
tle onto the tire valve of the faulty
wheel.
5. With the compressor switched off, in-
sert the connector into the power socket
in the vehicle interior.
6. With the ignition switched on or the en-
gine running, switch on the compressor.
Let the compressor run for max. 10 mi-
nutes to fill the tire with sealing compound
and achieve a tire inflation pressure of ap-
prox. 2.5 bar.
While the tire is being filled with sealing
compound, the tire inflation pressure may
sporadically reach approx. 5 bar. Do not
switch off the compressor in this phase.
Checking and adjusting the tire
inflation pressure
Checking
1. Switch off the compressor.
2. Read the tire pressure on the tire pres-
sure display.
To continue the trip, a tire inflation pres-
sure of at least 2 bar must be reached.
Removing and stowing the sealant
bottle
1. Unscrew the filler hose of the sealant
bottle from the tire valve.
2. Press the red unlocking device.
3. Remove the sealant bottle from the com-
pressor.
4. Wrap and store the sealant bottle in
suitable material to avoid contamination
of the cargo area.
Minimum tire inflation pressure is not
reached
1. Pull the connector out of the power
socket in the vehicle interior.
2. Drive 33 ft/10 m forward and back to
distribute the sealing compound in the
tire.
Seite 262
MOBILITY Wheels and tires
262
Online Edition for Part no. 01405A53AA0 - II/22