Do you have a question about the Minimotors DUALTRON THUNDER II and is the answer not in the manual?
Key safety rules and limitations for operating the electric scooter to prevent accidents and ensure user safety.
Essential checks and actions to perform before starting to ride, ensuring safe operation and readiness.
Schematic representation of the electrical connections and components within the Dualtron Thunder II scooter.
Detailed physical dimensions of the scooter in unfolded and folded states, including handle width and footrest width.
Step-by-step instructions for installing the optional damper system on the scooter, including rubber deck modification.
Identification of key components and parts of the scooter, categorized into Handle and Body Frame sections.
List of items included in the box: main body, charger, tool, remote control, and LED remote control.
Instructions for assembling the instrument panel and adjusting the brake position using a hexagon wrench.
Important safety advice on how to lift the product to avoid damaging the folding part and causing accidents.
Guidance on locating and noting the product's serial number for warranty and identification purposes.
Step-by-step guide on how to unfold the Dualtron Thunder II scooter, including handle post and handlebar locking.
Instructions for powering on the scooter, operating the instrument panel, adopting a riding stance, and accelerating/decelerating.
Guidance on using the rear and front brakes effectively for smooth and safe deceleration and stopping.
Detailed steps for folding the handlebar and steering tube, and securing the folded position for storage or transport.
Procedure for adjusting and selecting the speed step value on the instrument panel for different riding modes.
Explanation of functions and settings available on different main screen modes, adjustable via the mode button.
In-depth guide to detailed functions and settings within the instrument panel, including speed units, start methods, and modes.
Explanation of the cruise control function for automatic speed maintenance and its advantages for long-distance travel.
Guide to setting the intensity of the electronic brake, including precautions for use with a fully charged battery.
Explanation of the Anti-Lock Brake System (ABS) function, its benefits, and precautions regarding vibration.
Details on controlling LED lights, including brightness, speed, and color modes using the remote control.
Guide to interpreting diagnostic codes displayed on the dashboard to identify system errors and their potential solutions.
Steps for connecting the charger, understanding the charging status indicator, and general charging practices.
Important safety instructions and warnings related to charger usage, electrical shock, and fire prevention.
Guidelines for battery care, understanding performance effects of temperature and usage cycles, and replacement.
Precautions for charging, proper storage conditions, and safe operating temperature ranges for the lithium battery.
Instructions for handling battery damage, overheating, ignition, misuse, and warnings about water exposure.
Guidelines for battery disposal and prohibition of disassembly, modification, or repair to ensure safety.
Essential checks for throttle, handle, brakes, tires, and folding parts to ensure safe operation before riding.
Situations requiring immediate cessation of driving and contact with service centers for diagnosis and repair.
Guidance on checking and replacing consumable parts based on usage time or mileage, including a replacement cycle chart.
Instructions for inspecting external parts for damage, wear, and discoloration caused by driving environment and usage.
Procedures for adjusting brakes and replacing tires, including precautions for brake issues and puncture repair.
Troubleshooting disc brake noise and instructions for adjusting the variable rubber suspension system.
Details on the motor type, peak power, battery type, capacity, and charging times for the Dualtron Thunder II.
Specifications for max mileage, max speed, gradeability, load capacity, and physical dimensions of the scooter.
Information on the instrument panel, lighting, brake system, suspension, tires, and product materials used.
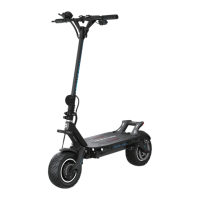
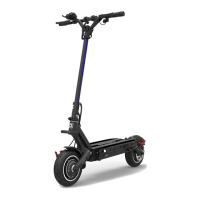
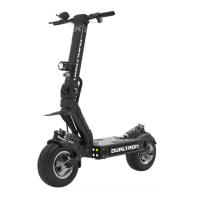
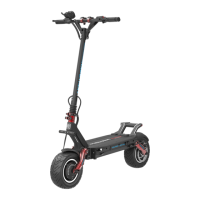
The Dualtron Thunder II is a personal mobility electric scooter designed and manufactured by Minimotors Co.LTD., a company with a professional production system since 1999. The brand "DUALTRON" is globally recognized for its electric scooters, known for pioneering the world's first dual-drive system and incorporating new rubber suspension technology (patent pending). This luxury Korean brand exports to over 30 countries.
The Dualtron Thunder II is an electric scooter primarily used for personal mobility. It features a dual-drive system, providing powerful acceleration and enhanced performance. The scooter is equipped with an EYE throttle LCD instrument panel, which displays essential information such as battery level, trip distance, odometer, time, speed, and allows for mode changes. The instrument panel also enables various settings, including speed step adjustment, start method (acceleration start or kick start), cruise mode, slow start, battery save mode, electronic brake strength, LCD brightness, auto-off time, and ABS setting.
The scooter's control system includes a main power switch, a POWER button on the instrument panel to turn it on/off, and switch buttons for lights, horn, and driving modes (ECO/Turbo). It also features LED BAR functions, which can be controlled via a remote. These functions include brightness, light speed, number of lamp beads, multicolor light mode selection, and light change mode selection, offering a customizable lighting experience.
Safety features are integrated into the design, such as an electronic brake system with adjustable strength and an Anti-Lock Brake System (ABS) to prevent wheel lock-up during sudden braking, enhancing rider safety. The scooter is designed for a single adult rider, with specific warnings against companion boarding.
To use the Dualtron Thunder II, the user must first unfold it. This involves releasing the QR lever, raising the locking slide, raising the handle post, and then lowering the locking slide. The folding parts are secured by tightening a finishing screw. The handlebar is unfolded by loosening the QR lever, pulling the locking slide inward, raising the handlebar, and then closing the QR lever and tightening the set screw. The handle is locked by placing the locking slide up to the safety line and securing it with the QR lever.
Starting the scooter involves turning on the main power switch and then pressing the POWER button on the instrument panel for two seconds. The instrument panel allows for setting various driving parameters, including start mode, cruise mode, electronic brake, and ABS function.
For stopping, the user should primarily use the rear brake for deceleration, followed by both front and rear brake levers for a smooth and safe stop. The electronic brake can be set for use and strength through the instrument panel, working in conjunction with the brake levers to increase braking force.
The scooter supports a cruise mode for automatic driving, which can be activated by setting the Cruise function on the dashboard and applying the throttle. It is released by holding and releasing the brake.
Charging the scooter involves opening the charging port cap, connecting the charger to the port and a household outlet. The charging status is indicated by an LED (red for charging, green for complete). It's crucial to close the charging port cap when not charging and to use only the genuine charger provided by the manufacturer.
Regular maintenance is crucial for the Dualtron Thunder II's longevity and safety. Before each ride, users should check the throttle and handle for proper return to the home position and ensure the QR lever is fastened correctly. Brake and cable checks are essential, including verifying sufficient braking force, checking for worn pads, loose or damaged cables, and any unusual noises. Tire pressure (45 to 50 psi) and wear should also be inspected, along with ensuring all bolts and nuts on folding and handle parts are tight.
Self-maintenance includes adjusting the brake if braking force decreases due to overheating, oil hose damage, or lever loosening. Tire replacement involves removing calipers, the motor, and then disassembling the wheel to replace the tires, followed by reassembly and tightening. After tire replacement, a test run with appropriate air pressure is recommended. Punctures can be repaired using a patch seal.
The scooter features a variable rubber suspension system (patent pending) that allows for 45-step adjustment. This system can be adjusted by modifying the motor shaft distance (3 steps), arm angle (3 steps), and rubber cartridge replacement (5 steps). Adjustments involve removing the front fender, loosening nuts, and then adjusting the suspension arm components to achieve the desired suspension strength.
The self-diagnosis feature on the dashboard helps identify potential issues, displaying fault types such as system, motor, accelerator, or controller errors. If an error appears, the user should stop using the scooter immediately and take it to a service center.
The manual also provides guidelines for the replacement timing of consumable parts, such as swing arms, hinges, steering tubes, handle stems, locking slides, and batteries, which vary depending on driving habits and environment. External damage inspection is also recommended, especially after heavy driving or exposure to strong sunlight, to check for deformation, cracks, or discoloration.
Proper care for the Lithium-ion battery is emphasized, including using only genuine chargers, charging in well-ventilated, dry places between 0-45°C, and storing at room temperature (10-20°C) with a 70-80% charge level for long periods. Any damage, leakage, or unusual odor from the battery requires immediate discontinuation of use and contact with the service center. Battery disassembly, modification, or repair by unauthorized personnel is strictly prohibited and voids the warranty. Disposal of the lithium battery should be done as industrial waste, ensuring terminals are not short-circuited.
| Motor | Dual BLDC hub motors |
|---|---|
| Max Load | 265 lbs (120 kg) |
| Water Resistance | IP54 |
| Motor Power | 5400W |
| Battery | 72V 35Ah |
| Top Speed | 62 mph |
| Brakes | Hydraulic disc brakes |
| Tires | 11 inch |
| Lights | LED lights |
| Charging Time | 12 hours |