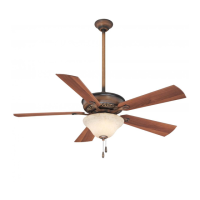
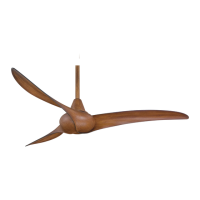
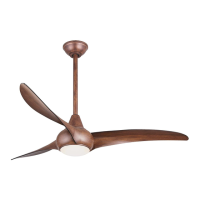
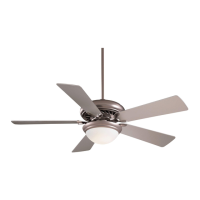
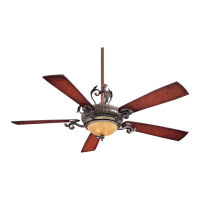
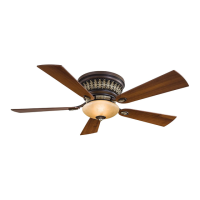
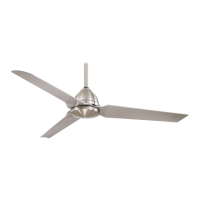
This document is an instruction manual and warranty certificate for the Java ceiling fan by Minka Aire. It provides comprehensive information for the installation, operation, and maintenance of the fan, along with warranty details and troubleshooting tips.
Function Description
The Java ceiling fan is designed to provide air circulation and can be operated using a remote control or a wall control. It features multiple fan speeds (low, medium, high) and the ability to change the direction of blade rotation for different seasons. The fan can also include a light, which can be turned on/off and dimmed. The Aire Control® System is equipped with a learning frequency function to prevent interference from other remote units, with 256 code combinations.
Usage Features
- Installation: The manual provides detailed steps for installing the fan, including securing the hanger bracket to the ceiling outlet box, feeding wires through the downrod, assembling the downrod and hanger ball, and placing the motor assembly onto the hanger bracket. It emphasizes the importance of using appropriate fasteners and ensuring the outlet box can support the fan's weight. Special instructions are given for mounting on steep, sloped ceilings or where there is no ceiling joist, suggesting the use of a longer downrod or a hanger bar.
- Blade Attachment: The fan blades are attached to the motor housing using blade support plates and screws. The manual advises removing rubber packing mounts before installation.
- Switch Cup Attachment: The switch cup plate is secured to the motor housing, and the switch cup is then raised and turned clockwise until snug.
- Remote/Wall Control Operation:
- Fan Speed: Dedicated buttons on the remote/wall control allow users to select low, medium, or high fan speeds.
- Fan Off: A specific button is used to turn the fan off.
- Light Control: If the fan includes a light, buttons control turning the light ON/OFF and adjusting its brightness. Pressing and holding the button cycles through bright and dim settings. The light key has an auto-resume feature, returning to the last brightness setting when turned off.
- Direction of Rotation: A button (on full function remote control units) or a slide switch on the motor housing allows users to change the direction of blade rotation.
- Warm Weather (Forward): A downward airflow creates a cooling effect, allowing the air conditioner to be set at a warmer temperature. This corresponds to a counterclockwise direction of rotation.
- Cool Weather (Reverse): An upward airflow moves warmer air off the ceiling area, allowing the heating unit to be set at a cooler temperature. This corresponds to a clockwise direction of rotation.
- Wall Control (OFF-ON Slide Button): For wall control fans, a slide button turns the power Off and On to the fan and light(s).
- Frequency Interference: The system is designed to prevent interference. If interference occurs, the manual provides steps to change the frequency settings on the control system, which involves turning off power, using a small tool to change settings, restoring power, and pressing/holding the "Stop" button on the transmitter within 60 seconds.
- Safety Rules: Before installation, users are instructed to shut off power at the circuit breaker. All electrical connections must comply with local codes. The installation site must allow for unobstructed blade rotation, with minimum clearances from the floor and walls. The fan must be mounted to a U.L. Listed metal octagonal outlet box marked "Acceptable for Fan Support," secured directly to the building structure, and capable of supporting the fan's moving weight (at least 50 pounds). Only provided screws and lock washers should be used. Users are warned not to insert anything into rotating blades and to wait for blades to stop completely before maintenance. The fan is suitable for use in wet locations.
Maintenance Features
- Connection Checks: Due to natural movement, connections may loosen over time. Users are advised to check support connections, brackets, and blade attachments twice a year to ensure they are secure, without needing to remove the fan from the ceiling.
- Cleaning: To maintain the fan's appearance, periodic cleaning is recommended using a soft, lint-free cloth and soapy water. Caution is advised against using common household cleaning products that could damage the fan's finish.
- Wood Veneer Blades: If the fan has wood veneer blades, a light coat of furniture polish can be applied for protection and enhanced beauty. Small scratches can be covered with shoe polish.
- Dust Removal: A lint-free, lightly damp cloth or duster should be used to remove dust from the blades.
- Lubrication: The fan motor has permanently lubricated bearings, so no oiling is necessary.
- Glass Shades: If the fan includes glass shades, they should be cleaned with lukewarm soapy water and a soft cloth or sponge. Users are warned not to immerse glass shades in hot water or put them in an automatic dishwasher.
- Troubleshooting: The manual includes a troubleshooting section for common issues such as the fan not starting, noisy operation, or wobbling. Solutions include checking wall switches, circuit fuses/breakers, wire connections, and ensuring screws are tight. For wobbling, a balancing kit is provided with instructions.
- Power Disconnection: Before attempting any repairs or maintenance, users are reminded to ensure the power is off at the electrical panel box.
The Minka-Aire® warranty is for one (1) year from the date of purchase from an authorized dealer, covering defects in material and workmanship (excluding light bulbs). The motor is warranted for the lifetime of the fan (excluding wall controls and electrical components). The warranty is voided by using non-Minka-Aire® electrical devices, if the original purchaser no longer owns the fan, if the fan is moved from its original installation point, or if any hanger bracket other than the one supplied with the fan is used. To obtain warranty service, the purchaser should return the fan with the sales receipt to the original place of purchase. The authorized dealer will repair or replace the fan at their discretion. Replacement is subject to availability of the same model or one of equal value. The original purchaser is responsible for removal and reinstallation costs. Contact information for customer care and online FAQs is provided for assistance.