Do you have a question about the minkaAire Molino and is the answer not in the manual?
Details various methods for securing the outlet box to the ceiling structure.
Provides step-by-step instructions for attaching the fan assembly to the ceiling hanger bracket.
Outlines the wiring procedures for connecting the fan to the power supply.
Covers the final steps to secure the fan canopy and cover after wiring.
Details the process of attaching the fan blades to the motor assembly.
Explains how to install the mounting plate for accessories like light kits.
Guides the user through connecting and securing the LED light component.
Describes how to attach the glass shade to the LED light kit.
Explains the functions and usage of the remote control for fan operation.
Provides guidance on using the smart features and downloading the companion app.
Lists technical details such as fan size, speed, voltage, and weight.
Provides data on airflow, power usage, and energy efficiency ratings.
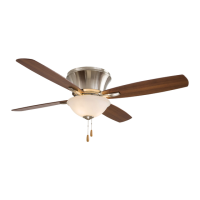
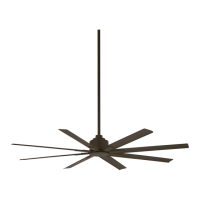
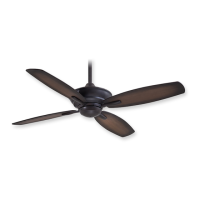
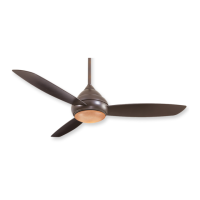
The Molino ceiling fan, by Minka Aire, is a sophisticated and functional appliance designed to provide comfort and enhance the aesthetic of any room, including wet locations. This instruction manual and warranty certificate provide comprehensive guidance for its installation, operation, and maintenance, ensuring safe and efficient use.
The Molino ceiling fan is primarily designed to circulate air, offering both cooling in warm weather and improved heat distribution in cooler weather. It features a DC brushless motor, which is equipped with a self-learning frequency function for remote control operation and a built-in safety mechanism against obstruction. The fan includes an integrated LED light kit, providing illumination that can be adjusted in brightness. The fan's operation, including speed, direction, and light settings, is managed via a dedicated remote control. For enhanced functionality, the fan is also "smart" enabled, allowing for control through a mobile application.
The installation process begins with securing the hanger bracket to a U.L. Listed metal octagonal outlet box, ensuring it is marked "Acceptable for Fan Support" and securely fastened to the building structure. The outlet box and its support must be capable of supporting at least 50 pounds of the fan's moving weight. The manual provides detailed diagrams for various mounting options, including to a ceiling joist or using a hanger bar for existing fixtures without a joist. For sloped ceilings, a longer downrod may be necessary to maintain proper blade clearance.
The fan's downrod assembly involves carefully feeding the fan wires through the downrod, threading the downrod into the coupling, and securing it with a lock pin and hitch pin. The coupling cover, canopy cover, and canopy are then slipped onto the downrod, followed by the reinstallation of the hanger ball, ensuring it is properly positioned over the cross pin and the wires are not twisted. The motor assembly is then lifted and placed into the hanger bracket, rotating it until the check groove from the hanger ball rests firmly over the registration tab, preventing rotation.
Electrical connections are crucial and must be performed with the power off at the main fuse or breaker box. The Aire Control® System, which includes a receiver and transmitter, comes with a learning frequency function with 1024 code combinations to prevent interference. The receiver is inserted into the hanger bracket, and the 2-PIN, 4-PIN, and sensor wire connectors from the motor are snapped into the receiver. House supply wires (WHITE neutral to "AC in N" and BLACK hot to "AC in L") are connected to the receiver. Ground wires from the outlet box, hanger ball, hanger bracket, and receiver are connected together. All wire connections should be secured with plastic wire nuts and, as an additional precaution, electrical tape. The fan must be installed within a maximum distance of 40 feet from the transmitting unit for proper signal transmission.
Finishing the installation involves securing the canopy to the hanger bracket. One of the two screws from the bottom of the hanger bracket is removed, and the other is loosened. The canopy's keyhole is placed over the loosened screw, turned to lock it in place, and then aligned with the remaining hole before tightening both set screws. The canopy screws are adjusted until the canopy and canopy cover are snug.
Blade installation requires removing six rubber packing mounts from the fan motor assembly. The fan blades are attached to the blade holders using provided screws and rubber washers. The motor is then rotated to align the screw holes with the blade holders, which are secured with screws and lock washers.
The mounting plate is installed by removing one of three screws from the mounting ring and loosening the other two. The keyholes of the mounting plate are placed over the loosened screws, turned to lock, and then all three screws are tightened.
The LED light kit installation also requires the power to be off. One of the three screws from the mounting plate is removed, and the other two are loosened. While holding the LED light kit under the fan motor assembly, the 2-pin wire connections (white to white, blue to blue) are made. The light kit's keyholes are placed over the loosened screws, turned to lock, and then all three screws are tightened.
Finally, the glass shade is raised against the bottom of the LED light kit and secured by turning it clockwise until snug, without overtightening.
The remote control requires two AAA 1.5 volt batteries. It is essential to remove batteries if the remote is not used for extended periods to prevent damage. The remote and DC fan motor perform a one-time self-calibration test upon setting a new code, which lasts approximately one minute.
The remote features six buttons (1-6) for fan speed control, ranging from minimum to high speed. A "Reverse" button changes the direction of blade rotation for warm (downward airflow) or cool (upward airflow) weather. A "Power Off" button turns the fan off. The "Light" button controls the LED light, turning it ON/OFF and adjusting brightness. Pressing and releasing the light button toggles the light, while pressing and holding cycles through brightness settings. The light has an auto-resume feature, retaining the last brightness setting when turned off.
The fan's auto-learning function for frequency is activated within 60 seconds of turning the AC power ON. Users select the desired frequency on the back of the transmitter, then press and hold the "Off" button on the remote. The fan's down light will blink, and blades will spin once the frequency is detected. The learning frequency and self-calibration settings are retained even if AC power is shut off, but a change in frequency will trigger a new self-calibration test. The DC motor has a lock position safety feature that disconnects power if an obstruction occurs for 30 seconds. An over 80W protection feature stops receiver power if motor consumption exceeds 80W.
The Molino fan can be controlled via the BOND HOME app, available on Google and Apple Play Store. A QR code is provided for easy app download, or users can visit the specified URL. Before using the smart features, it is recommended to test all fan functionalities with the remote control.
Regular maintenance ensures the fan's longevity and performance.
The manual includes a troubleshooting section for common issues. If the fan does not start, users should check the wall switch, circuit fuses or breakers, and ensure power is off before checking wire connections and wall control transmitter connections. Noisy fan operation may be due to a "break-in" period, loose screws on blade holders or motor hub, or an unsecured outlet box or hanger bracket. Fan wobble can be caused by variations in blade density, an unsecured outlet box, or a loose hanger bracket. If the fan or light turns on and off unexpectedly, it may be due to frequency interference, which can be resolved by changing the frequency settings on the control system. The manual provides a step-by-step guide for resolving frequency interference, including turning off power, adjusting frequency settings with a small tool, returning power, and initiating the transmitter's "Stop" button learning function.
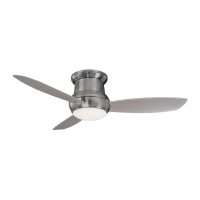
| Type | Ceiling Fan |
|---|---|
| Blade Span | 52 inches |
| Number of Blades | 3 |
| Control Type | Remote Control |
| Blade Pitch | 14 degrees |
| Speeds | 3 |
| Remote Included | Yes |
| Energy Efficiency | Energy Star Certified |
| Motor Type | AC |
| Motor Speed | High |
| Mounting Type | Downrod Mount |
| Finish | Brushed Nickel |
| Warranty | Lifetime |