This document is an instruction manual and warranty certificate for a Sundance ceiling fan by Minka-Aire. It provides comprehensive information on the fan's installation, operation, and maintenance, emphasizing safety precautions and warranty details. The fan is designed for use in wet locations when installed in a GFCI protected branch circuit, making it suitable for a variety of indoor and outdoor settings.
Function Description
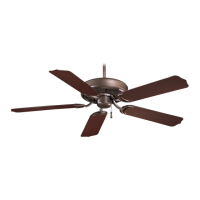
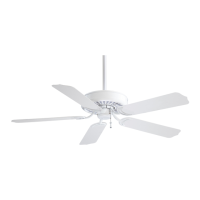
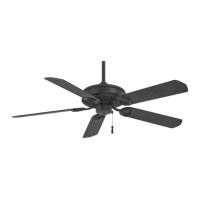
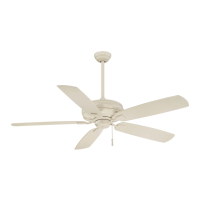
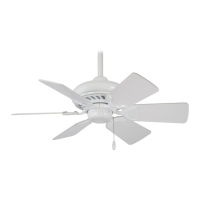
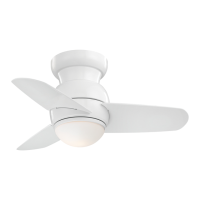
The Sundance ceiling fan is designed to provide air circulation and comfort in various environments. It features multiple speed settings controlled by a pull chain, allowing users to adjust the airflow to their preference. The fan also includes a slide switch on the switch cup that controls the forward or reverse direction of the fan blades. This feature enables the fan to be used effectively in both warm and cool weather conditions. In warm weather, a downward airflow creates a cooling effect, allowing air conditioners to be set at a warmer temperature without compromising comfort. In cool weather, an upward airflow moves warm air off the ceiling area, which can help in setting heating units at a cooler temperature.
The fan's operation can be controlled either by a pull chain for both fan speed and an optional light kit, or by wall controls for both the fan and light kit. The manual provides detailed wiring diagrams for different control options, including scenarios where a light kit is installed. If a light kit is not included with the fan, it can be purchased separately from a Minka-Aire retailer, provided it is marked "Suitable for use in wet location."
Usage Features
The manual outlines a step-by-step installation process, starting with safety precautions such as shutting off power at the circuit breaker. It emphasizes the importance of using a U.L. Listed metal octagonal outlet box marked "Acceptable for Fan Support" and ensuring that the installation site allows for unobstructed rotation of the fan blades, with minimum clearances from the floor and walls. The fan is designed to be mounted to a ceiling fan outlet box or a joist that can support its moving weight. For steep sloped ceilings, longer downrods are available to maintain proper blade clearance.
The installation process involves securing the hanger bracket to the ceiling outlet box, assembling the downrod with the fan motor housing, and carefully feeding the fan wires through the downrod. The hanger ball is then reinstalled onto the rod, ensuring that the cross pin is in the correct position and the set screws are tightened. The motor assembly is lifted into position, and the hanger ball is placed into the hanger bracket, rotated until it firmly seats into the registration slot.
Electrical connections are detailed, guiding users to connect the fan's wires to the house supply wires using provided wire nuts and electrical tape. Specific instructions are given for connecting black (hot), white (neutral), blue (optional light), and green (ground) wires. The manual also advises spreading the wires apart within the outlet box to prevent interference.
Attaching the fan blades involves securing each blade to its bracket using rubber washers, metal washers, and screws. The rubber stops are then removed from the motor, and the blade brackets are aligned with the motor holes and secured with screws.
Once installed, the fan's operation is straightforward. The pull chain cycles through high, medium, and low speeds, and then turns the fan off. The slide switch on the switch cup allows users to change the direction of the fan blades for seasonal comfort. It is important to wait for the fan to stop completely before changing the setting of the slide switch.
Maintenance Features
The manual provides simple maintenance suggestions to ensure the fan's longevity and appearance. It recommends checking support connections, brackets, and blade attachments twice a year to ensure they remain secure, noting that it is not necessary to remove the fan from the ceiling for this check.
Periodic cleaning is advised to maintain the fan's new appearance. Users should use a soft brush or lint-free cloth to avoid scratching the finish. The fan's plating is sealed with a lacquer to minimize discoloration or tarnishing.
A key maintenance feature is that the fan motor has permanently lubricated bearings, meaning there is no need to oil the fan. This simplifies maintenance and reduces the effort required to keep the fan in good working order.
The manual also includes a troubleshooting section to address common issues such as the fan not starting, making noise, or wobbling. Solutions include checking fuses, circuit breakers, wire connections, and ensuring all screws are snug. For fan wobble, it suggests ensuring the hanger bracket and outlet box are secure and using the enclosed blade balancing kit if necessary. It also notes that all blade sets are grouped by weight, but variations in plastic injection materials can still cause some wobble.
The warranty information specifies a one-year warranty from the date of purchase for defects in material and workmanship (excluding light bulbs), and a lifetime warranty for the motor (excluding wall controls and electrical components) for the original purchaser or user. The warranty is voided by using non-Minka-Aire electrical devices, if the fan is moved from its original installation point, or if a non-Minka-Aire hanger bracket is used.