The Minolta Motor Drive MD-90 is an accessory designed for fully integrated operation with your Minolta (MAXXUM) 9000 autofocus SLR camera. It enhances the camera's capabilities by providing advanced film transport and power options.
Function Description:
The Motor Drive MD-90's primary function is to provide continuous film advance at high speeds, allowing for rapid-fire shooting. It supports both single-frame advance and continuous film advance at various speeds. It also facilitates multiple exposures and offers features for rewinding film. The device is designed to work seamlessly with the Minolta 9000 camera, integrating its controls and power sources.
Important Technical Specifications:
Type: Detachable motor drive unit for automatic film advance and rewind with the Minolta (MAXXUM) 9000 camera.
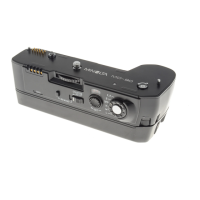
Function: Operates the camera's film advance/shutter cocking mechanism, controlled by a 6-position selector dial.
Drive motor: Single micromotor for both film advance and rewind.
Power sources:
- Available separately, either Battery Pack BP-90M which uses twelve AA-size alkaline-manganese or carbon-zinc batteries.
- Ni-Cd Battery Pack NP-90M which has built-in nickel-cadmium batteries and is supplied with its own battery charger (Ni-Cd Charger NC-90M).
- For maximum film-advance speed of 5fps, fully charged NP-90M must be used.
Film advance: Film-advance rate selected by rotating the selector dial to one of five operating positions:
- "H" (high) setting for continuous film-advance at up to 5fps.
- "M" (medium) for up to 3fps.
- "L" (low) for up to 2fps.
- "S" (single) setting for single-frame advance.
- "F.P." (focus-priority) setting for continuous film advance with focus-priority shutter release.
- Manual film advance is possible when the selector dial is at the "OFF" position.
Usable exposure modes: All exposure modes can be used.
Shutter speed: 1/250 sec. shutter speed required for maximum film-advance speed; at slower shutter speeds, film-advance speed decreases to allow sufficient time for correct exposure.
Frame counter: Countdown type shows the remaining number of exposures on roll; film advance stops automatically whenever the counter shows "0".
Film rewinding: Automatic with manual activation; rewind motor stops automatically after film is rewound; film leader remains out.
Film-cartridge winding capacity: Approximately 36-exposure rolls per set or charge (based on Minolta's standard test method at 20°C (68°F)):
- NP-90M: 35 rolls
- BP-90M: 50 rolls with alkaline-manganese, 40 rolls with carbon-zinc
Other features: Tension switch stops film advance at end of roll; green monitor lamp signals film advance; red monitor lamp signals film advance is stopped.
Size and weight: 144 x 30 x 55mm (5-11/16 x 1-3/16 x 2-3/16 in.); 330g (10-5/8 oz.) without battery pack.
Usage Features:
Attaching and Removing Battery Pack:
- To attach: Move the battery-pack release all the way to the left and set the selector dial at "OFF" position. Align attaching pins on the battery pack with guide holes in the base of the MD-90. Then, bring left sides of the battery pack and motor drive together, and press the battery pack firmly onto the motor drive. When the battery pack is attached correctly, the battery-pack release will snap back to its lock position.
- To remove: With the selector dial at "OFF" position, move the battery-pack release as indicated in the diagram, and separate the battery pack from the motor drive. First pull out the right side of the battery pack, then the left side.
Attaching and Removing MD-90:
- To attach: With the selector dial at "OFF" position, align the motor drive's guide pins and attaching screw with guide holes and tripod socket on the bottom of the camera. Turn the grooved ring on the attaching screw clockwise until the motor drive is secured.
- To remove: With the selector dial at "OFF" position, turn the grooved ring counterclockwise until the attaching screw is out of the camera's tripod socket. Separate the motor drive from the camera. Make sure the guide pins in the motor drive are drawn straight out of the guide holes in the camera.
- Note: Always set the selector dial to "OFF" before attaching or removing the motor drive. Before attaching the motor drive, make sure that nothing is lodged in between the camera and motor drive, such as the camera's carrying strap. Also make sure that the locating holes and couplers are free of foreign matter. To assure proper connection, wipe electrical contacts on the camera and motor drive with a clean dry cloth.
Loading Film:
- Set the MD-90's selector dial to "OFF" and slide the counter reset to set the MD-90's frame counter to "S" (start) position. Open the camera's back cover and load film. After threading film into the take-up spool, make sure the sprocket teeth engage holes in the lower edge of the film leader. Press the camera's operating button and manually advance film one frame to take up slack in film, then close the camera back.
- Set the MD-90's selector dial to H, M, or L setting and hold down the camera's operating button. The motor drive will advance film to the first frame and stop automatically.
- If desired, film can be advanced manually to the first frame. Just set the selector dial to "OFF" position, release the shutter, and operate the film-advance lever.
- Frame counter: After advancing film to the first frame, the frame counter will be set to "36". When using rolls of film with less than 36 exposures, the frame counter should be set to "24" for 24-exposure rolls, "20" for 20-exposure rolls, and "12" for 12-exposure rolls.
- Note: The MD-90 frame counter is a countdown-type which shows the remaining number of exposures on the roll. Since the camera's frame counter shows the actual number of exposures taken, the numbers on the two frame counters will not match. If the motor drive stops before the last exposure on the roll, check whether the counter is set correctly. If not, set the selector dial to "OFF", and reset the counter for the remaining number of exposures on the roll.
Operation:
- Focus-priority setting: Single-frame advance at "S" setting, continuous film advance at "H", "M", or "L" setting, or for focus-priority shutter release at "F.P." setting.
- To set film-advance: While pressing the selector-dial release, rotate the dial to align the white index with the setting indication. Release must be pressed whenever you want to change from one setting to another.
Shutter Release:
- With the Motor Drive MD-90 attached, the shutter can be released in any of three ways:
- Camera's operating button: Meter activation, continuous autofocusing with focus hold, and shutter release are all the same as for manual film advance.
- Battery pack's shutter-release button: Used with either motor-driven or manual film advance for more comfort when holding the camera vertically. Slight pressure switches on the camera's meter. Pressing partway down focuses the lens and activates focus hold. Pressing all the way down releases the shutter. This button does not have a touch-sensitive switch, thus continuous auto-focusing is not possible.
- To prevent accidental exposures and conserve battery power, the shutter-release button can be locked by sliding the release lock downward so that the red dot appears.
- Remote Cord RC-1000S or 1000L: Attaches to the remote-control terminal on the camera body. Operation is the same as for the battery pack's shutter-release button.
Single-frame Advance:
- Rotate the selector dial to "S" to set the MD-90 for single-frame film advance.
- For continuous autofocusing, touch the camera's operating button. To release the shutter, press the operating button all the way down. After exposure, the motor drive will advance film one frame and recock the shutter for the next exposure. During film advance, the green monitor lamp glows.
Continuous Film Advance:
- For continuous film advance, rotate the selector dial to "H", "M", or "L" setting. At these settings, the motor drive recocks the shutter and advances film continuously as long as the operating button is held down. Between exposures, focus is not adjusted. Focus is locked at the position used for the first exposure in the series. During film advance, the green monitor lamp glows.
- At shutter speeds below 1/250 sec., film-advance speed is automatically decreased to allow sufficient time for correct exposure. Maximum film-advance speeds are: 5 frames per second (fps) at "H" setting, 3fps at "M" (medium) setting, and 2fps at "L" (low) setting. For shooting at 5fps, use of the Ni-Cd Battery Pack NP-90M is required.
Focus-priority Setting:
- Rotate the selector dial to "F.P." setting for focus-priority shutter release with continuous film advance.
- To shoot autofocus sequences, press the operating button all the way down while keeping the subject centered in the focus frame. As long as the operating button is pressed, the camera will adjust focus for each exposure, then release the shutter. Film advance is continuous with a maximum film-advance speed of up to 4fps. Actual speed will vary according to focus adjustment required for each shot and shutter speed in use. During film advance, the green monitor lamp glows.
Manual Advance:
- With the Motor Drive MD-90 attached and its selector dial at "OFF" position, the shutter can be released and film advanced manually as described in the camera owner's manual. To reduce the camera's weight and facilitate handling, it is best to remove the motor drive when it is not being used.
- Note: To prevent accidental exposures, keep the Motor Drive MD-90's selector dial at "OFF" position when the motor drive is not being used. When using the motor drive, the camera's film-advance lever should be kept folded up against the camera body.
Rewinding Film:
- Film advance stops automatically when the MD-90's frame counter shows "0" or at the end of the roll. The red monitor lamp will glow indicating that film should be rewound.
- To rewind film: With the selector dial at any position except "OFF", slide and hold the counter reset to the left and press the rewind button. With fresh batteries loaded, rewinding a 36-exposure roll takes about 7 seconds. When rewinding is complete, the motor stops automatically and film leader remains out. Open the camera back and remove the film.
- Note: Manual rewinding is not possible when the motor drive is attached. When you want to rewind film manually, set the MD-90's selector dial to "OFF", then detach the motor drive from the camera. Rewind film as explained in the camera owner's manual.
- Note: Excess tension on film, weak batteries, or incorrect setting of the MD-90's frame counter may cause film advance to stop before the end of the roll; the red monitor lamp will glow. If this happens, move the selector dial to "OFF". Then check the frame counter setting and battery condition. Set the selector dial to one of its operating positions. If the lamp remains on and film does not advance, switch the motor drive to "OFF" and advance film manually.
- At the end of the roll, never repeatedly turn the selector dial back and forth between "OFF" and an operating position. This could damage the film.
Multiple Exposures:
- When using the Motor Drive MD-90 for making multiple exposures, the motor drive recocks the shutter after exposure as long as the multiple-exposure button is pressed.
- To make multiple exposures:
- While pressing the camera's multiple-exposure button, release the shutter. After exposure, the shutter will be recocked, and film will remain stationary.
- Any number of exposures can be made on a single frame by repeating step 1. However, before making the final exposure, release the finger from the multiple-exposure button, then release the shutter. After exposure, the MD-90 will recock the shutter and advance film to the next frame.
- Note: When using continuous advance (H, M, L, or F.P.) settings, film advance may be too fast for you to release the multiple-exposure button before the final exposure. If this happens, release the multiple-exposure button, set the MD-90's selector dial to "S", and attach the camera's lens cap. Then, set the camera to 1/4000 sec. at f/22 and make a blank exposure. After exposure, the motor drive will advance film to the next frame.
Using Dedicated Flash:
- For flash photography with the Motor Drive MD-90, Minolta's Program (MAXXUM) Flash 4000AF and 2800AF units can be used. X-sync settings and viewfinder indications are the same as when using manual film advance.
- For single-frame advance (MD-90's "S" setting), any power level on the flash can be selected, and the flash's AF illuminator will be activated when focus-assist illumination is required.
- Flash sequences: For shooting flash sequences with continuous film advance, focus is held at the position used for the first exposure in the series. When the flash is mounted on the camera and Ni-Cd batteries are used, 2fps flash sequences are possible.
- Set the flash unit to its lowest power setting, that is, "MD" (motor drive) setting on the 4000AF, "Lo" setting on the 2800AF. Set the motor drive to "L" setting to synchronize film advance and flash recycling.
Use of Control Grip CG-1000:
- By mounting the flash on the Control Grip CG-1000 and using Ni-Cd batteries, flash recycling time can be reduced for shooting at 5 frames per second.
- Set the flash unit to its lowest power setting, that is, "MD" (motor drive) setting on the 4000AF, "Lo" setting on the 2800AF. Set the motor drive to "H" setting to synchronize film advance and flash recycling.
- Note: Be sure to use fully charged Ni-Cd batteries in the flash unit and Control Grip to obtain the shortest recycling times. Before releasing the shutter, check that the subject is within the flash range for the power level selected. If not, use a larger aperture or move closer to the subject. Flash recycling times are based on Minolta's standard test method at ISO 100. For further information, refer to the appropriate owner's manuals.
Maintenance Features:
Care and Storage:
- The Motor Drive MD-90 can be cleaned by wiping with a dry or silicone-treated cloth. Do not allow alcohol or other chemicals to touch its surface.
- Remove batteries when the motor drive will not be used for more than two weeks.
- Store the motor drive in a cool, well-ventilated place. Do not store in places subject to high temperatures, high humidity, dust or dirt.