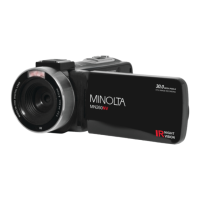
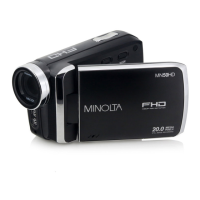
This document describes the Minolta MN2K10NV camcorder, a 2.7K QHD device with infrared night vision capabilities. It is designed for capturing both video and still images, offering a range of features for various shooting conditions and user preferences.
Function Description
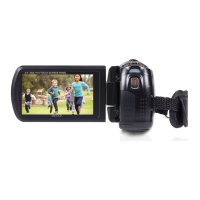
The Minolta MN2K10NV camcorder serves as a portable device for recording high-definition video and capturing still photographs. It supports different modes including Video, Photo, Playback, and Setup, allowing users to switch between recording, viewing, and configuring settings. The camcorder features a zoom function, an infrared LED light for night vision, and a built-in speaker for audio playback. It can connect to a computer for file transfer and viewing, and to a TV for display.
Important Technical Specifications
- Model Number: Minolta MN2K10NV
- Lens: Fixed Focus, f=7.5mm, F/3.2, 37mm Front Threading for Lens Accessory Attachments
- Zoom: 16X Digital Zoom
- Image Sensor: 8MP CMOS Sensor
- Shutter: Electronic, Anti-Shake Image Stabilization
- Pixels (photo): JPEG: 48 MP, 30 MP, 24 MP, 20 MP, 16 MP, 12 MP, 10 MP, 8 MP, 7 MP, 5 MP, 3 MP
- Pixels (video): AVI: 2.7K 2688x1520, 1080p 1920x1080, 720p 1280x720, VGA 640x480
- ISO Sensitivity: Auto, 100, 200, 400
- LCD Monitor: 3.0 Inch IPS High Resolution Touch Screen LCD
- Assistive Light: Infrared LED (for shooting in dark scenery)
- Power Saving Mode: OFF, 1 Minute, 3 Minutes, 5 Minutes
- White Balance Control: Auto, Daylight, Cloudy, Fluorescent, Tungsten
- Scene Modes: Auto, Night, Portrait, Landscape, Backlight, Sport, Party, Beach, High Sensitivity
- Special Features: Photo Burst, Face Detection, Color Filters, Anti-Shake, Time-Lapse
- Hot Shoe: Yes, for external MIC or Assistive Lighting
- Recording Media: SD, SDHC; Maximum: 128GB
- I/O Ports: 5-pin Mini USB 2.0, Mini HDMI C Type, 3.5mm Microphone Input, Hot Shoe
- Power: NP-180; 3.7V, 1400mAh
- Dimensions: 5.12 x 2.18 x 2.40 in., 10.4 oz.
Usage Features
The camcorder offers a user-friendly interface with various buttons and a touch screen LCD for navigation.
Basic Operation:
- Power On/Off: Press and hold the POWER button for 2 seconds. The camcorder automatically powers on and off when the screen is opened or closed.
- Mode Switching: Use the MODE button to cycle between Video, Photo, Playback, and Setup Modes. The corresponding mode icon is displayed on the top left corner of the screen.
- Zoom: Use the ZOOM button (left/right) to zoom in or out.
- Recording: Press the RECORD button to start/stop video recording.
- Photo Capture: Press the PHOTO button to capture a still image.
- Menu Navigation: The 'MENU' icon in the bottom left corner of the touch screen allows access to settings.
Video Mode Features:
- Movie Size (Resolution): Select from 2.7K, 1080P, 720P, 480P. Higher resolution and faster frames per second rate produce higher quality and larger video files.
- Sharpness: Adjust the visible detail of a photograph.
- Loop Recording: Set a duration for each video clip recorded (On, Off, Loop Duration).
- Time-Lapse: Capture long sequences of events in a much shorter time period. Options include 1 Second, 5 Seconds, 10 Seconds, 30 Seconds, 60 Seconds. The camera can capture a photo every 10 seconds and create a time-lapse video.
- White Balance: Adjust the color of light in your pictures (Auto, Daylight, Cloudy, Fluorescent, Tungsten).
- Exposure: Adjust frame brightness (+3, +2, +1, 0, -1, -2, -3).
- ISO: Adjust light sensitivity (Auto, 100, 200, 400).
- Effect: Apply color filter effects (Normal, Black & White, Sepia, Red, Green, Blue, Sunset, Warm, Cool, Over Exposure, IR, Binary, Vivid, Undertone, Dog Eye, Aibao, Gothic, Japan Style, LOMO, Negative).
- Scene Mode: Optimize settings for specific scenes (Auto, Night, Portrait, Landscape, Backlight, Sport, Party, Beach, High Sensitivity).
- Beauty Filter: Apply a filter effect on people in the scene (On, Off).
Photo Mode Features:
- Photo Size (Resolution): Select from 48 MP, 30 MP, 24 MP, 20 MP, 16 MP, 12 MP, 10 MP, 8 MP, 7 MP Wide, 5 MP, 3 MP.
- Quality: Adjust the level of compression (Super Fine, Fine, Normal). Super Fine uses the least amount of compression for saving, and as a result produces a higher photo quality.
- Sharpness: Adjust the visible detail of a photograph (Sharp, Normal, Soft).
- White Balance: Adjust the color of light in your pictures (Auto, Daylight, Cloudy, Fluorescent, Tungsten).
- ISO: Adjust light sensitivity (Auto, 100, 200, 400).
- Exposure: Adjust frame brightness (+3, +2, +1, 0, -1, -2, -3).
- Self-Timer: Set a time delay before a photograph is captured (Off, 2 Seconds, 5 Seconds, 10 Seconds).
- Photo Burst: Capture 3 consecutive photos with one click of the PHOTO button (Off, 3 Photos).
- Effect: Apply color filter effects (Normal, Black & White, Sepia, Red, Green, Blue, Sunset, Warm, Cool, Over Exposure, IR, Binary, Vivid, Undertone, Dog Eye, Aibao, Gothic, Japan Style, LOMO, Negative).
- Anti-Shake: Enables photo capture in high speed and low-light by electronically minimizing motion blur and reducing camera shake (On, Off).
- Scene Mode: Optimize settings for specific scenes (Auto, Night, Portrait, Landscape, Backlight, Sport, Party, Beach, High Sensitivity).
- Face Detection: Set the camera to detect faces in a scene and adjust your camera's setting for the most optimal picture (On, Off).
- Smile Capture: Set your camera to detect smiles in a scene and for it to capture a photo automatically (On, Off).
- Beauty Filter: Apply a filter effect on people in the scene (On, Off).
Playback Mode Features:
- Delete: Delete single or all photos and videos.
- Protect: Protect photo/video files from being deleted accidentally (Lock This, Unlock This, Lock All, Unlock All).
- Rotate: Rotate images (90°, 180°, 270°).
- Slideshow: View photographs as a slideshow.
- Video Playback: Playback recorded videos.
Setup Menu Features:
- Language: Set the camcorder's interface language.
- Beep Sound: Turn the sound the camcorder makes after pressing a button on or off (On, Off).
- Date and Time: Set the current Date and Time on your recorded video clips and captured photos.
- Power Save: Set the duration of time in which the camcorder will wait with no user input before automatically powering off (Off, 1 Minute, 3 Minutes, 5 Minutes).
- Frequency: Set the frequency of the camcorder from 50Hz to 60Hz. The default frequency for the United States is 60Hz.
- Format Memory Card: Erases all photos, videos and data stored on your memory card. NOTE: This will delete all of your media and cannot be undone.
- Restore Default Settings: Restores factory default settings.
- Touch Screen Calibration: Calibrate the touch screen.
Connecting to External Devices:
- Computer: Connect via USB to transfer photos and videos. The camcorder's screen will enter "Mass Storage" mode automatically.
- TV: Connect via HDMI to view content on a TV.
- External Microphone/Assistive Lighting: Attach to the hot-shoe mount and plug into the MIC port.
Maintenance Features
- Battery Management:
- Insert the lithium-ion battery into the battery compartment, ensuring the metal contacts face the back of the camcorder.
- Charge the battery by connecting the camcorder to the included AC adaptor with the USB cable. Open the camcorder LCD screen to access the charging port.
- Warning: Keep batteries out of reach of children to prevent from swallowing batteries, which might cause poisoning. Once the battery's color changes or its shape is twisted, stop using it.
- Memory Card Management:
- Insert the SD memory card into the memory card slot, ensuring the metal contacts are inserted first. Push the memory card down until you hear an audible click. The memory card can only be inserted in one way. Do not force the card in if it will not go in smoothly.
- To remove, close the memory card door by flipping it back into place, simply push in and the card will eject back out.
- Note: Format the memory card before using. Do not remove or insert the memory card when recording. Memory card rating must be Class 10 or above.
- General Care and Safety:
- Do not disassemble or attempt to service the camera yourself.
- Do not expose the camera to moisture, or extreme temperatures.
- Allow the camera to warm up when moving from cold to warm temperatures.
- Do not touch and put pressure on the camera lens.
- Do not expose the lens to direct sunlight for extended periods.
- Do not use abrasive chemicals, cleaning solvents or strong detergents to clean the product. Wipe the product with a slightly damp soft cloth.
- Do not use the flash of LED Light near a person's eyes to prevent possible eye injury.
- To prevent you from falling over or resulting in traffic accident, please do not use the camera while you are walking, driving or riding a vehicle.
- Please handle the camera strap with care, and never place the strap around the neck of an infant or child. Wrapping the strap around a neck may cause suffocation.
- Do not subject the LCD screen to impact.
- To prevent the risk of fire or electric shock, do not expose this appliance to rain or moisture.
- Battery Information:
- Turn off the camera before installing or removing the battery.
- Use only the provided batteries or type of battery and charger that came with your camera. Using other types of battery or charger may damage the device and invalidate the warranty.
- Inserting the battery upside down can cause damage to the product and possibly cause an explosion.
- When the camera is used for an extended period of time, it is normal for the camera body to feel warm.
- Download all pictures and remove the battery from the camera if you are going to store the camera for a long period of time.
- The type of battery and the battery power level may cause the lens to be stuck up. Ensure you use the correct battery type and use a fully charged battery.
- Risk of explosion if battery is replaced by an incorrect type. Dispose of used batteries according to the instructions.
- USB Adapter Information:
- Do not expose the adapter to high temperatures or moisture places. Otherwise, it may cause fire or electric shock.
- Do not attempt to repair, disassemble, change or transform the adapter.
- Avoid sudden changes in temperature, which may cause condensation on the adapter's internal surfaces. Please do not use it immediately in this situation.
- Do not touch the plug with wet hands. Otherwise, it may cause electric shock.
- Do not use the travel voltage converter or AC/DC power inverter. Otherwise, it may cause damage, overheating, malfunction or fire to the camera.