Do you have a question about the Minolta X-700 - PART 2 and is the answer not in the manual?
Table showing usable shutter speeds for various ISO film speeds.
Table detailing usable camera modes with different lenses and accessories.
Notes on using MD lenses in P mode and specific operation for Auto Rokkor lenses.
Steps to set the mode selector and lens aperture for A mode.
Guide to composing, focusing, and checking viewfinder indicators in A mode.
Tips on AE lock, exposure adjustment, and eyepiece shielding in A mode.
Explanation of symbols and LEDs shown in the camera's viewfinder.
Table of recommended aperture settings for various ISO and lighting conditions.
Description of the camera's metering system and its influence.
Guidance on shielding the viewfinder to prevent light interference.
Instructions on how to use the AE lock for proper exposure in high-contrast situations.
Steps to increase or decrease exposure using the adjustment control.
Key points regarding the exposure adjustment control's behavior and usage.
Guidance on using AE lock/adjustment for subjects darker or brighter than background.
Recommendations for exposure adjustments when copying documents or using filters.
Visual examples of underexposed and overexposed images without adjustments.
Visual examples showing improved exposure using AE lock or adjustment.
How to set the mode selector for manual exposure control.
Methods for setting shutter speed or aperture in manual mode.
Explanation of the slow-shutter-speed warning in manual mode.
Explanation of viewfinder indicators for manual mode (M, aperture, speed).
How to use the 'B' (bulb) setting for exposures longer than one second.
Information on self-timer, battery life, and multi-function back for long exposures.
Description of the split-image spot and microprism band focusing aids.
Steps for visually focusing using the viewfinder and lens ring.
Recommendations for using split-image, microprism, or matte field focusing.
Using the distance scale for focusing in low light or for prefocusing.
Explanation of the film-plane index for measuring distances in close-ups.
How to focus correctly when using infrared film with a red filter.
Definition and explanation of depth of field and its factors.
How aperture, focus distance, and focal length influence depth of field.
How to use the preview button to check depth of field visually.
How to read and use the depth-of-field scale on the lens.
Using the depth-of-field scale for zone focusing for anticipated action.
Explanation of how subject or camera movement causes blur.
How shutter speed relates to object speed and distance for freezing motion.
How lens, subject distance, shutter speed, and support affect camera shake.
Importance of a slow, steady squeeze to avoid camera shake.
Demonstrations of various ways to hold the camera for stability.
Explanation of the beep warning for slow shutter speeds (1/30s or slower).
Techniques to maintain steadiness when slow shutter speeds are unavoidable.
Advice on using a tripod for maximum sharpness during long exposures or self-timer shots.
Step-by-step guide to setting and using the 10-second self-timer.
Explanation of the LED and beep signals indicating timer status.
Alternative methods for shutter release like remote cords and controllers.
Using aperture to control depth of field for sharp focus or blurred backgrounds.
Examples of how small and large f-numbers affect depth of field.
Using fast shutter speeds (1/500-1/1000 sec) to freeze motion.
Using slow shutter speeds (1/2-1 sec) to show subject flow or motion.
Explanation of the second cell for through-the-lens flash metering.
How to use P and A modes for simple or controlled flash photography.
How to attach cordless clip-on and bracket-type flash units.
Details on camera connection, flash mode, and sync shutter speed for PX-series flashes.
Details on camera connection, flash mode, and sync shutter speed for X-series flashes.
Information on other flash types, signals, and exposure-adjustment control usability.
Images and names of various flash units, adapters, and related accessories.
Images and names of power sources, chargers, and connecting cables.
Images and names of camera body, motor drive, auto winder, and data backs.
How PX flash units provide TTL flash control in P and A modes.
Highlights compact design, sync speed, bounce, and macro lighting features.
Overview of accessories like Power Grip, filter sets, and AC adapters for PX flashes.
How the back connects wirelessly for camera control and data imprinting.
Setting the back for time-lapse, long exposures, and multi-frame sequences.
Using the timer and calendar for accurate time recording or imprinting.
Capturing action with single-frame or continuous shooting at 2 or 3.5 fps.
Benefits of the auto winder for film advance and continuous shooting up to 2 fps.
How both units attach quickly and allow easy film loading/unloading.
Listing and brief descriptions of eight optional Acute Matte focusing screens.
Descriptions of screens for general, close-up, and telephoto photography.
Descriptions of S and H screens for macro, astro, and general photography.
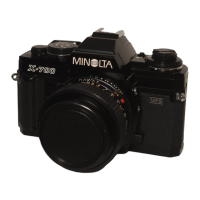
Overview of camera type, exposure modes, and lens mount compatibility.
Information on circuit, quartz crystal, stepless speed, and shutter type.
Details on TTL metering and viewfinder magnification, field of view, displays.
Range of adjustment control, flash sync, and other interface elements.
Types of batteries used and specifics of the 10-sec delay timer.
Physical dimensions, weight, and lists of standard/optional accessories.
Guidelines for battery removal, periodic operation, and long-term storage.
List of Minolta company addresses worldwide.
| Type | 35mm SLR |
|---|---|
| Lens Mount | Minolta MD |
| Metering | TTL center-weighted averaging |
| Flash Sync Speed | 1/60s |
| Weight | 505g (body only) |
| Exposure Modes | Aperture Priority, Program, Manual |
| ISO Range | ISO 25 to 1600 |
| Viewfinder | Pentaprism |
| Battery | 2x 1.5V LR44 or SR44 |