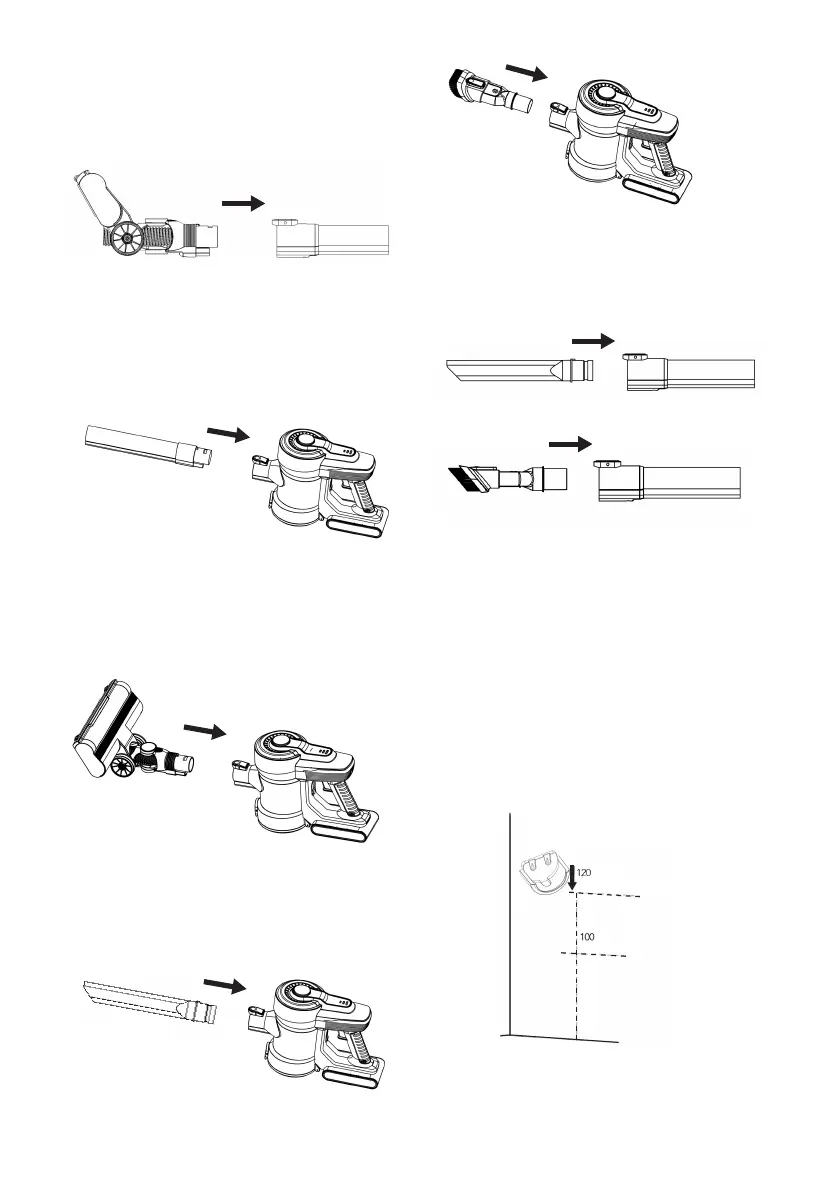
7
Connection of Extension Tube and
Motorized Brush Head
Insert the upper part into lower connection of the
extension tube and can hear the sound of locking.
(Fig.4)
Fig.4
Connection of Main Unit and Extension
Tube
Insert the upper ends into the main hole of the
dust cup and can hear the locking sound. (Fig.5)
Fig.5
Connection of Motorized Brush Head and
Main Unit
Insert the upper part of the Motorized Brush Head
into the main hole of the Main Unit until hearing
the locking sound. (Fig.6)
Fig.6
Connection of Crevice Tool and Dusting
Brush with Main Machine
Insert the Dusting Brush and Crevice Tool into the
main hole of the Main Unit. (Fig.7, Fig.8)
Fig.7
Fig.8
Connection of Dusting Brush and Crevice
Tool with Extension Tube
Insert the Dusting Brush and Crevice Tool onto the
Extension Tube until hearing the locking sound.
(Fig9, Fig10)
Fig.9
Fig.10
Wall Mount Installation
The product is equipped with a Wall Mount and
relative xing kit. The support only helps to keep
the appliance sturdy when the tube and the brush
are inserted. The appliance will not be aached
to the support but only supported by it.
Mount the wall mounting bracket on the wall. Do
not secure the bracket to drywall only. Secure
the screws to a stud. Use the 2 screws provided.
Mount at a recommended height of 120cm and
no less than 100cm above the floor. Behind the
mounting area. (Fig.11)
Fig.11
(Recommended)
cm
cm
(Minimum)