8
INSTALLATION INSTALLATION
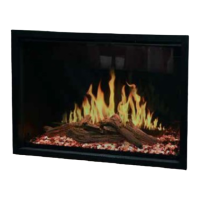
Recessed Installation:
1. Prepare frame opening according to chart.
Frame opening is slightly larger than the fire
unit. For best concealment, a qualified
electrician should add an electrical outlet per
local building codes anywhere in the shaded
area. Install 110v outlet on the finished surface
above or to the right of the recessed opening.
Fascia will cover the plug and outlet.
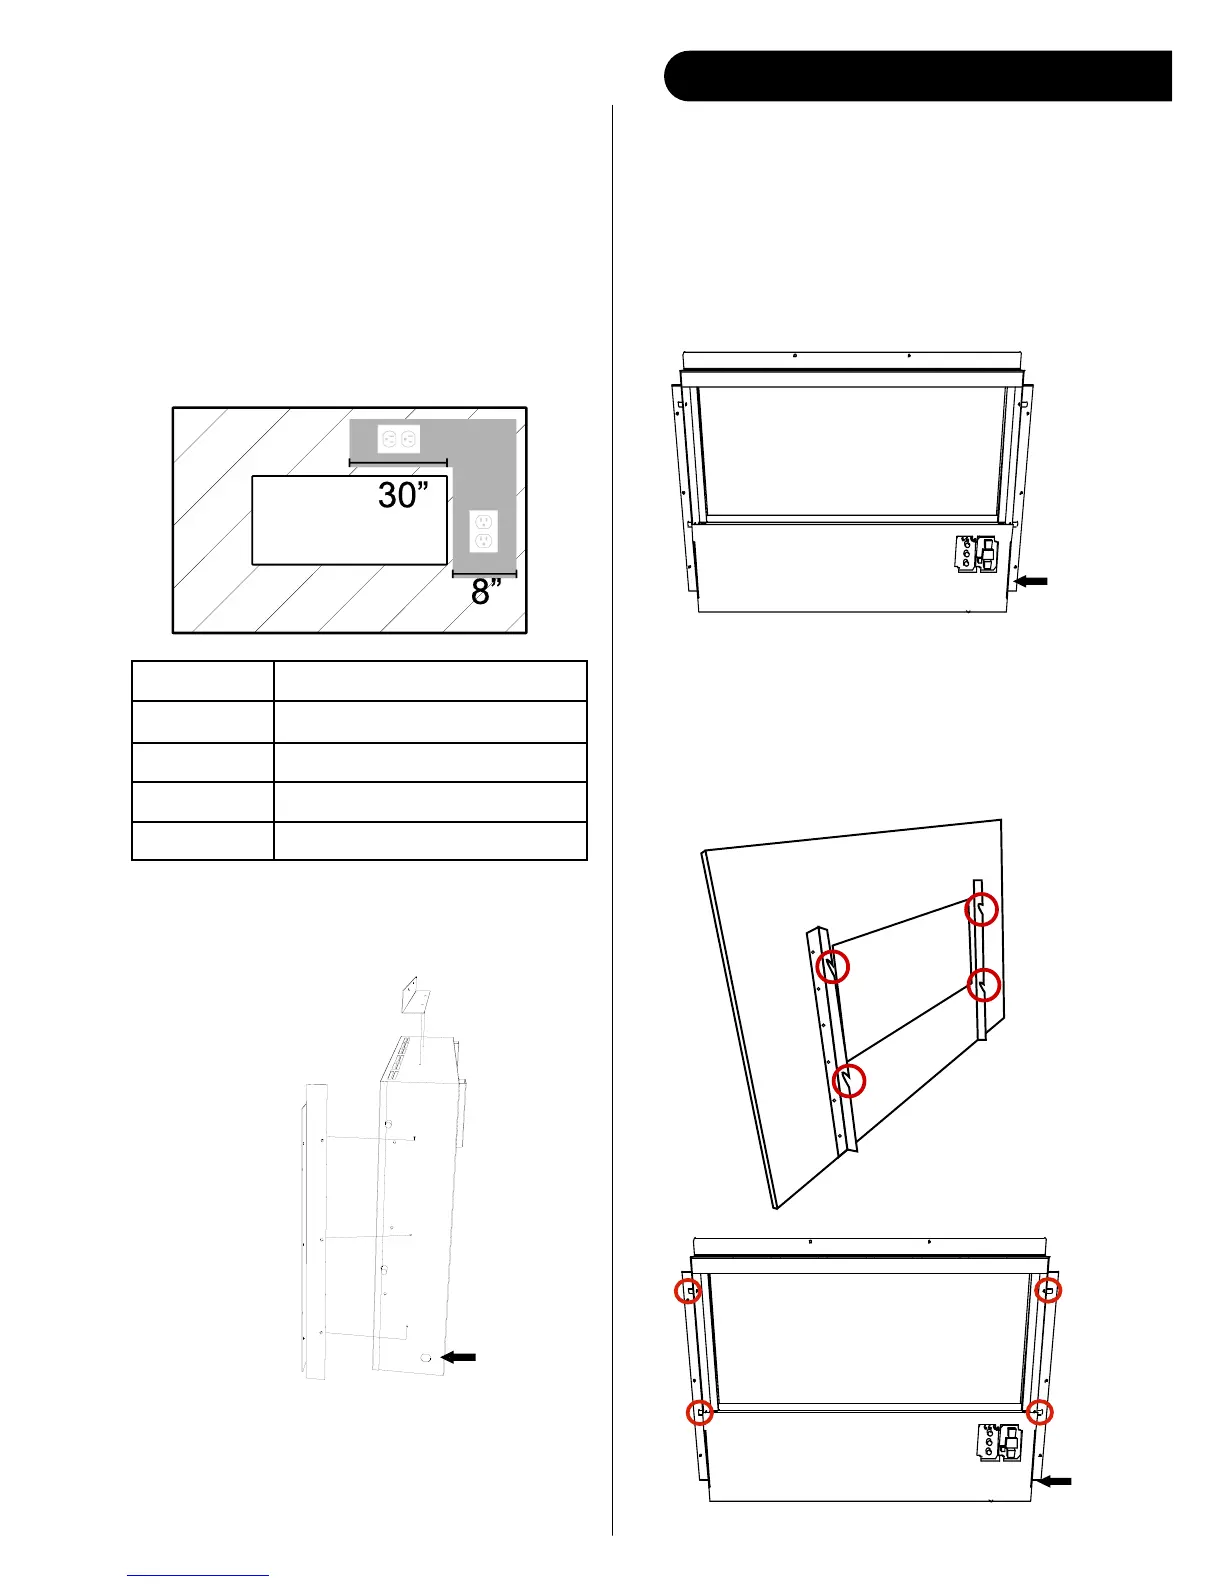
3. Secure fire unit to the finished framed opening
with the provided large washer head screws.
Make certain that at least 4 of the screws are
driven in to a solid backing.
AL45CLX 30” W x 19 3/4” H x 4” D
AL60CLX 45” W x 19 3/4” H x 4” D
AL80CLX 65” W x 19 3/4” H x 4” D
AL100CLX 85” W x 19 3/4” H x 4” D
AL144CLX 131 1/2” W x 19 3/4” H x 4” D
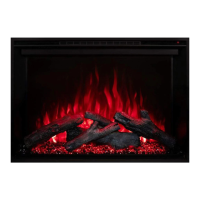
2. Attach L-metal brackets to the fire unit with he
provided small washer head screws.
Fireplace will stand proud of the finished wall
opening by 1-1/8 inches, this area must not be
blocked by any additional trim, tile, etc. as this
will block proper air flow. This is a semi-
permanent installation. Remove screws to
relocate.
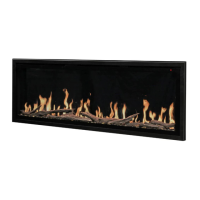
4. Hang the face on the fire unit. Make certain
that the hooks from the on the backside of the
glass face are secured on all 4 studs on the fire
unit.
Power cord
Power
cord
Power
cord