6
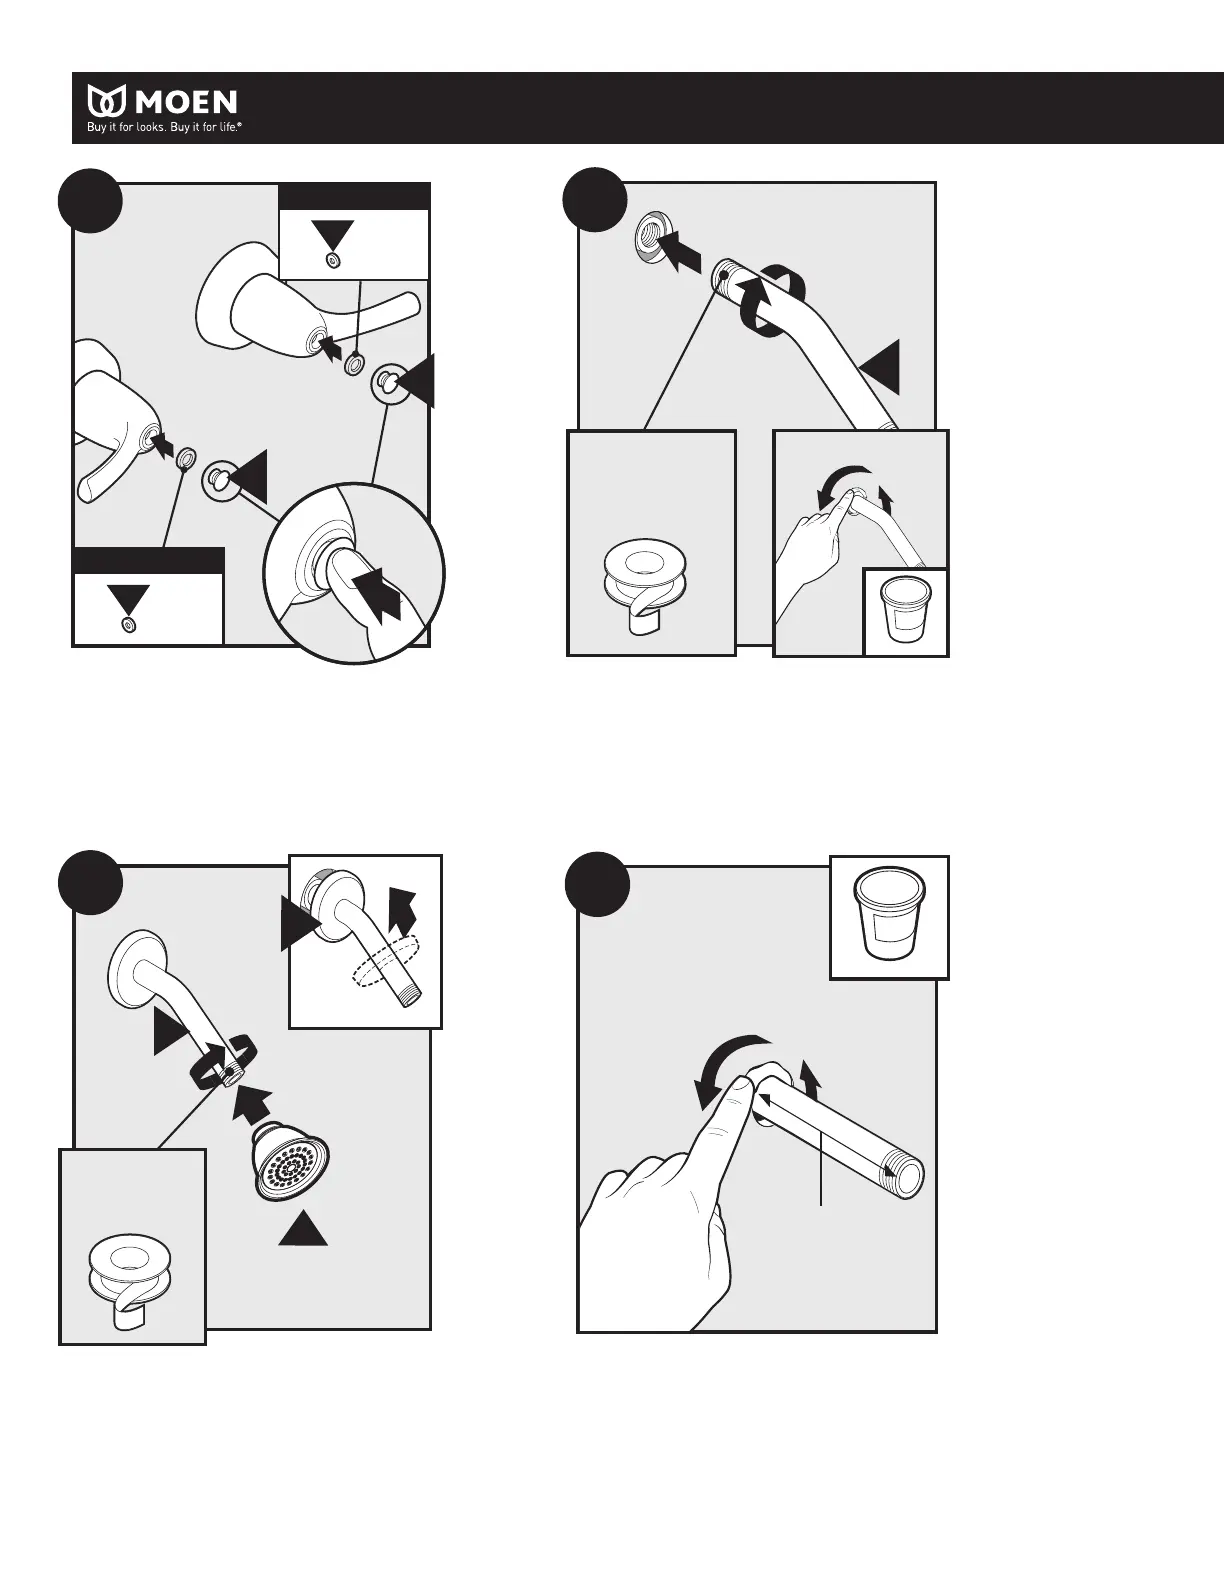
Wrap thread seal tape onto the shower arm (B) threads clockwise. Thread
shower arm (B) clockwise into shower arm elbow in wall. Apply plumbers
putty or other sealant to the area surrounding the wall area and pipe.
Wrap thread seal tape onto the shower arm (B) threads clockwise. Thread
shower arm (B) clockwise into shower arm elbow in wall. Apply plumbers
putty or other sealant to the area surrounding the wall area and pipe.
Wrap thread seal tape onto the shower arm (B) threads clockwise. Thread
shower arm (B) clockwise into shower arm elbow in wall. Apply plumbers
putty or other sealant to the area surrounding the wall area and pipe.
Slide the shower arm escutcheon (A) onto shower arm (B).
Slide the shower arm escutcheon (A) onto shower arm (B).
Slide the shower arm escutcheon (A) onto shower arm (B).
The threaded pipe for the tub spout should protrude 4-1/16” out from the
nished wall. Apply a sealant between the wall opening and the pipe.
The threaded pipe for the tub spout should protrude 4-1/16” out from the
nished wall. Apply a sealant between the wall opening and the pipe.
The threaded pipe for the tub spout should protrude 4-1/16” out from the
nished wall. Apply a sealant between the wall opening and the pipe.
If desired, the blue cold temperature indicator (M) and the red hot tempera-
ture indicator (L) can be installed onto the handles and are held in place by the
handle caps (I). If no temperature indicators are wanted, install the caps (I) into
the handles as shown.
If desired, the blue cold temperature indicator (M) and the red hot tempera-
ture indicator (L) can be installed onto the handles and are held in place by the
handle caps (I). If no temperature indicators are wanted, install the caps (I) into
the handles as shown.
If desired, the blue cold temperature indicator (M) and the red hot tempera-
ture indicator (L) can be installed onto the handles and are held in place by the
handle caps (I). If no temperature indicators are wanted, install the caps (I) into
the handles as shown.
7
I
I
L
Option/Opción/Option
Red
Rojo
Rouge
M
Option/Opción/Option
Blue
Azul
Bleu
2
1
B
8
Thread seal tape
Cinta para sellar roscas
Ruban pour joints letés
3
1
Thread seal tape
Cinta para sellar roscas
Ruban pour joints letés
9
A
C
B
2
10
3-3/4" (95mm)