INS10838B - 4/19
15
I
A
B
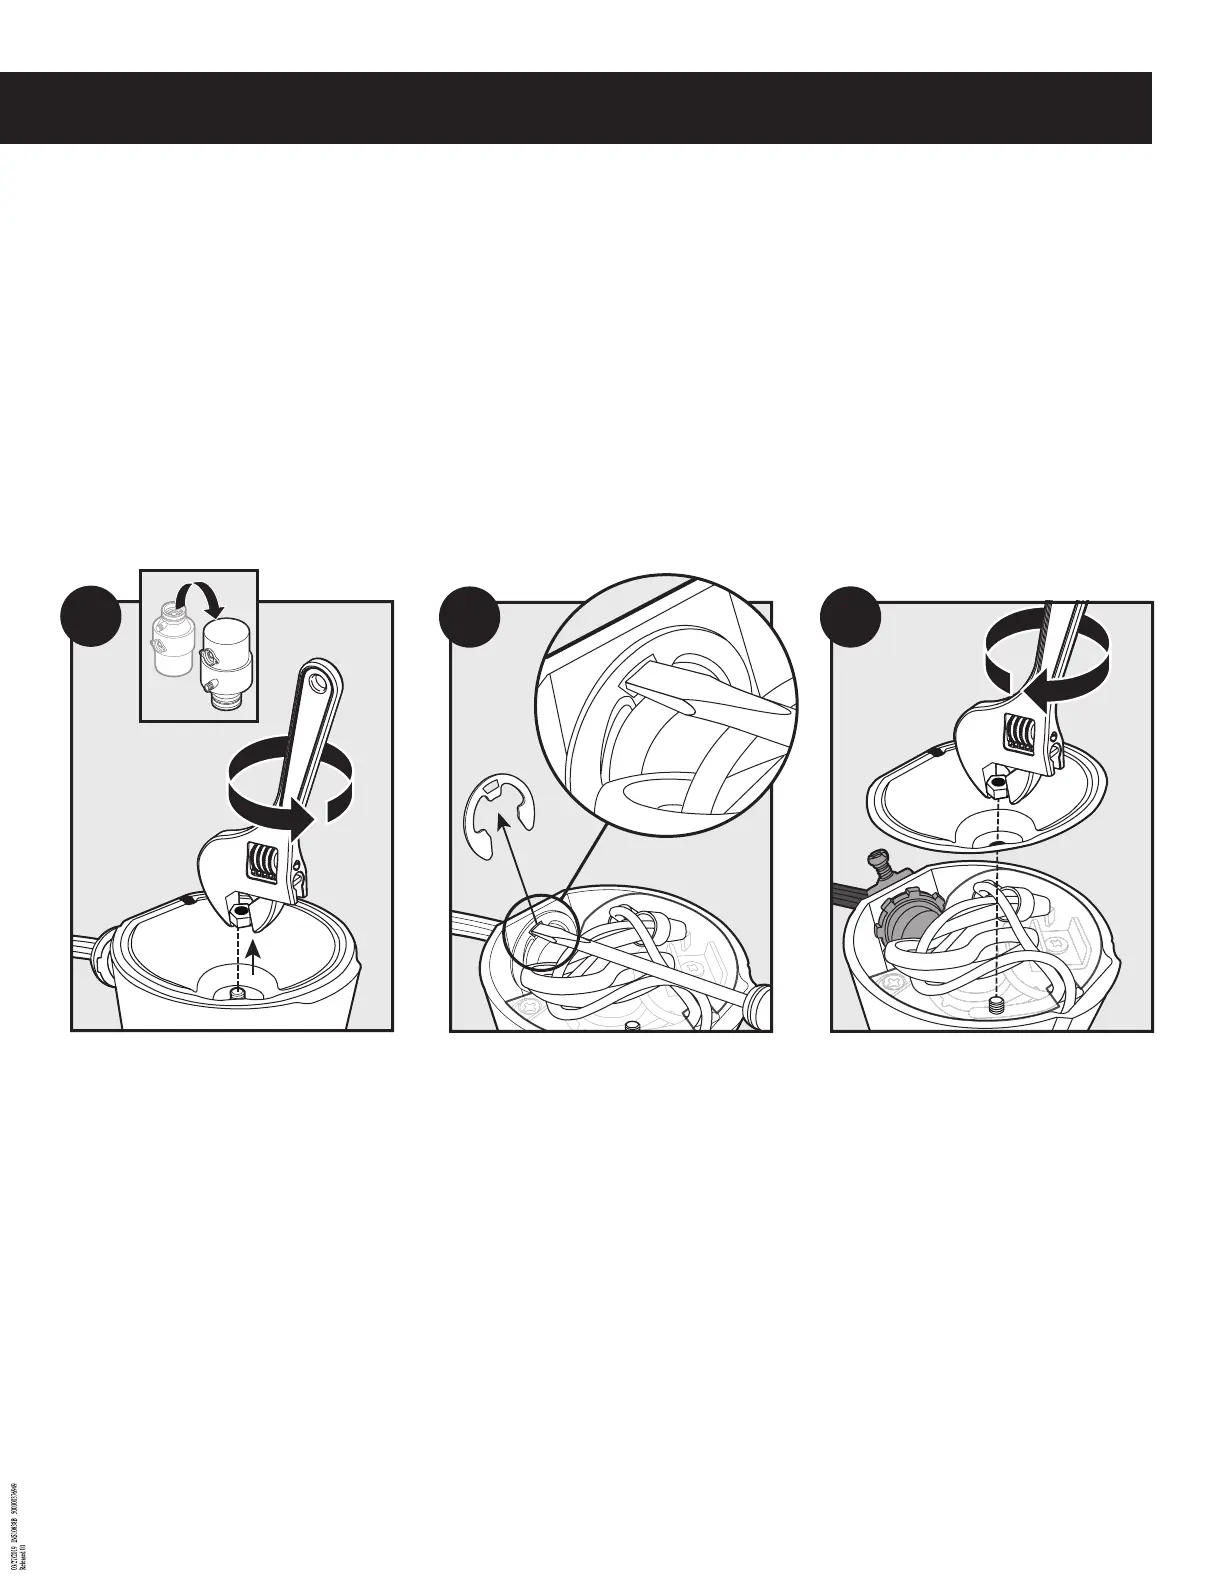
With power supply turned o, remove metal plate
on the bottom of the disposal.
Con la fuente de alimentación apagada, retire la
placa de metal en la parte inferior del triturador.
S’assurer d’abord que l’alimentation électrique est
coupée, puis enlever la plaque de métal au fond
du broyeur.
Remove clip with needle nose pliers or athead
screwdriver from the strain relief piece of the cord,
and remove cord.
Retire el clip con un alicate de punta na o un
destornillador de punta chata del prensacable del
cable de alimentación y retire el cable.
Enlever la bride à l’aide d’une pince à bec elé ou un
tournevis à tête plate, du réducteur de tension sur le
cordon puis retirer le cordon.
Cut white and black wires o close to the connectors.
Corte los cables blancos y negros cerca de los
conectores.
Couper les ls blancs et noirs près des raccords.
OPTIONAL STEPS FOR HARDWIRE INSTALLATION
(Complete Steps A through I prior to mounting disposal on sink.)
PASOS OPTATIVOS PARA LA INSTALACIÓN DEL CABLEADO PERMANENTE
(Complete los Pasos A hasta I antes de montar el triturador en el fregadero.)
ÉTAPES OPTIONNELLES POUR L’INSTALLATION CÂBLÉE
(Suivre les étapes A à I avant de monter le broyeur sur l’évier.)
 Loading...