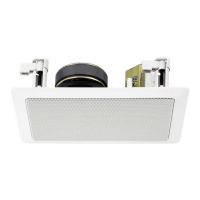
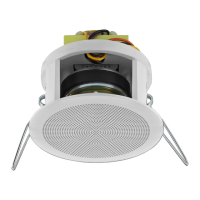
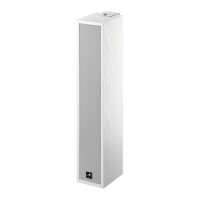
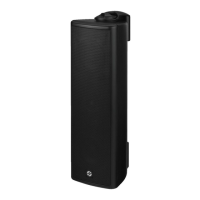
ELA-HiFi-Wand- /
Deckenlautsprecher
1 Verwendungsmöglichkeiten
Dieser ELA-Lautsprecher ist speziell für den Einsatz in
ELA-Anlagen konzipiert, die mit 100-V-Technik arbeiten.
Er läßt sich in Decken oder Wände mit einer Stärke von
8 – 35 mm einbauen. Durch die 2-Wege-Ausführung
(Breitbandlautsprecher plus Kalottenhochtöner) wird
eine besonders gute Klangwiedergabe erreicht.
2 Wichtige Hinweise für den sicheren
Gebrauch
Der Lautsprecher entspricht der Richtlinie für elektro-
magnetische Verträglichkeit 89/336/EWG und der
Niederspannungsrichtlinie 73/23/EWG.
●
Der Lautsprecher ist nur zur Verwendung im Innen-
bereich geeignet. Schützen Sie ihn vor Feuchtigkeit
und Hitze (zulässiger Einsatztemperaturbereich
0–40°C).
●
Verwenden Sie für die Reinigung nur ein trockenes,
weiches Tuch, auf keinen Fall Chemikalien oder
Wasser.
●
Wird der Lautsprecher zweckentfremdet, nicht fachge-
recht angeschlossen oder überlastet, kann für even-
tuelle Schäden keine Haftung übernommen werden.
●
Soll der Lautsprecher endgültig aus dem Betrieb ge-
nommen werden, übergeben Sie ihn zur Entsor-
gung einem örtlichen Recyclingbetrieb.
3 Montage
1) In die Decke bzw. in die Wand ein Loch von
115mm x 190mm sägen.
2) Den elektrischen Anschluß herstellen (Kapitel 4).
3) Zur Montage mit Hilfe des beiliegenden Hakens
das Schutzgitter herausziehen.
4) Den Lautsprecher in die Decke bzw. in die Wand
einsetzen, und durch Anziehen der vier Montage-
schrauben das Lautsprechergehäuse festklem-
men. Das Schutzgitter wieder einsetzen.
4 Elektrischer Anschluß
Warnung: Im Betrieb liegt berührungsgefähr-
liche Spannung bis 100 V an der Anschluß-
leitung an.
Die Installation darf nur durch Fachpersonal
erfolgen.
Isolieren Sie unbedingt die nicht benutzten
Adern der Anschlußleitung.
Achten Sie auf die richtige Leistungsanpas-
sung. Eine falsche Anpassung führt zur Zer-
störung des ELA-Verstärkers!
B
1) Falls die ELA-Anlage eingeschaltet ist, diese zuerst
komplett ausschalten!
2) Den Lautsprecher über den Transformatoreingang
anschließen: Die schwarze Ader und eine der an-
deren farbigen Adern, die der gewünschten Nenn-
belastung durch den Lautsprecher entspricht, mit
dem Ausgang des ELA-Verstärkers verbinden.
3) Beim Anschluß von mehreren Lautsprechern dar-
auf achten, daß die Lautsprecher alle gleich gepolt
werden (schwarze Ader = Minuspol).
Änderungen vorbehalten.
PA HiFi Wall and Ceiling Speaker
1 Applications
This PA speaker is especially designed for applica-
tions in PA systems operating with 100 V technique. It
can be built into ceilings or walls with 8 to 35 mm
thickness. Due to the 2-way design (full range speaker
plus dome tweeter) an especially good sound repro-
duction is obtained.
2 Important Safety Notes
The speaker corresponds to the directive for electro-
magnetic compatibility 89/336/EEC and the low volt-
age directive 73/23/EEC.
●
The speaker is only suitable for indoor use. Protect
it against humidity and heat (admissible ambient
temperature range 0 – 40 °C).
●
For cleaning only use a dry, soft cloth, by no means
chemicals or water.
●
If the speaker is used for purposes other than orig-
inally intended, if it is not connected in an expert way
or overloaded, no liability can be assumed for any
damage.
●
If the speaker is to be put out of operation defini-
tively, it must be disposed of in a local recycling
plant.
3 Mounting
1) Saw a hole of 115mm x 190mm into the ceiling or
wall.
2) Make the electrical connection (chapter 4).
3) For mounting pull out the protective grille by means
of the supplied hook.
4) Insert the speaker into the ceiling or wall, and fix the
speaker cabinet by tightening the four mounting
screws. Insert the protective grille again.
4 Electrical Connection
Warning: During operation there is a hazard of
contact at the connection cable with a voltage
of up to 100 V.
The installation must only be made by author-
ized personnel.
Insulate in any case the cores of the connec-
tion cable which are not used.
Pay attention to the correct power matching. In
case of wrong matching, the PA amplifier will
be destroyed!
1) In case the PA system is switched on, first switch it
off completely!
2) Connect the speaker via the transformer input:
Connect the black core and one of the other col-
B
oured cores, which corresponds to the desired rated
load by the speaker, to the output of the PAamplifier.
3) When connecting several speakers, observe that
the speakers are polarized in the same way (black
core = negative pole).
Subject to change.
in. 8mm
ax. 35mm