CLEANING AND MAINTENANCE
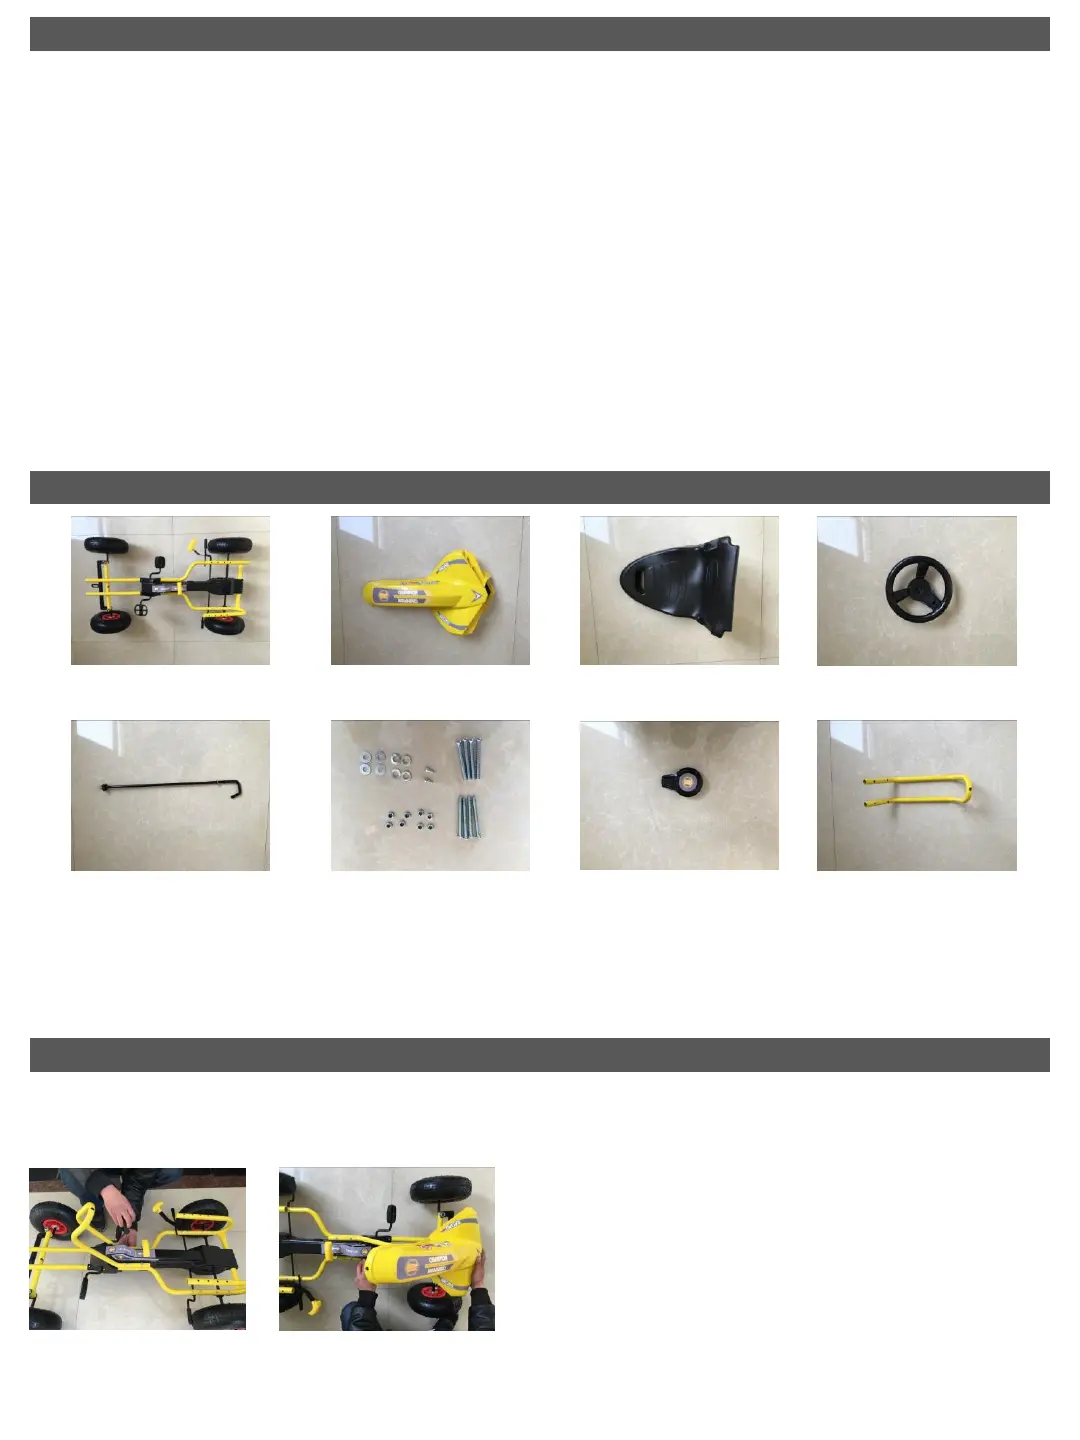
PARTS
8
А.Cleaning:
• Clean regularly!
• The go – kart can be cleaned with mildly wetted soft cloth with neutral detergent.
• Do not pour water directly over the product using hose.
• Do not use strong detergents (bleach, alcohol based ones, such with abrasive particles).
Б.Maintenance and storage:
• Before each use inspect thoroughly the product. Check if all the moving parts are well fixed and if
the wheels can rotate freely. If need, tighten the loose screws and bolts.
• Check regularly the integrity of the tire. If necessary – pump them. Use a manual pump only
(maximum 30 PSI)
• If there is any damage to the kart, please, do not use it and contact the commercial agent from
whom you have purchased the product, the importer or manufacturer.
• Keep the toy in a dry place without moisture and at a safe distance from heat sources.
• Do not leave the product in direct sunlight. It should not be stored near direct heat sources –
heaters, oven and cookers, because the plastic parts may melt.
D. Steering wheelA. Frame of the
kart
B. Front ornamental
panel of the kart
C. Kart seat
H. Steering
support
G. Ornamental cap of
the steering wheel
E. Steering shaft - 1хМ8 screw
1хМ8 spring gasket
1х plastic gasket
2х square washers
1хМ10 iron gasket
F. Supporting assembly
parts:
4 x M5*50mm bolts,
4 x M5*45mm bolts,
2 x 4*10mm bolts,
8 x M5 screws,
8 x M5 screws
ASSEMBLY INSTRUCTIONS
The assembly of the pedal kart must be performed by an adult. Follow the instructions and
accompanying drawings carefully. After the execution of each operation, make sure that you have
fulfilled the instructions properly and the parts are fixed stably.
Fig. 1 Fig. 2
1. Step 1 – See Fig. 1: Attach the steering support to the
frame of the karting by inserting screws М5*50mm through
the respective openings on the frame and tighten with a
screwdriver. Do not overtighten, in order to avoid damage
to any of the parts. Use washers, where necessary.
2. Step 2 – See Fig. 2: Attach the front ornamental panel
to the steering shaft
 Loading...