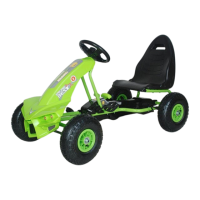
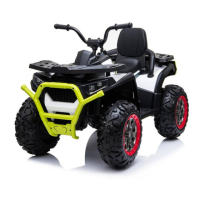
HOW TO OPERATE THE BO SUV
See Fig. U - On it are shown the different buttons:
1.Power button: Turn the power on and off.
2.Forward-reverse switch: Changes the direction of movement of the SUV.
● To move the vehicle forward, shift the lever to top position. If you release the foot pedal, the SUV will stop moving.
● To move the vehicle reverse, shift the lever to down position. If you release the foot pedal, the SUV will stop moving.
Or H/M/L/P/R Lever: Changing the direction of movement of the vehicle. Changing the speed from high, middle and low.
The SUV can be moved with low speed only backwards.
3.2W/4W switch (if equipped): Operates the vehicle to 2WD mode and 4WD mode.
4.Lights switch: Turn the front lights on and off.
5.Foot pedal: To move the vehicle, press the pedal down. To brake or slow down, release pressure from the pedal. Use the
steering wheel to turn to the left or right.
6.Music buttons: Press to hear various melodies and horn sound. Long press for volume up or volume down.
7.Mp3 player – See Fig. MP:
A.USB slot
B.TF card slot (Read mp3 format only)
C.AUX input
D.Previous Song/ Increase volume
E.Play/ Pause
F.Next song / decrease volume
G.Change the audio input (If you insert two or more audio input devices).
H.Display screen: It displays the power level of the battery when the vehicle stops.
WARNING! IMPORTANT! Always stop the SUV when changing the direction of movement or the speed in order to avoid
damage of the gearboxes or motors.
•After each step you must check if each part is correctly placed and well fixed. Follow strictly each step and study well the
assembly figures.
•DO NOT over-tighten in order to avoid any damage.
1.Step 1 - Attach the Rear shock absorbers – See Fig. 1: Gently turn the vehicle body upside down. First, remove the
screws and nuts from the rear shock absorbers with 2 hex wrenches. Align the holes of the rear axle frame with those of the
shock absorbers. Slide the screws, you initially removed, through these holes. Fix them using the hex wrenches and the
nuts.
2.Step 2 - Attach the Rear Wheels - See Fig. 2: Slide the rear axle through the openings of the rear axle frames. Attach a
ϕ12 washer to the rear axle. Attach the rear gearbox to the axle. Slide the rear wheel on the axle. Its cog wheel must fit to
the cog wheel of the rear gearbox. Attach a ϕ12 washer to the rear axle. Fix the wheel using a nut and a wrench. Repeat the
same actions to fix the other rear wheel. HINT: Additional wrench is provided. You can hold the nut on one side while
fixing the nut of the other side of the rear axle. Finally, fix the wheel covers.
3.Step 3 - Attach the Front Axle – See Fig. 3-1 & 3-2: Attach the front axle at the front of the SUV body. Remove the
screws, 2xΦ8 washers and the nuts from the front shock absorbers using hex wrench. Align the openings on the front axle
frame with those of the shock absorbers. Slide the screws you initially removed. Reattach the Φ8 washers and fix using nut
and hex wrench. Repeat on the other side. Press the button on the front hood and lift the hood up. Attach a Φ12 washer to
each end of the front axle frame and fix using nut and wrench. Connect the cables of the gearboxes to the cables coming out
of the vehicle body. Slide the bent end of the steering column into the hole of the front axle linkage. Attach to the end Φ10
plastic washer and slide a split pin through the opening in the column. Bend the ends of the pin using long nose pliers (not
included). Hint: You can adjust the tightness of the shock abs orbers by tightening the nuts.
4.Step 4 – Fixing the front wheels and the steering wheels – See Fig. 4 & 5: Attach the front wheel to the front axle. Its
cog wheel must fit to the gearbox. Attach a Φ12 washer to the axle. Fix using nut and wrench. DO NOT OVERTIGHTEN!
Attach the wheel cover. Repeat the same actions to attach and the other front wheel. Turn over the vehicle body. Connect
the cable coming out of the steering wheel to the cable coming out of the dashboard. Attach the steering wheel to the top of
the steering column. Align its openings. Slide through them M5x40 screw. Fix the screw using nut and screwdriver.
5.Step 5 - Attach the Front frame & Rear lights frame – See Fig. 6 & 7: Place the ends of the front frame into the
openings in the vehicle body. Press down until it “clicks” in place. Fix it with two 4x16 screws. Take the rear lights frame.
Insert its 4 ends into the openings in the vehicle body. Press carefully down until the frame clicks in place.
6.Step 6 - Connect the Power Supply & Attach the Seat – See Fig. 8 & 9: Attach the seat in the rear of the vehicle body,
slide it onto the rails. Press the button and hold it until the rear holders of the seat attach to the openings in the vehicle body.
Release the button. You can adjust the seat into 3 positions. Press the button of the front hood and lift the hood up. Connect
the red cable to the red terminal of the battery. DO NOT CONNECT RED CABLE WITH BLACK TERMINAL OR BLACK
CABLE WITH RED TERMINAL. Put down the hood.
16
 Loading...