Monitor Audio 2004
Radius Floor Stand Fixing Instructions
1
Thank you and congratulations on purchasing our bespoke Monitor Audio Radius
Floorstand. This product has been designed using the most up-to-date computer
technology to provide you with an aesthetically pleasing stand for your loudspeakers, and
also to ensure that the exceptional sound quality is maintained. The stand incorporates a
heavy cast metal alloy base which offers great balance and stability.
With Radius comes simplicity, and it couldn’t be more simple to connect your speakers to
the stand. The stand comes fully assembled with our very own ‘Pure Flow’ loudspeaker
cable internally within the stand so that there is no awkward threading of cables. Simply
follow the step by step instructions below and then sit back and enjoy the big sound from
little speakers…
Please remember to always read the instructions first as they are sequenced to
provide a safe way of working.
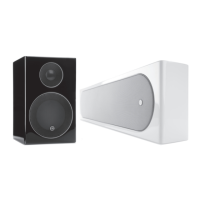
This stand has been designed to be used with either the Radius 90 or the Radius 180
loudspeakers.
DO NOT CONNECT YOUR SPEAKER CABLES TO THE AMPLIFIER BEFORE ASSEMBLY.
CONTENTS LIST
Within this carton you will have:
2 x Radius Floorstands.
8 x Spikes.
4 x Radius loudspeaker fixing screws.
1 x Hex key
1 x Warranty card. Please note: When filling in the warranty card, there is no
serial number on the floorstand. Simply leave the serial number section blank and
fill in themodel name/numbersection with ‘Radius Floorstand’
ASSEMBLY INSTRUCTIONS
1. Now that you have removed the carton, remove the polystyrene end-caps to reveal
your Radius Floorstands.
2. While the Floorstands are lying on the floor, now is the time to put the spikes in (if
you decide to use them), if you aren’t using the spikes move on to Step 3. This is
done by screwing them all the way into their threaded holes. Position the stands in
their desired locations to see if they are level. If the stand does not appear to be
level, unscrew one of the spikes slightly until the stand is level and tighten up the
lock nut. You are now ready to fix your Radius Loudspeakers to thestand.