5.2. How to handle Padding
Adjust time of clamp release (for padding)
Push button: Set
Display shows = “Vice 2-Time:” or”Finish Time:”
Push button: Set Up or Set Down for desired time of paper
release off clamp.
Set time by 15 steps:
Protect Cover-clamp-station (Finishing Station) by
white sheet of card board for:
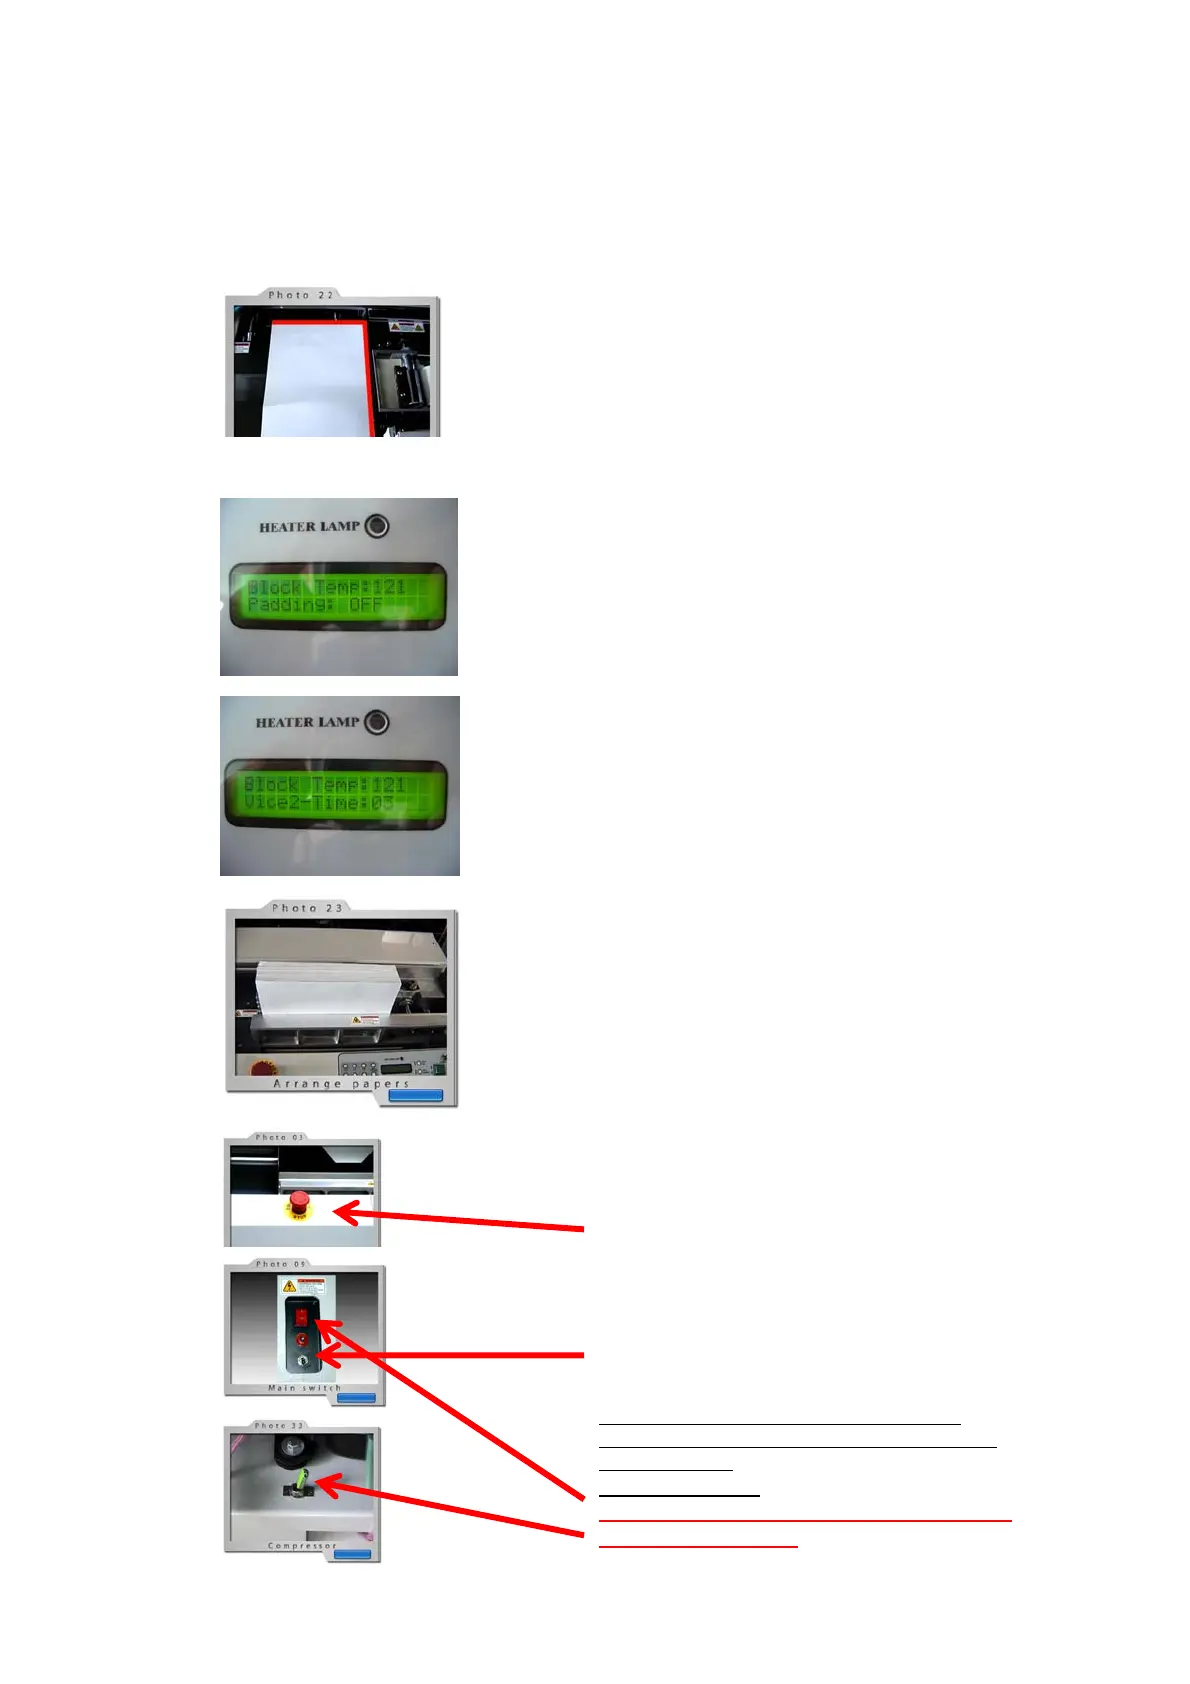
1) Keeping the clamps in finishing station protected by a sheet
of cardboard or paper in case a padded binding might fall onto
it after release of clamps without holding it by hand!
2) The card board or paper must cover the sensor for
positioned binding-cover. (simulating a cover). Otherwise the
machine does not start!
Position of sheet for protection
Select: Padding Mode by: Padding ON
Press buton: “Set”
Display should show: “Padding On”
Press button: “All Clear” for selection of “Padding OFF”
or “Padding On”
In mode: “Padding” = 1 Step = 5 seconds
In mode: “Cover Binding = 1 Step = app. 0,7 seconds
Load paper to be bound in Clamp-device
Paper to be bound must be positioned in clamp in
full right side against the round right hand guide-
rod.
The sensor on back clamp must be covered always
by paper.
Make sure that all sheets are knocked down to get
an even spine and a neat glue appliance.
For clamping press the button for compression
(No 2, see section 4)
And start the binding procedure by pressing the
start-button (No1, see section 4)
In emergency press emergency stop button
For serial binding procedure repeat all steps as
described above.
If desired: Shut Off the slitting and milling device.
(Production of padded tear-off blocks!)
For interruption of binding production it is
recommended to switch into Stand-By mode.
(See section 4)
End of binding:
Shut off main switches on machine and
on air compressor!
 Loading...