This document is a user guide manual for a MORRIS refrigerator, model T70747DH. It provides comprehensive information on the appliance's function, technical specifications, usage, and maintenance.
Function Description:
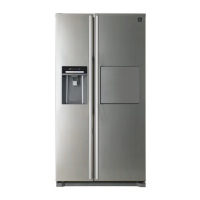
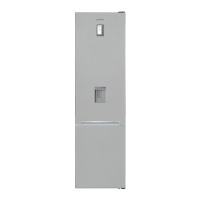
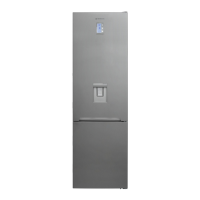
The MORRIS refrigerator is designed for food storage, offering both refrigeration and freezing capabilities. It comes in dispenser and non-dispenser models, with the dispenser models providing access to chilled water and ice. The appliance utilizes a refrigerant system to maintain desired temperatures, with options for faster cooling and freezing. Some models include a "Refreshment Compartment" or "Home Bar" for quick access to frequently used items without opening the main door, thus saving electricity. An automatic icemaker is available in dispenser models, producing ice cubes for convenience.
Important Technical Specifications:
- Refrigerant Information (R-134a Models Only):
- Refrigerant: R-134a
- Charge: 0.190kg
- Global Warming Potential: 1300
- Contains fluorinated greenhouse gases covered by the Kyoto Protocol and is hermetically sealed.
- Foam blown with fluorinated greenhouse gases.
- Blowing Agent: C-pentane
- Refrigerant Information (R600a Models):
- Contains isobutane refrigerant (R600a), a natural gas with high environmental compatibility, which is combustible. The room must be 1 m³ in size for every 8g of R600a refrigerant.
- Climatic Categories and Ambient Temperature Ranges:
- SN: +10℃ to +32℃
- N: +16℃ to +32℃
- ST: +16℃ to +38℃
- T: +16℃ to +43℃
- Dimensions (including Door Handles): 905mm (Width) x 720mm (Depth) x 1770mm (Height)
- Water Pressure for Icemaker: 2.0~12.5 kgf/cm² (1.96~12.26 Bar) or more. A cup of 180cc should fill within 10 seconds for adequate pressure.
Usage Features:
- Control Panel:
- Dispenser Model: Features buttons for LIGHT/FILTER (dispenser light, filter exchange/reset), LOCK (control panel lock), WATER (water dispensing), ICE (ice dispensing, icemaker lock), and REF.SET (refrigerator compartment temperature).
- Non-Dispenser Model: Features buttons for FRZ.SET (freezer compartment temperature) and LOCK (control panel lock).
- Lock Function: Pressing the LOCK button for more than 3 seconds activates the control panel lock, preventing unintentional changes. Pressing it again for more than 3 seconds releases the lock.
- Display Off Function: After 5 minutes of inactivity, all display LEDs except for water, ice, and ice lock icons go out. The display returns to normal upon button or door operation.
- System Off Function (Power Off): Pressing FRZ.SET and REF.SET buttons simultaneously for 5 seconds turns the appliance off. The temperature displays show "-- --", and all operations halt. Repeating the action turns the appliance back on.
- Temperature Control:
- Freezer Compartment: The FRZ.SET button allows sequential temperature changes. A "Faster Freezing" mode can be activated by pressing the FRZ.SET button until the snowflake LED turns on.
- Refrigerator Compartment: The REF.SET button allows sequential temperature changes. A "Faster Cooling or Refrigeration" mode can be activated by pressing the REF.SET button until the snowflake LED turns on.
- Temperature Indicator Convert Function (Dispenser Models Only): In locked mode, pressing the light and water buttons simultaneously for 10 seconds swaps the temperature scale between Fahrenheit and Celsius (default is Celsius).
- Interior Parts:
- Door Storage Compartments: For short-term food and ice cream (freezer door), and frozen food (refrigerator door).
- Freezer Shelf: For frozen foods like meat, fish, and ice cream.
- Ice Cube Tray: (Not all models)
- Freezer Case: For storing dried or fish, meat for long periods.
- Ice Maker & Storage: (Not all models)
- Xpress Can Chiller: For quick cooling of beverages.
- Refrigerator Shelf: For common foods.
- Vegetable Case & Fruit Case: Dedicated compartments for produce.
- Water Filter: (Not all models)
- Refreshment Pocket: For storing refrigerating foods, milk, juice, beer bottles, etc.
- Dispenser Usage (Dispenser Models Only): Select "WATER" or "ICE" button, then push the lever with a cup. Output occurs 1-2 seconds later.
- Automatic Icemaker Usage (Dispenser Models Only): Produces about 10 ice cubes (14-15 times a day). Stops when the ice storage case is full. Banging sounds during ice drop are normal.
Maintenance Features:
- Care & Cleaning:
- Dispenser Water Shelf: Remove the spill grill and clean regularly.
- Ice Cubes Storage Case: To remove, pull up the case assembly forward. To replace, fit into side grooves and insert. If difficult, rotate the swirl coil or drive mechanism a quarter turn.
- Freezer & Refrigerator Pockets: Hold both ends and pull up to remove.
- Freezer & Refrigerator Shelves: Open doors fully, then pull shelves forward to remove.
- Vegetable Case & Fruit Case: Pull forward and lift up slightly to remove.
- Interior Parts: Clean with a cloth, water, and mild detergent.
- Back (Machine Section): Remove dust from the grill with a vacuum cleaner at least once a year.
- Water Filter:
- Remove the locking cap to install the filter.
- Turn the filter clockwise to install.
- Change the filter at least once every 6 months.
- Wipe up any droplets that fall when exchanging the filter.
- Flush the water system by dispensing water for several minutes if the appliance has not been used for a long time or if the ice/water has an unpleasant taste/smell.
- Discard any ice produced in the first 24 hours after installing a new filter.
- Empty the ice box and discard any ice produced over the next 24 hours if no ice has been removed for a long period.
- Door Adjustment (If needed): Instructions are provided for leveling the refrigerator and adjusting door alignment if the freezer door is lower than the refrigerator door, or vice versa. This involves using a screwdriver and spanner to adjust hinge nuts and wheels.
- Installation Preparation:
- Ensure sufficient space (more than 5cm) from the back of the refrigerator to the wall for free air ventilation.
- Avoid direct sunlight.
- Instructions for removing freezer and refrigerator doors are provided if the appliance cannot pass through a doorway during installation.
- Connecting the water line for dispenser models requires specific water pressure and proper connection to a cold water line using plumbers thread sealing tape.