12
ENGLISH
de
en
fr
it
es
pt
nl
sv
no
fi
tr
pl
cs
sk
hu
sl
ro
bg
ru
uk
el
ar
13
ENGLISH
de
en
fr
it
es
pt
nl
sv
no
fi
tr
pl
cs
sk
hu
sl
ro
bg
ru
uk
el
ar
· Whenthespeedofthebatteryaudiblybeginstoslowdown,thebatteryhasaremainingcapac-
ityofapprox.2-3minutes.Chargingthebattery.
· Whenthebatteryhasfullyrundown,themachinewillswitchitselfoffautomatically.
·
Note:Incaseofinsufficientmaintenanceofthebladeset,theoperatingtimecanbereduced
considerably.
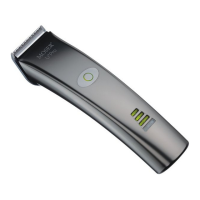
Cutting-length adjustment
Thecuttinglengthcanbeadjustedtobetween0.7mmand3mm(5possiblepositions)usingthe
cutting-lengthadjustmentintegratedintothebladeset(Fig.4).Todothis,settheadjustmentlever
tothedesiredpositionandletitsnapintoplace.
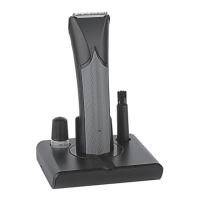
Cutting with attachment combs
Theappliancecanalsobeoperatedwithattachmentcombs.Inordertoachievetheindicated
cuttinglength,thecuttinglengthadjustmentlevershouldbesettoposition1(Fig.4).Thefollow-
ingattachmentcombsareincludedasstandard:3mm,6mm,9mmand12mmcuttinglengths.
Attachmentcombswith18mmand25mmcuttinglengthareavailableasoptionalaccessories.
Attaching/removing the attachment comb
· Slidetheattachmentcombontothebladesetinthedirectionofthearrowuntilitreachesthe
limitstop(Fig.5a).
· Theattachmentcombcanberemovedbypushingitinthedirectionofthearrow(Fig.5b).
Cleaning and Care
· Donotimmersetheapplianceinwater!
· Aftereachuse,removetheattachmentcombandusethecleaningbrushtoremovecuthairs
fromthehousingopeningandfromthebladeset.Todothis,removethebladeset (Fig.6a)
andpressthecleaninglever(Fig.7).Thisallowsthecuthairsthataccumulatebetweenthebot-
tombladeandthetopbladetobeeasilyremovedusingthecleaningbrush(
EASY CLEANING).
· Thechargingcontactsontheapplianceandchargingstandshouldalwaysbekeptclean.
· Onlywipetheappliancewithasoftcloth,whichmaybedampenedslightly.Donotusesolvents
orabrasives!
· Thebladesetcanbecleanedwithhygienicspray,orderno.4005-7051.Donotuseanyother
cleaningagents.
· Foralong-lasting,goodcuttingperformance,itisimportanttooilthebladesetfrequently
(Fig.8).Useonlybladesetoilforthispurpose,orderno.1854-7935(200ml).
· BladesetoilandhygienicsprayisavailablefromyourdealerorourServiceCentre.
· Ifthecuttingperformancedeterioratesafterlongusedespiteregularcleaningandoiling,the
bladesetshouldbereplaced.
Automatic Sensor System
Toensurethatyournewhaircuttingapplianceenjoysalongservicelife,theapplianceneedstobe
cleanedandoiledonaregularbasis(seesection
Cleaning and Careintheuserinstructions).To
giveyouadvancenoticeofanurgentneedformaintenancecare,yourhaircuttingappliancehas
beenequippedwithanautomaticsensorsystem.Thissystemautomaticallyrecogniseswhenthe
bladesetneedsoilingorcleaning.Consistentheavysoilingorlackofoilcanleadtoearlywear
andtearoftheappliance.
Shouldthesensorsystemrecognisesuchasituation,anacousticsignalwillsoundandtheLED
displaywillblinkfor2minutesaftertheappliancehasbeenswitchedoff.Theacousticsignaland
theblinkingoftheLEDdisplaycanbecancelledbybrieflyswitchingtheapplianceonandoff.
Beforeusingtheapplianceagain,itis
urgently recommendedtocleantheapplianceandoilthe
bladeset.Forthispurpose,pleaseproceedasfollows(failuretoobservetheseinstructionsmay
resultindamagetoandearlyfailureoftheapplianceandwillvoidallguaranteeclaims):
· Switchofftheapplianceusingtheon/offswitch(Fig.2b).
· Removetheattachmentcombandthebladesetandusethecleaningbrushtocleantheopen-
ingofthehousingandthebladeset.(Fig.7).
· Oilthebladeset(Fig.8).
Changing the blade set
· Switchofftheapplianceusingtheon/offswitch(Fig.2b).
· Thebladesetcanberemovedbyslidingitawayfromthehousinginthedirectionofthearrow
(Fig.6a).
· Replacethebladesetbyhookingitintothehousingandpressingitdownuntilitclicksintoposi-
tioninthehousing(Fig.6b).
Disposal in EU countries
Donotdisposeoftheappliancewithdomesticrefuse.AspartoftheEUDirectivegovern-
ingthedisposalofelectricalandelectronicequipment,theapplianceisacceptedfreeof
chargebylocalwastecollectionpointsorrecyclingcentres.Correctdisposalwillensure
environmentalprotectionandpreventanypotentiallyharmfulimpactsonpeopleandthe
environment.
Disposal in non-EU countries
· Pleasedisposeoftheapplianceattheendofitsservicelifeinanenvironmentallyfriendly
manner.
· Disconnecttheplug-intransformerfromthemainspowersupplyandswitchontheapplianceto
dischargethebatterycompletely.
· Removethebladeset(Fig.6a)anduseascrewdrivertoremovethescrewsintheopeningof
thehousing(Fig.9).PullthehousingpartsapartandremovetheentiredrivewiththePCB
(Fig.10).
· Pullbatteryoffcircuitboard.Ifnecessary,useascrewdrivertoprythemoff(Fig.11).
· Takethebatteriestoanappropriatecollectionpoint.
· Oncethebatterieshavebeenremoved,theappliancemaynolongerbeconnectedtothe
mains!
 Loading...