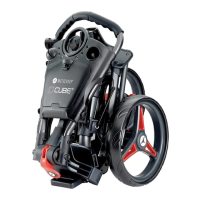
The Motocaddy M1 / M1 DHC Electric Trolley is a golf trolley designed for transporting golf bags and clubs. It features a compact folding mechanism and various functionalities to enhance the golfing experience.
Function Description
The primary function of the Motocaddy M1 / M1 DHC Electric Trolley is to assist golfers by carrying their golf bags and clubs around the course, reducing physical strain. It is an electric trolley, meaning it is powered by a Lithium battery and controlled via a simple interface. The DHC (Downhill Control) models offer additional functionality, automatically maintaining a controlled speed when traveling downhill and including an electronic parking brake.
Usage Features
The M1 trolley is designed for ease of use, from assembly to operation.
Assembly and Setup:
- Wheel Attachment: The rear wheels are attached by pushing a quick-release button, sliding the wheel onto the inner groove of the axle until an audible 'click' confirms it's in place. Non-DHC wheels rotate freely forwards but not backwards when correctly attached to the inner groove. DHC wheels do not rotate freely in either direction.
- Inverting Wheels: The wheels can be inverted to reduce the trolley's width for easier transportation and storage. This involves pushing and holding the quick-release button, sliding the wheel off, flipping it over, and then re-attaching it to the free-wheel groove.
- Unfolding: To unfold the trolley, the upper bag support is lifted slightly to release the upper latch. The handle is then unfolded and the latch re-secured. Next, the lower latch is released, and the trolley handle is lifted into position, which automatically unfolds the front wheel. Finally, the lower latch is re-secured, and the auto-open stand is folded away.
- Folding: Folding the trolley involves releasing the lower latch (which also activates the auto-open stand), folding the frame forward until fully extended (the front wheel automatically folds underneath), releasing the upper latch, and folding the handle back until the trolley is fully folded. Both latches are then re-secured. For upright storage, the auto-open stand can be left out, but it should be pushed down when not in use to prevent damage.
- Bag Supports: The trolley features upper and lower bag supports. The upper bag support straps are elasticated and secured by looping them around a rounded bar underneath a hook, with the two placement straps positioned centrally on the golf bag. For the lower bag supports, the trolley is fitted with the EASILOCK™ bag attachment system. With an EASILOCK™ compatible golf bag, the pre-fitted lower bag straps are removed, and the golf bag's indicating line is matched with the lower bag support's line, then lowered until the pins lock in position with an audible 'click'. For non-EASILOCK™ bags, the lower bag strap is stretched around the bag base and looped underneath the hook, with placement straps centered on the bag base. All straps must be securely hooked before releasing to prevent injury.
- Adjusting Bag Supports: The elasticated bag support straps can be adjusted for tightness. This is done by unclipping the straps from the housing, moving a bar to tighten (pulling downwards) or loosen (pushing upwards) the strap fitting, and then re-clipping the straps into the housing.
- Front Wheel Alignment: If the trolley veers, the front wheel alignment can be adjusted. This involves lifting the quick-release lever on the front wheel housing and loosening the wheel nut. Small metal dials on either side of the housing are used for realignment: turning the left-hand dial clockwise and the right-hand dial anti-clockwise corrects veering to the right, while the opposite corrects veering to the left. After adjustment, the wheel nut is tightened, and the lever is pushed down to lock the wheel.
Operation:
- Starting, Stopping, and Speed Control: The M1 has a single main button for starting and stopping the trolley, and a speed dial for adjusting speed (1 to 9, with 9 being the fastest). Speed can be adjusted while stationary or in motion. To start, select the desired speed and press the button; the trolley will accelerate smoothly. To stop, press the button again. The speed number flashes when the trolley is started.
- Battery Meter: An on-screen LCD battery meter indicates remaining battery capacity with illuminated bars. A fully charged battery shows two short red bars, two medium orange bars, and two larger green bars. If battery capacity drops too low, the trolley will cut power to the motor to protect the battery. Localized misting in the display screen due to moisture, temperature, or humidity conditions is normal and does not affect functionality.
- USB Charging Port: The trolley includes a USB charging port under the handle for charging USB-powered devices during a round. The charging rate is slower than a mains AC charger. The USB port draws power from the main trolley battery, and continuous charging will reduce battery capacity. The port is disabled if battery capacity reaches a preset low level.
- Adjustable Distance Control (ADC): This feature allows the trolley to be sent ahead for 15, 30, or 45 yards. While stationary, select the desired speed, then hold the on/off button for 3 seconds until "1" flashes on the display. Turn the button clockwise to increase or anti-clockwise to decrease the distance setting. Press the on/off button again to set the trolley in motion. The speed number and white dashes will flash when ADC is active. The trolley can be stopped manually by pressing the button. If the trolley fails to register distance in ADC mode, power to the motor is cut, and "E" flashes on the screen, indicating a safety feature activation. The trolley can be reset by pressing the on/off button, disabling ADC until technical support is contacted.
- Downhill Control (DHC) (DHC models only): DHC models automatically maintain a controlled speed when traveling downhill. When moving the trolley, it is advised to use a low speed setting for easier steering.
- DHC Parking Brake (DHC models only): DHC models are equipped with an electronic parking brake. While stationary, rotate the speed dial down to 1 and then one click further to activate the brake. The screen will toggle between 'P' and '1'. The speed setting can still be adjusted while the brake is active. To release the parking brake, press the on/off button to start the trolley.
Maintenance Features
The Motocaddy M1 / M1 DHC Electric Trolley is designed for low maintenance, but regular checks and proper care are recommended.
-
General Trolley Care:
- Ensure no excessive mud or dirt build-up.
- Check that the front wheel nut is tight and the quick-release lever is clamped down.
- Verify the front wheel is not clogged and turns freely.
- Only use original Motocaddy parts for repairs.
- Do not store the trolley outside.
- Minimize exposure to heavy rain with an umbrella.
- Wipe excess water from the trolley before storage.
- Never use a pressure washer; clean with a damp cloth to prevent water damage.
- Avoid high-pressure air hoses near moving components.
- All batteries must be disconnected from the trolley before folding, storage, and transportation.
-
Lithium Battery Care:
- Charge batteries as soon as possible after each use to prolong battery life.
- Only use Motocaddy batteries with Motocaddy chargers. Lithium battery chargers are specifically designed for Motocaddy Lithium batteries and should not be used for other battery types.
- The charger should only be connected to an earthed socket outlet. Only authorized personnel should open or maintain the battery charger; unauthorized opening invalidates the warranty.
- Store and charge the battery on a dry, non-carpeted surface at temperatures between 10°C and 30°C.
- Ensure black-to-black and grey-to-grey connections when connecting the battery to the trolley.
- Charging Process: Unplug the battery from the trolley before folding. Plug the charger into the mains, then connect the battery cable to the charger (black to black, grey to grey). A red LED indicates charging, and a green LED indicates a full charge. Charging takes 3-5 hours, potentially longer for initial charges. Disconnect the charger from the mains, then from the battery, once charging is complete. If the LED goes out when connecting the battery to the charger, it likely indicates a full charge.
- Battery Management System (BMS): Motocaddy Lithium batteries have a BMS to protect against excessive abuse, high currents, deep discharge, and overcharge. The BMS may prevent output upon delivery; a full charge activates it. If the BMS switches off due to deep discharge or long-term storage, a full charge will rectify it. The trolley's voltage meter is synchronized with the BMS. If battery voltage falls below the low warning, the BMS may disable the battery for protection; recharge fully. Lithium batteries can "drop off" quickly at the end of a cycle, so avoid playing excessive holes when the battery is low.
- Hibernation (Winter Storage): For long periods of non-use (e.g., 3 months over winter), store the battery half-charged. Use it for a round, then charge for 1.5 hours. Recharge (top up) before next use. Always disconnect the charger from the battery after charging.
- Physical Care: Avoid getting the battery too wet (no submerging or deep puddles). Do not clean the trolley with the battery in the tray. Dropping the battery can damage internal cells. Do not lift or carry the battery by its cable. Clean dirt off with a damp cloth.