18
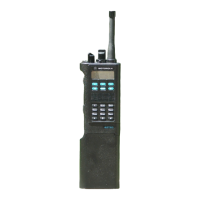
Programmable Emergency Button
19
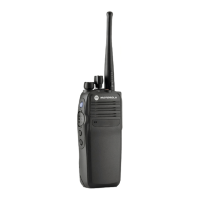
Antenna
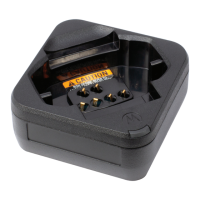
Attaching the Battery
Notice: For optimal performance, charge a new battery 14 to 16
hours before initial use.
1
Align the battery with the rails on the back of the radio.
2
Slide the battery upwards until the latch snaps into place.
3
Lock the battery latch.
Attaching the Antenna
1
Turn off the radio.
2
Set the antenna in the receptacle and turn clockwise.
Powering On/Off the Radio
Rotate the On/Off/Volume Control Knob clockwise or
counterclockwise until a click sounds.
Adjusting the Volume
Rotate the On/Off/Volume Control Knob clockwise or
counterclockwise.
LED Indicators
Blinking Red
Radio has failed the self-test upon powering up, has moved out of
range if Auto-Range Transponder System is configured, has Mute
mode enabled, is receiving an emergency transmission, is transmit-
ting in low battery state, or is indicating a battery mismatch.
Solid Green
Radio is powering up, is transmitting, or is sending a Call Alert or an
emergency transmission.
Blinking Green
Radio is receiving a call or data, is detecting activity over the air, or is
retrieving Over-the-Air Programming transmissions.
Double Blinking Green
Radio is receiving a privacy-enabled call or data.
Solid Yellow
Radio is monitoring a conventional channel, or is in Bluetooth Discov-
erable Mode.
Blinking Yellow
Radio is scanning for activity, is receiving a Call Alert, has Flexible
Receive List enabled, or all Capacity Plus-Multi-Site channels are
busy.
Double Blinking Yellow
Radio has Auto Roaming enabled, has yet to respond to a Group Call
Alert, is actively searching for a new site, is not connected to the re-
peater while in Capacity Plus, is locked, or all Capacity Plus channels
are busy.
Display Icons
The following icons appear on the status bar at the top of the radio
display. The icons are arranged left most in order of appearance or
usage, and are channel-specific.
Emergency
2
Not for Limited Keypad models.
English
2
 Loading...