EasyManua.ls Logo

Motorola VM481-2 - User Manual

Motorola VM481-2
27 pages
Print Icon
To Next Page IconTo Next Page
Loading...
VM481
2.0" Video Baby Monitor
User Guide
For: VM481, VM481-2, VM481-3 and VM481-4
Question and Answer IconNeed help?

Do you have a question about the Motorola VM481-2 and is the answer not in the manual?

Overview

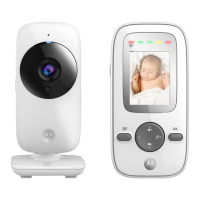
This document is a user guide for the Motorola VM481 2.0" Video Baby Monitor, which also covers models VM481-2, VM481-3, and VM481-4.

Function Description:

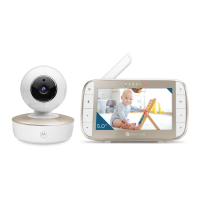
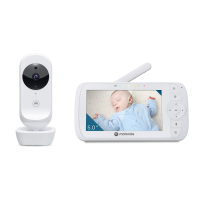
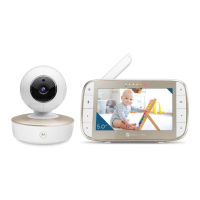
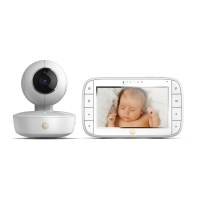
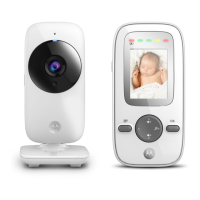
The Motorola VM481 is a digital video baby monitor designed to allow parents to see and hear their baby from another room or monitor older children in their playroom. It consists of two main units: a Baby Unit (camera) and a Parent Unit (monitor). The system establishes a radio link between these units to transmit video and audio.

Important Technical Specifications:

  • RF frequency bands: 2405 MHz to 2475 MHz
  • Parent unit display: 2.8" diagonal TFT LCD
  • Operating range: 0 °C - 45 °C or 32 °F - 113 °F
  • Baby unit Image sensor: Color CMOS 0.3M Pixels
  • Power adaptor for the baby unit and the parent unit:
    • Input: 100-240V AC, 50/60Hz, 200mA or 300mA
    • Output: 5.0V DC, 1000mA
  • Parent unit battery information: 3.7V, 1200mAh Lithium-Ion, rechargeable battery pack
  • Battery life: 5 hours (maximum)
  • Rechargeable battery pack rating: 3.7V 1200mAh (for replacement)

Usage Features:

Baby Unit (Camera):

  • Power ON/OFF switch: Slide to turn the Baby Unit on or off.
  • Power/Link indicator: Red when the Baby Unit is turned on and linked to the Parent Unit. Flashes Red when searching for the Parent Unit or during pairing. Off when powered off.
  • PAIR button: Press and hold to pair to the Parent Unit.
  • Microphone: For transmitting sound to the Parent Unit.
  • Camera Lens: For transmitting video to the Parent Unit.
  • Light Sensor: For detecting when to switch on the Infra-red LEDs.
  • Infra-red LEDs: 6 infra-red LEDs for night vision. (Note: picture will not be in colour for night vision.)
  • Night Vision Mode: The Baby Unit has infra-red LEDs for picking up clear images in the dark. When the built-in light sensor on the front of the unit detects a low level of ambient light, the LEDs will activate automatically, and the screen on the Parent Unit will display in black and white.

Parent Unit (Monitor):

  • Sound Level indicators: Show the sound level detected by the Baby Unit. More LEDs light on indicate stronger sound.
  • LCD display: The screen for viewing video and menu options.
  • Control key panel:
    • UP / VOLUME +: Increases speaker volume, scrolls up in menus, moves up zoomed image.
    • DOWN / VOLUME -: Decreases speaker volume, scrolls down in menus, moves down zoomed image.
    • LEFT <: Chooses left option in menus, moves left within zoomed image.
    • ZOOM / RIGHT >: Chooses right option in menus, zooms in on image, zooms out or moves right within zoomed image.
    • OK button: Chooses an item in a menu, saves a setting.
  • Power/Link and battery status indicator:
    • Red light on: Parent unit is on.
    • Red light flashes: Parent unit is searching for Baby Unit or in pairing process.
    • Red light off: Parent unit battery is fully charged.
    • Green light on: Parent unit battery is being charged.
    • Green light flashes: Parent unit battery is low and needs charging.
    • Green light off: Parent unit battery is not being charged or no battery is installed.
  • Menu button: Enters the main menu.
  • Power ON/OFF button: Press and hold to turn the Parent Unit on or off. Press to turn the screen on or off.
  • Connecting Baby Unit to power: Insert DC plug into the DC jack in the back of the Baby Unit. Connect the other end of the power adapter to a suitable power outlet. Slide the ON-OFF switch to the ON position. Only use the power adapter provided.
  • Installing the battery and connecting Parent Unit to power: Unclip and remove the battery compartment cover. Insert the plug of the battery pack into the jack inside the battery compartment, and fit the battery pack into the compartment. Replace the battery compartment cover, and pull out the stand. Connect the other end of the power adapter to a suitable power outlet; the battery level indicator turns on.
  • The stand on the Parent Unit: Pull the stand out so that the Parent Unit can stand.
  • Power on or off the Baby Unit: Slide the Power ON/OFF switch to turn the Baby Unit on or off. The Power/Link indicator light turns on/off.
  • Power on or off the Parent Unit: Press and hold the power button to turn the Parent Unit on. The Power/Link and battery status indicator light turns on. Press and hold again to turn off the Parent Unit. The Power/Link and battery status indicator light turns off.
  • Turn off the Parent Unit screen: You can turn on or off the Parent Unit screen without powering off the Parent Unit by pressing the power button. You can still hear sound from the Baby Unit.
  • Adjust the speaker volume for Parent Unit: Adjust the speaker volume from Level 1 to Volume 5, or turn it off using the volume buttons.
  • Adjust the LCD brightness of the Parent Unit: Adjust the brightness from Level 1 to Level 5 using the menu options.
  • Set the alarm on the Parent Unit: Set the alarm as a reminder for you to take care of your baby.
  • Set the screen off time of the Parent Unit: Set the screen off time after being in idle mode for a particular time interval (60 minutes, 30 minutes, 5 minutes or OFF).
  • Zoom: Zoom in or out while viewing the image from Baby Unit.
  • Pair and replace extra new Baby Unit: The Baby Units and Parent Unit provided are already paired. You can add or replace a Baby Unit in your video and audio monitoring system. You can pair a maximum of four Baby Units to your Parent Unit. Each new Baby Unit must be paired to the Parent Unit before use.
  • Multi-Camera Use: Up to 4 cameras can be paired with the Parent Unit. If more than one camera is linked, you can select which camera to view or set it in Patrol mode, where the Parent Unit automatically steps through the paired cameras every 15 seconds. The audio from a camera is only heard at the Parent Unit when that camera is selected.

Parent Unit Status Icons:

  • Connection status:
    • Full bars: Strong signal strength.
    • Two bars: Moderate signal strength.
    • Flashing: Parent Unit is out of range.
    • X: Link is lost.
  • Patrol mode: Displays when the Parent Unit is in patrol mode.
  • Current view status: Displays the number of the Baby Unit being viewed in patrol mode.
  • Zoom: Displays when the viewing image is zoomed in.
  • Volume off: Displays when the volume is turned off.
  • Battery status:
    • Animating bars: Battery is charging.
    • Solid bars: Battery is fully charged.
    • Flashing bars: Battery is low and needs charging.
    • Plug icon: No battery is installed and AC power is being used, or when the battery has been installed incorrectly.
  • Night vision mode: Displays when in infra-red mode and the screen changes to black and white.

Maintenance Features:

Cleaning:

  • Clean your Baby Monitor with a slightly damp cloth or with an anti-static cloth.
  • Never use cleaning agents or abrasive solvents.
  • Do not clean any part of the Baby Monitor with thinners or other solvents and chemicals - this may cause permanent damage to the product which is not covered by the warranty.
  • Keep your Baby Monitor away from hot, humid areas or strong sunlight, and do not let it get wet.
  • Always switch off and disconnect the power adapter before cleaning your baby monitor.

Troubleshooting:

  • Power Indicator on the Parent Unit does not come on: Check whether the Parent Unit is powered on. Check whether the battery pack supplied is correctly installed and that it is not drained. Recharge the Parent Unit by connecting it to the power supply.
  • Power/Link Indicator on the Baby Unit flashes: The Baby Unit may not be paired to the Parent Unit. Refer to section 3.10 to pair the Baby Unit. The Parent Unit and the Baby Unit may be out of range with each other. Reduce the distance between the units, but not closer than 3 feet. The Baby Unit may be switched off. Slide the Power ON/OFF switch to turn on the Baby Unit.
  • Battery pack in the Parent Unit is running low quickly: The LCD brightness may be set too high. Try to decrease the brightness level. The volume level of the Parent Unit may be set too high which consumes power. Decrease the volume level of the Parent Unit.
  • Cannot hear sound or baby crying from the Parent Unit: The volume level in the Parent Unit may be set too low. Increase the volume level of the Parent Unit. The Parent Unit and the monitoring Baby Unit may be out of range with each other. Reduce the distance between the units, but not closer than 3 feet.
  • The baby monitor system produces a high-pitched noise: The Parent Unit and the Baby Unit are too close to each other. Make sure the Parent Unit and Baby Unit are at least 3 feet away from each other. The speaker volume of the Parent Unit may be set too high. Decrease the volume of the Parent Unit.

Important Guidelines for Installing Your Baby Monitor:

  • To use your Baby Unit and Parent Unit together, you must be able to establish a radio link between them, and the range will be affected by environmental conditions.
  • Any large metal object, like a refrigerator, a mirror, a filing cabinet, a metallic door or reinforced concrete, between the Baby Unit and Parent Unit may block the radio signal.
  • The signal strength may also be reduced by other solid structures, like walls, or by radio or electrical equipment, such as TVs, computers, cordless or mobile phones, fluorescent lights or dimmer switches.
  • If the signal is poor, try moving the Parent Unit and/or the Baby Unit to different positions in the rooms.

Safety Instructions:

  • WARNING: STRANGULATION HAZARD - Keep the unit and adaptor cord more than 3 feet from the crib and out of the baby’s reach. NEVER place Baby Unit or cords within the crib. Secure the cords more than 3 feet away from the baby’s reach. Never use extension cords with AC Adaptors. Only use the AC Adaptors provided.
  • Determine a location for the BABY UNIT that will provide the best view of your baby in his/her crib.
  • Place the BABY UNIT on a flat surface, such as a dresser, bureau, or shelf.
  • NEVER place the Baby Unit or cords within the crib.
  • Adult assembly required. Keep small parts away from children when assembling.
  • This product is not a toy. Do not allow children to play with it.
  • This Baby Monitor is not a substitute for responsible adult supervision.
  • Keep this user’s guide for future reference.
  • Keep the cords out of reach of children.
  • Do not cover the Baby Monitor with a towel or blanket.
  • Test this monitor and all its functions so that you are familiar with it prior to actual use.
  • Do not use the Baby Monitor in damp areas or close to water.
  • Do not install the Baby Monitor in extreme cold or heat, direct sunlight, or close to a heat source.
  • Only use the chargers and power adapters provided. Do not use other chargers or power adapters as this may damage the device and battery pack.
  • Only insert a battery pack of the same type.
  • Do not touch the plug contacts with sharp or metal objects.
  • Connect the power adapters to easily accessible electrical outlets.
  • CAUTION: You risk explosion if the battery is replaced by an incorrect type. Dispose of used batteries according to their instructions. Use only the rechargeable battery pack with rating: 3.7V 1200mAh.

Disposal of the Device (environment):

  • At the end of the product life cycle, you should not dispose of this product with normal household waste. Take this product to a collection point for the recycling of electrical and electronic equipment.
  • Some of the product materials can be re-used if you take them to a recycling point. By reusing some parts or raw materials from used products you make an important contribution to the protection of the environment.
  • Dispose of the battery pack in an environmentally-friendly manner according to your local regulations.

Motorola VM481-2 Specifications

General IconGeneral
BrandMotorola
ModelVM481-2
CategoryBaby Monitor
LanguageEnglish

Related product manuals