EasyManua.ls Logo

Motorola VM50G - User Manual

Motorola VM50G
2 pages
Print Icon
To Next Page IconTo Next Page
Loading...
UK EN
WARNING:
Strangulation hazard. Children have STRANGLED in cords.
Keep this cord out of the reach of children (more than 1 meter
away). Do not remove the tags from the AC Adapters. Only use
the AC Adapters provided.
QUICK START GUIDE
For a full explanation of all features and instructions, please refer to the User’s
Guide (available for download from motorolanursery.com).
1. Setting up your Digital Video Baby
Monitor
A. Connecting the power supply for the Baby Unit.
Connect the USB plug of the power
adapter to the Baby Unit and the other end
to a suitable mains power outlet.
Only use the enclosed adapter (5V DC/
1000mA).
Ensure the ON/OFF switch is at the "ON"
position.
MODELS:
VM50G
VM50G-2,
VM50G-3,
VM50G-4
B. Connecting the power supply for the Parent Unit.
Connect the small plug of the power adapter to the parent unit and the other
end to the electrical outlet.
Only use the enclosed adapter (5V DC/1000mA).
A rechargeable battery (Lithium-ion battery 3.8V/2000mAh) inside the
Parent Unit allows you to move it without losing the link and picture from the
Baby Unit. The battery gives up to 5 hours operation for the Parent Unit. We
recommend you charge it for at least 16 hours before first use, or when the
Parent Unit indicates the battery is low.
Press and hold the POWER button
0
on the top of the Parent Unit to turn it
ON.
NOTE
When the Baby and Parent Units are both turned on and within range, the Parent Unit
should show a color image from the Baby Unit camera, but if the room is dark, the image
will be in black and white, with a
icon showing, due to the infra-red illumination by the
Baby Unit.
2. Basic operation of the keys
Parent Unit
ON/OFF button Press and hold to switch the Parent Unit ON/OFF.
UP/DOWN buttons
Press to tilt the camera up or down.
Press to move up or down menu settings.
LEFT/RIGHT
buttons
Press to pan the camera left or right.
Press to move left or right across menu options.
MENU button Press to open menu options or exit the menu.
OK button Press to confirm a selection.
VIDEO button Press to turn the LCD screen ON/OFF.
TALK button Press and hold to talk to your baby.
Volume buttons Press -/+ to adjust the volume of the parent unit.
RESET button Press and hold with a small pin to reset the unit.
Baby Unit
ON/OFF switch
Slide the switch to the left to switch on the Unit.
Slide the switch to the right to switch off the Unit.
PAIR button
Press and hold the button on the underside of the Baby
Unit to register the camera to a Parent Unit.
3. General Information
If your product is not working properly, read this Quick Start Guide or the User’s Guide of
one of the models listed on page 1.
Please visit us at:
motorolanursery.com/support
Consumer Products and Accessories Limited Warranty (“Warranty”)
Thank you for purchasing this Motorola branded product manufactured under license by
Meizhou Guo Wei Electronics Co. LTD ("MZGW').
What Does this Warranty Cover?
Subject to the exclusions contained below, MZGW warrants that this Motorola branded
product (“Product”) or certified accessory (“Accessory”) sold for use with this product
that it manufactured to be free from defects in materials and workmanship under normal
consumer usage for the period outlined below. This Warranty is your exclusive warranty
and is not transferable.
THIS WARRANTY GIVES YOU SPECIFIC LEGAL RIGHTS, AND YOU MAY HAVE OTHER
RIGHTS THAT VARY BY STATE, PROVINCE OR COUNTRY. FOR CONSUMERS WHO ARE
COVERED BY CONSUMER PROTECTION LAWS OR REGULATIONS IN THEIR COUNTRY
OF PURCHASE OR, IF DIFFERENT, THEIR COUNTRY OF RESIDENCE, THE BENEFITS
CONFERRED BY THIS LIMITED WARRANTY ARE IN ADDITION TO ALL RIGHTS AND
REMEDIES CONVEYED BY SUCH CONSUMER PROTECTION LAWS AND REGULATIONS.
FOR A FULL UNDERSTANDING OF YOUR RIGHTS YOU SHOULD CONSULT THE LAWS
OF YOUR COUNTRY, PROVINCE OR STATE.
Who is covered?
This Warranty extends only to the first consumer purchaser, and is not transferable.
Question and Answer IconNeed help?

Do you have a question about the Motorola VM50G and is the answer not in the manual?

Summary

Setting Up Your Digital Video Baby Monitor

Baby Unit Power Connection

Connects the Baby Unit to power using the enclosed adapter and ensures the ON/OFF switch is set correctly.

Parent Unit Power & Charging

Connects the Parent Unit to power, details battery charging, and explains initial power-on.

Basic Operation of Baby Monitor Keys

Parent Unit Controls

Explains the function of buttons on the Parent Unit for camera control, menu navigation, and communication.

Baby Unit Controls

Describes the ON/OFF switch and PAIR button on the Baby Unit for basic operation and camera pairing.

General Information and Support

Motorola Product Warranty Details

Outlines the limited warranty coverage, duration, exclusions, and consumer rights.

Warranty Service and Support

Provides guidance on how to obtain warranty service and contact support for issues.

Environmental Disposal and Compliance

Details proper device disposal and lists EU/UK Declarations of Conformity.

Overview

This document serves as a Quick Start Guide for the Motorola Digital Video Baby Monitor, providing essential information for setup, basic operation, and general warranty details. It is designed to help users quickly get their baby monitor up and running, with references to a more comprehensive User's Guide for detailed information.

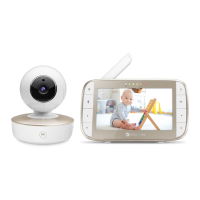
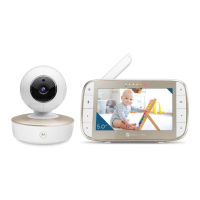
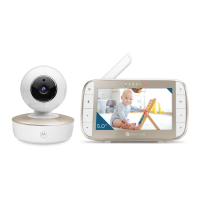
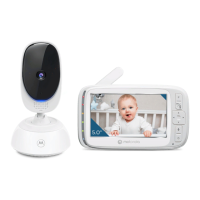
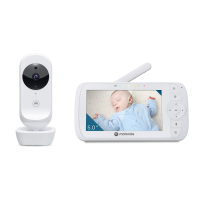
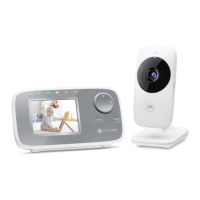
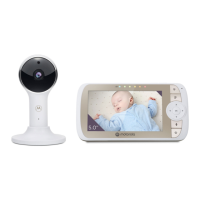
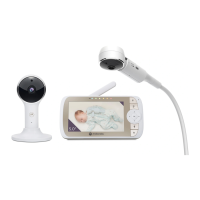
The primary function of this device is to allow parents or caregivers to monitor a baby remotely using video and audio. It consists of two main components: a Baby Unit (camera) and a Parent Unit (monitor). The Baby Unit is placed near the baby, capturing video and audio, which is then transmitted wirelessly to the Parent Unit, allowing the caregiver to see and hear the baby from another room. This provides peace of mind and convenience, enabling monitoring without constant physical presence in the baby's room.

Usage Features:

Powering the Baby Unit:

To set up the Baby Unit, connect the USB plug of the provided power adapter to the Baby Unit and the other end to a suitable mains power outlet. It is crucial to use only the enclosed 5V DC/1000mA adapter. Once connected, ensure the ON/OFF switch on the Baby Unit is in the "ON" position. A critical safety warning is highlighted regarding the power cord: it poses a strangulation hazard to children. Users are advised to keep the cord out of reach of children (more than 1 meter away) and not to remove any tags from the AC Adapters. Only the provided AC Adapters should be used.

Powering the Parent Unit:

For the Parent Unit, connect the small plug of its power adapter to the unit and the other end to an electrical outlet. Again, only the enclosed 5V DC/1000mA adapter should be used. The Parent Unit includes a rechargeable Lithium-ion battery (3.8V/2000mAh) which allows for up to 5 hours of operation, providing mobility without losing the connection to the Baby Unit. It is recommended to charge the Parent Unit for at least 16 hours before its first use, or whenever the battery indicator shows low. To turn the Parent Unit ON, press and hold the POWER button located on the top of the unit. Once both units are on and within range, the Parent Unit should display a color image from the Baby Unit camera. If the room is dark, the image will automatically switch to black and white, accompanied by an infra-red illumination icon, indicating the use of night vision.

Basic Operation of Parent Unit Keys:

The Parent Unit features several intuitive controls for navigation and monitoring:

  • ON/OFF button: Press and hold to switch the Parent Unit ON/OFF.
  • UP/DOWN buttons: Used to tilt the camera up or down, or to move up or down through menu settings.
  • LEFT/RIGHT buttons: Used to pan the camera left or right, or to move left or right across menu options.
  • MENU button: Press to open menu options or exit the menu.
  • OK button: Press to confirm a selection within the menus.
  • VIDEO button: Press to turn the LCD screen ON/OFF, allowing users to conserve battery when only audio monitoring is needed.
  • TALK button: Press and hold to activate the two-way talk feature, enabling communication with the baby through the Baby Unit.
  • Volume buttons (+/-): Press to adjust the volume of the Parent Unit's speaker.
  • RESET button: Press and hold with a small pin to reset the unit, which can be useful for troubleshooting.

Basic Operation of Baby Unit Keys:

  • ON/OFF switch: Slide the switch to the left to turn the Baby Unit ON, and to the right to turn it OFF.
  • PAIR button: This button, located on the underside of the Baby Unit, is pressed and held to register the camera to a Parent Unit, establishing the wireless connection.

Maintenance Features:

Warranty and Support:

The device comes with a "Consumer Products and Accessories Limited Warranty" provided by Meizhou Guo Wei Electronics Co. LTD (MZGW), the manufacturer under license for Motorola branded products. This warranty covers defects in materials and workmanship under normal consumer usage for a specified period. For consumer products, the coverage is two years from the original purchase date by the first consumer purchaser. For consumer accessories, it is ninety days from the original purchase date. If a product or accessory is repaired or replaced under warranty, the coverage extends for the balance of the original warranty or ninety days from the return date, whichever is longer.

Exclusions from Warranty:

The warranty does not cover:

  • Normal Wear and Tear: Routine maintenance, repair, and replacement of parts due to normal wear and tear.
  • Batteries: Only batteries whose fully charged capacity falls below 80% of their rated capacity and batteries that leak are covered.
  • Abuse & Misuse: Defects or damage resulting from improper operation, storage, misuse, abuse, accidents, neglect (e.g., physical damage like cracks or scratches), contact with liquids, extreme humidity, heat, or food. Commercial use or abnormal usage conditions are also excluded.
  • Use of Non-Motorola branded Products and Accessories: Defects or damage from using non-Motorola branded or certified products or other peripheral equipment.
  • Unauthorized Service or Modification: Defects or damage from service, testing, adjustment, installation, maintenance, alteration, or modification by anyone other than MOTOROLA, MZGW, or their authorized service centers.
  • Altered Products: Products or accessories with removed, altered, or obliterated serial numbers or date tags; broken seals; evidence of tampering; mismatched board serial numbers; or non-conforming/non-Motorola branded housings or parts.
  • Communication Services: Defects, damages, or failure due to any communication service or signal subscribed to or used with the products.

Obtaining Warranty Service:

To obtain service or information, users should visit motorolanursery.com/support. Instructions will be provided on how to ship the product or accessories to an MZGW Authorized Repair Center at the user's expense and risk. Required items for service include: the product/accessory, original proof of purchase (receipt with date, place, and seller), a completed warranty card (if included) showing the serial number, a written description of the problem, and the user's address and telephone number.

Disposal of the Device:

At the end of its life cycle, the product should not be disposed of with normal household waste. It must be taken to a collection point for the recycling of electrical and electronic equipment. The symbol on the product, user's guide, and/or box indicates this requirement. Reusing parts or raw materials from used products contributes significantly to environmental protection. Users should contact their local authorities for more information on collection points.

Compliance:

The device complies with EU Declaration of Conformity (RE Directive 2014/53/EU) and UK Declaration of Conformity (UKCA marking). The CE and UK Declarations of Conformity can be obtained at motorolanursery.com.

Motorola VM50G Specifications

General IconGeneral
ConnectivityWireless
Sound ActivationYes
Night LightYes
Two-Way CommunicationYes
Out of Range IndicatorYes
Low Battery IndicatorYes
FeaturesTemperature monitoring
RangeUp to 1000 feet
Power SourceAC adapter and rechargeable battery
DisplayColor

Related product manuals