EasyManua.ls Logo

Motorola WSi CLS1410 - User Manual

Motorola WSi CLS1410
2 pages
Print Icon
To Next Page IconTo Next Page
Loading...
CLS1410 Two Way Radios
Activating Scan Setting
1. Turn the radio off
2. Enter programming mode by doing the following
a. Press and hold the PTT button and the MON button
b. Turn the radio on, keeping those buttons held down until you hear a chirp
c. If done successfully, you will see a PROG in the bottom left of the screen
3. Adjust your settings
a. Press the MENU button to cycle through your settings
i. 1
st
press will be to change the channel that you’re adjusting settings for,
to change press + or -
ii. 2
nd
press will be your frequency setting, to change press + or
iii. 3
rd
press will be your code setting, to change press + or
iv. 4
th
press will be your active channels, to change press + or
v. 5
th
press will be your call tone, to change press + or
vi. 6
th
press will be your mic gain, to change press + or
vii. 7
th
press will be your scan settings (you will see a z shape on the bottom
of the screen), to change please follow these steps:
1. Press + or to change the channel number that you need to
enable/disable the scan feature
2. To enable/disable a specific channel, press the MON button to
select Y (yes) or N (no) for that channel
3. Cycle through all 4 channels and enable/disable the specific
channels desired
4. Save your settings
a. To save your settings, press and hold the PTT button until you hear a low pitch
beep. The PROG on the screen will go away.
5. Activating after programming
a. Turn radio ON
b. With radio on, switch to your designated channel that you usually stay on
c. Short press the MON button to enable/disable the scan feature. You can press
the PTT to transmit while scan mode is activated and your radio will transmit on
your designated channel (see b above)
Question and Answer IconNeed help?

Do you have a question about the Motorola WSi CLS1410 and is the answer not in the manual?

Summary

Turn the radio off

Enter Programming Mode

Press PTT and MON Buttons

Press and hold the PTT and MON buttons to initiate programming mode.

Power On and Chirp Confirmation

Turn radio on while holding buttons until a chirp confirms entry.

Programming Mode Indicator

Successful entry into programming mode is indicated by 'PROG' on screen.

Adjust Radio Settings

Navigate Settings with MENU

Press the MENU button to cycle through available settings for adjustment.

Adjust Channel Selection

Use '+' or '-' to change the channel for settings adjustment.

Adjust Frequency Setting

Use '+' or '-' to modify the frequency setting.

Adjust Code Setting

Use '+' or '-' to modify the code setting.

Adjust Active Channels

Use '+' or '-' to adjust the active channels.

Adjust Call Tone

Use '+' or '-' to adjust the call tone setting.

Adjust Mic Gain

Use '+' or '-' to adjust the microphone gain setting.

Access Scan Settings

Navigate to scan settings (indicated by 'z' shape) for configuration.

Configure Scan Feature

Select Channel for Scan

Use '+' or '-' to select channels for enabling or disabling the scan feature.

Enable;Disable Channel Scan

Press the MON button to select Y (yes) or N (no) for specific channels.

Cycle Through Channels

Cycle through all 4 channels to enable or disable them as desired.

Save Settings

Press and hold PTT until a beep to save settings; 'PROG' display will disappear.

Activate Scan Feature

Turn Radio On

Power on the radio after programming is complete.

Select Designated Channel

Switch to your usual designated channel while the radio is on.

Toggle Scan Mode

Short press the MON button to enable or disable the scan feature.

Overview

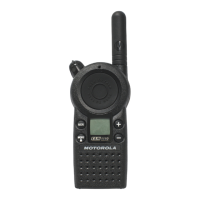
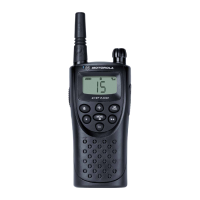
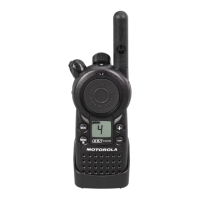
The provided document describes the programming and activation of the scan setting for the CLS1410 Two Way Radios, manufactured by Motorola. This manual focuses specifically on how to configure and use the scan feature, rather than providing a comprehensive overview of all radio functions or detailed technical specifications.

Function Description:

The CLS1410 Two Way Radio is a communication device designed for various applications, likely in business or professional settings, given the emphasis on channel programming and scan features. The core function of the radio is to facilitate two-way voice communication over designated channels. The "scan setting" feature allows the radio to monitor multiple channels for activity, ensuring that the user does not miss incoming transmissions across different programmed frequencies. When scan mode is active, the radio continuously cycles through a pre-selected set of channels. Upon detecting a signal on one of these channels, it temporarily stops scanning to allow the user to listen to the transmission. The user can then transmit on their designated channel even while scan mode is active, indicating a priority transmit function.

Important Technical Specifications (Inferred):

While the document does not explicitly list technical specifications like frequency ranges, power output, or battery life, several aspects can be inferred:

  • Channels: The programming instructions indicate that the radio supports at least four channels, as users can cycle through and enable/disable scan for all "4 channels." This suggests a multi-channel capability, which is standard for professional two-way radios.
  • Programming Interface: The radio features a display screen (where "PROG" appears and a "z shape" indicates scan settings) and a set of buttons for navigation and selection. These include a "MENU" button, "+" and "-" buttons for adjusting settings, a "MON" (Monitor) button, and a "PTT" (Push-To-Talk) button. This interface allows for on-device programming without requiring external software or cables for basic settings.
  • Audio Feedback: The programming process includes audio cues such as a "chirp" upon entering programming mode and a "low pitch beep" when saving settings, which are common in radio devices for user feedback.
  • Scan Feature: The primary focus of the document, the scan feature, allows for selective monitoring of programmed channels. The ability to enable or disable scan for individual channels provides flexibility in how the user manages their communication environment.

Usage Features:

The CLS1410 radio offers several user-friendly features, particularly concerning its programming and operation:

  • Intuitive Programming Mode:

    • Access: Programming mode is accessed by a specific button combination (PTT + MON held while turning on the radio), which is a common method for preventing accidental changes during normal operation.
    • On-Device Configuration: All described settings, including channel selection, frequency, code, active channels, call tone, mic gain, and scan settings, can be adjusted directly on the radio using the MENU, +, and - buttons. This eliminates the need for a computer or specialized programming equipment for these basic configurations.
    • Setting Categories: The "MENU" button cycles through distinct setting categories, each indicated by a specific "press" number (e.g., 1st press for channel, 7th press for scan settings). This structured approach helps users navigate the programming options.
    • Scan Channel Selection: Within the scan settings, users can individually select which of the four available channels should be included in the scan list by pressing + or - to choose the channel number and then the MON button to toggle "Y" (yes) or "N" (no) for scanning that channel. This granular control is a significant usage feature.
    • Saving Settings: Settings are saved by pressing and holding the PTT button until an audible beep confirms the save, and the "PROG" indicator disappears from the screen.
  • Active Scan Operation:

    • Activation/Deactivation: Once programmed, the scan feature can be easily toggled on or off during normal operation with a short press of the MON button. This allows users to quickly adapt to changing communication needs without re-entering programming mode.
    • Priority Transmit: A key operational feature is the ability to transmit on the designated channel (the one the radio is currently switched to) even while scan mode is active. This ensures that the user can always initiate communication on their primary channel without first disabling the scan.
    • Visual Indicator: The "z shape" on the bottom of the screen serves as a visual indicator that the radio is in scan settings mode during programming, helping users confirm they are in the correct menu.
  • Physical Controls: The radio features clearly labeled buttons:

    • PTT (Push-To-Talk): For transmitting voice.
    • MON (Monitor): For activating/deactivating scan and selecting options in programming mode.
    • MENU: For navigating through programming settings.
    • + and -: For adjusting values and selecting channels/options.
    • The image provided shows a robust, handheld design typical of professional two-way radios, with a prominent antenna and a speaker/microphone grill.

Maintenance Features (Inferred):

The document does not directly address maintenance. However, based on the nature of two-way radios and the information provided, some inferences can be made:

  • Durability: The design, as seen in the image, suggests a rugged build suitable for various environments, implying a degree of resistance to wear and tear.
  • User-Configurable: The extensive on-device programming capabilities mean that many operational adjustments and minor "maintenance" tasks (like updating scan lists or changing call tones) can be performed by the user without needing specialized tools or service personnel. This reduces reliance on external support for basic configuration changes.
  • No External Software: The absence of any mention of external software for programming implies that the radio is designed for standalone operation and configuration, simplifying its deployment and ongoing management.

In summary, the CLS1410 Two Way Radio, as described, is a user-friendly communication device with a strong emphasis on its scan feature. It allows for flexible, on-device programming of essential communication parameters and provides convenient activation and operation of the scan function, making it suitable for environments where monitoring multiple channels is crucial while maintaining the ability to transmit on a primary channel.

Motorola WSi CLS1410 Specifications

General IconGeneral
BrandMotorola
ModelWSi CLS1410
CategoryTwo-Way Radio
LanguageEnglish

Related product manuals