2726
EN
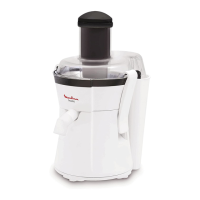
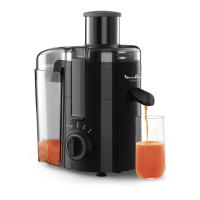
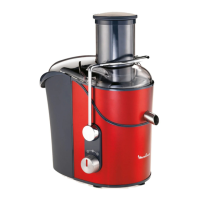
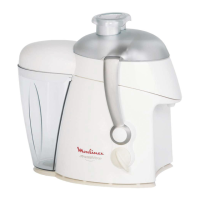
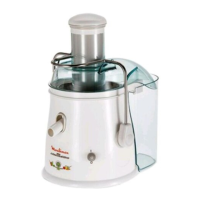
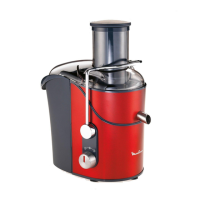
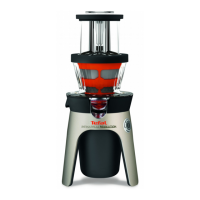
DESCRIPTION
SAFETY SYSTEM
BEFORE FIRST USE
USING THE APPLIANCE
A Pusher
B Feeding tube
C Cover
D Sieve
E Juice collector
F Pouring Spout with anti-drip system
G Pulp container
H Locking Handles
I Control button
J Motor unit
K Drive shaft
L Anti-slip feet
To start the juicer, the cover (C) must be fitted correctly (Fig. 2) and the clamps properly locked
(Fig. 4).
At the end of a cycle, turn the control button to “0” and wait until the sieve (D) stops completely
before removing the cover (C).
We recommend that you wash the removable parts (A, B, C, D, E, G) before the first use (see
section “Cleaning and care”).
Unpack the appliance and then place it on a solid, stable worktop, remove the cover (C) and take
out the protective card on the sieve (D).
• Place the pulp container in the correct position (see Fig. 1)
• Place the juice collector (E) on the body of the appliance (see Fig. 2).
• Place the sieve (D) in the juice collector (E). Ensure that the sieve is properly clipped onto the
drive shaft (K) (see Fig. 2).
• Fit the cover (C) on the appliance in order to have the pulp evacuation exit to the rear
(see Fig. 3).
• Lock the two handles (H) on the cover (C). You will hear an audible “click” (see Fig. 4).
• Slide the pusher (A) into the feeding tube (B) aligning the groove on the pusher with the small
ridge in the feeding tube.
• Place a glass under the pouring spout (F) in front of the appliance
(see Fig. 5).
• Make sure the spout is opened to let the juice flow.
• Plug in the appliance.
• To start the appliance, use the control button (I).
• Cut the fruits or vegetables into pieces if necessary after removing the stones.
• Insert the fruits or vegetables through the feeding tube (B).
• The fruits and vegetables must be inserted only while the motor is running.
• Do not press too hard on the pusher (A). Do not use any other utensil. NEVER push food with
your fingers.
• When you have finished, stop the appliance by turning the control button (I) to 0 and wait
until the sieve (D) stops completely.
Ingredients Approximate weight (kg) Quantity of juice (ml)
Apples 1 600
Pears 1 600
Carrots 1 550
Cucumbers 1(about 2 cucumber) 650
Pineapple 1 550
Tomatoes 1 600
Celery 1 700
Do not use the appliance for more than 1 minute continuously.
(*) The quality and quantity of juice varies widely depending on the freshness of the fruit or
vegetables and variety of each vegetable or fruit. The quantities of juice indicated above are
therefore approximate.
• To prevent spilling on the countertop, you can turn the spout to stop the juice flow (see Fig. 6)
• When the pulp container (G) is full, or the juice flow slows down, empty the pulp container (G)
and clean the sieve (D) and the cover (C).
PRACTICAL TIPS
• Wash the fruit carefully before stoning.
• You do not need to remove the skin or peel. You only need to peel fruit with thick (and bitter)
skin: citrus fruit, pineapple (remove the centre core).
• It is difficult to extract juice from melon, bananas, avocados, blackberries, figs, aubergines
and strawberries, etc.
• The juicer should not be used for sugarcane , ice cubes, and excessively hard or fibrous fruit.
• Choose fresh, ripe fruit and vegetables, they will yield more juice. This appliance is suitable
for fruits such as apples, pears, oranges, pomegranates, pineapple, etc. and vegetables such as
carrots, cucumbers, tomatoes, beetroot and celery, etc.
• If you use over-ripe fruit, the sieve (D) will tend to get clogged up more quickly.
IMPORTANT:
All juice should be consumed immediately. On contact with air, it is very quickly oxidised, which
can change its taste, colour and, above all, nutritional value. Apple and pear juices quickly turn
brown. Add a few drops of lemon juice to slow this discolouration.
CLEANING AND CARE
• All removable parts may be cleaned in the dishwasher (A, B, C, D, F, G). Alternatively wash
the parts in warm water and washing up liquid. Don’t use an abrasive sponge to do this. The
appliance is easier to clean if rinsed with water immediately after use and then cleaned
fully later. Do not use scouring pads, acetone, alcohol, etc. to clean your appliance.