1109012 / MCG-12590
Instructions for D-333
Digital Game Camera
THANK YOU for your purchase of the D-333 Digital Game Camera. Please read this
booklet before using the unit. If you should have any questions about this product or
any other Moultrie product, please contact us using the information on the back of
this booklet. Please register your camera at www.moultriefeeders.com/warranty
to activate your warranty.
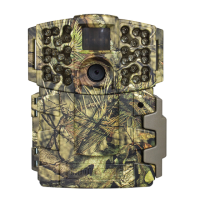
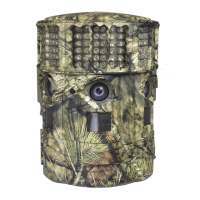
CAMERA OVERVIEW
I
Page 1
D-333 Digital Game Camera
FRONT VIEW
BOTTOM VIEW
Status Indicator
Light Sensor
LCD Display
LED Flash
IRAIM / OFF / ON
OK/Select Button
Menu Button
Navigation Buttons
External Power Port
Push Button Release for battery compartment
USB Port
SD Card Slot
Camera Lens
Motion Sensor
Our Service Department will gladly answer any questions you
have. Call 800-653-3334, Monday - Friday, 8:00 AM to 5:00 PM CST.
www.moultriefeeders.com
Important Battery lnformation
- Only use alkaline batteries. We recommend the use of Duracell or Energizer batteries.
- Do not mix old and new batteries. Always replace ALL the batteries at the same time.
- When the camera is not in use, please remove the batteries.
Moultrie Limited Warranty
This product has been thoroughly tested and inspected before shipment. It is guaranteed from
defects in material and workmanship from the date of purchase for 1 year. Under this limited
guarantee we agree to replace or repair free of charge any part or parts which have been found to
be defective in original material or workmanship. Should you require in-warranty service, call our
Customer Service Department. If your problem cannot be addressed over the telephone, we may
need you to send us your defective product plus proof of purchase.
FCC Statements
Moultrie Products, LLC
MCG-12590
Note: changes and modifications not expressly approved by the party responsible could void the user’s authority to operate this device.
This device complies with Part 15 of the FCC Rules. Operation is subject to the following two conditions: (1) This device may not cause harmful
interference, and (2) this device must accept any interference received, including interference that may cause undesired operation.
NOTE: THE MANUFACTURER IS NOT RESPONSIBLE FOR ANY RADIO OR TV INTERFERENCE CAUSED BY UNAUTHORIZED MODIFICATIONS TO THIS
EQUIPMENT. SUCH MODIFICATIONS COULD VOID THE USER’S AUTHORITY TO OPERATE THE EQUIPMENT.
NOTE: This device complies with the limits for a Class B digital device, pursuant to Part 15 of the FCC Rules. These limits are designed to provide
reasonable
protection against harmful interference in a residential installation. This device generates,
uses, and can radiate radio frequency energy
and, if not installed
and used in accordance with the instructions, may cause harmful interference to radio communications. However, there is no
guarantee that interference
will not occur in a particular installation. If this device does cause harmful interference to radio or television reception,
which can be determined by turning the equipment o and on, the user is encouraged to try to correct the interference by one or more of the
following measures:
- Reorient or relocate the receiving antenna.
- lncrease the separation between the equipment and receiver.
- Connect the equipment into an outlet on a circuit dierent from that to which the receiver is connected.
- Consult the dealer or an experienced radio/TV technician for help.