EasyManua.ls Logo

Moultrie Spreader User Manual

Moultrie Spreader
2 pages
To Next Page IconTo Next Page
Page #1 background imageLoading...
Page #1 background image
NOTE: Oblong hole should be at top.
r ATV SpreaderInstructions fo
MOUNTING BRACKET TO ATV RACK
CONNECTING THE SPREADER
ATTACHING SUPPORT STRAP
U-Bolt
ATV Rack
Mounting
Bracket
Hitch Pins
Spreader Frame
Align holes
Cotter Pins
THANK YOU for your purchase of the ATV Spreader, a top
quality Moultrie product. Please read both sides of this sheet
before operating this unit. if you should have any questions
about this or any other Moultrie product, please contact us using
the information on the revere side.
To help us better serve you, please complete and mail the
enclosed Warranty Card.
Using provided Nuts, Washers and
U-Bolts, connect the Mounting Bracket to
the rack of the ATV as shown.
When sliding Feedgate Arm through
oblong hole, align the holes on the
Mounting Bracket with the holes on
the frame of the Spreader. Slide the
two Hitch Pins through both of the
holes and secure with Cotter Pins
as shown.
Slide a 6’x 1” Ratcheting
Tie-Down Strap through
Metal Loop on back of ATV
frame. Place S hooks of ratchet
strap around front of ATV rack.
Adjust tension strap until firm.
Metal Loop
Ratcheting Tension
Adjustment
Tie-Down
Strap
Strap S hooks
Question and Answer IconNeed help?

Do you have a question about the Moultrie Spreader and is the answer not in the manual?

Moultrie Spreader Specifications

General IconGeneral
TypeBroadcast
MountingATV, UTV
Spread WidthUp to 20 feet
Power SourceBattery (6V)
Spread Rate ControlAdjustable

Summary

Mounting Bracket to ATV Rack

Connect Mounting Bracket to ATV Rack

Using provided Nuts, Washers and U-Bolts, connect the Mounting Bracket to the rack of the ATV.

Connecting the Spreader

Align and Secure Spreader Frame

Slide Feedgate Arm through oblong hole, align holes, and secure frame with Hitch Pins and Cotter Pins.

Attaching Support Strap

Attach and Tension Support Strap

Slide a 6'x 1" Ratcheting Tie-Down Strap through metal loop and secure S hooks to ATV rack.

Connecting Power Cable

Safety Precaution: Eye Protection

Always wear eye protection when connecting the power cable to the ATV's battery.

Connect Power Cable to ATV Battery

Connect Red Alligator Clip to positive (+) and Black Alligator Clip to negative (-) ATV battery terminals.

Adding Material and Adjusting Amount

Add Material to Hopper

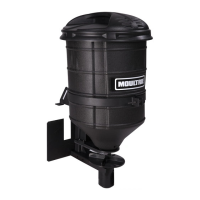
Add desired material such as feed, fertilizer, or seed to the hopper and secure the lid.

Adjust Material Dispensing Amount

Move Adjustment Stop towards front to dispense less, towards rear to dispense more material.

Operating Unit

Safety Precaution: Eye Protection

Always wear eye protection when operating the unit.

Turn Motor Switch ON

Turn the motor switch to the ON position to begin spreading material.

Operate Feedgate Arm

Pull Feedgate Arm towards you to open, push away to close. Reposition Adjustment Stop as needed.

Cleaning and Storing Unit

Cleaning Instructions

Wash and dry the ATV Spreader completely after use, especially if spreading corrosive material.

Storage Recommendations

Apply a light coat of oil on all metal parts and the motor to prevent rust and corrosion.

Tips and Pointers

Leaving Spreader Connected

It is recommended to empty the hopper to reduce potential damage when leaving the spreader connected.

ATV Handling with Loaded Spreader

The added weight affects ATV balance; exercise caution when traveling up/down hills.

Setting Dispensing Amount

Adjust stop, test spread for 20ft, check coverage, and reposition stop as needed for best results.

Replacement Parts

Moultrie replacement parts, including shrouds, backplates, and motors, are available for purchase.

Related product manuals