8
HOW TO USE
“Mulching” – Chopping and depositing grass on the
lawn
Cutting and collecting grass cuttings
Cutting and ejecting grass cuttings
Standards of use
1) Alwaystanddismantletheaccessorywiththeengine
o,afterremovingtheignitionkey(ifsupplied),orafter
disconnectingthecapfromtheenginesparkplug.
2) Apply the “mulching” accessory and check that the
ttedpartshavebeenfastenedcorrectlyandsecurely.
3) You always need to work with the grass-catcher or
stone-guard tted properly even when using the
“mulching”accessory.
4) Always avoid removing a large quantity of grass, to
avoid blocking the cutting deck or overloading the
engine and the cutting parts. Regulate the forward
speed depending on the lawn conditions and the
quantityofgrassremoved.
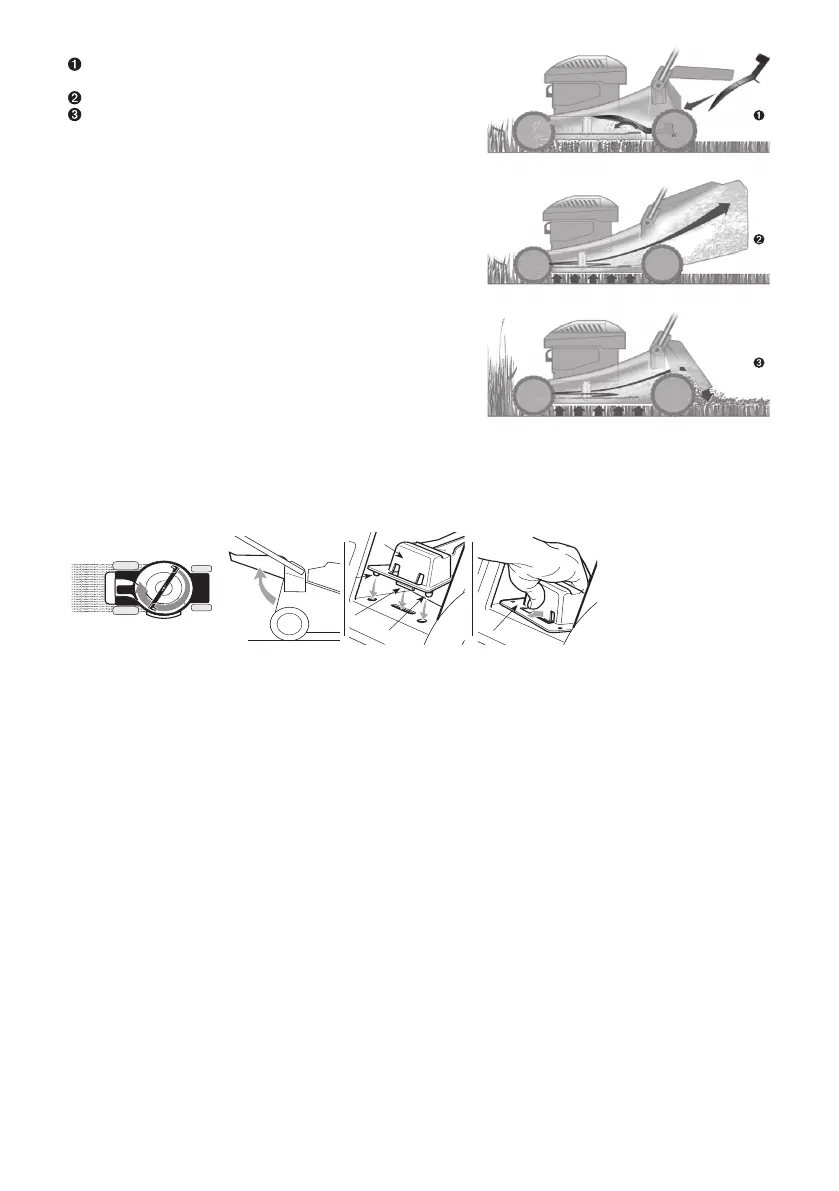
INSTRUCTIONS FOR ASSEMBLY AND DISMANTLING
Assembly
Lift the stone-guard and t the mulching plug (1) in the
outlet. Fasten it by tting the two pins (2) into the holes
provided until the fastener tooth clicks into place (3).
Dismantling
Lift the stone-guard and press down on the centre until the
tooth (3) is released and remove the mulching plug (1).
STARTING YOUR MOWER
Read and understand the Safety Precautions before using your mower.
• Put Mounteld 4-stroke oil, part number MX855, available from any Mounteld stockist or B&Q store, SAE 30 or
10W-30 oil, in the oil ller (Figure 3). Do not overll.
The oil tank capacity for models:
HP454 & SP454 is 0,5 litre
HP45 is 0,45 litre
HP45H is 0,55 litre
• Fill the fuel tank with UNLEADED petrol. Use only clean, fresh petrol - stale fuel may contain deposits that will
clog the carburettor. Unleaded fuel can start to go stale after just 28 days. For model HP45H a fuel stabiliser is
recommended to help prevent fuel becoming stale. We recommend the use of Mounteld universal fuel stabiliser.
Do not overll, the petrol level should be below the bottom of the fuel tank neck. Do not over tighten the fuel cap.
The fuel cap breathes through the threads of the cap and over tightening can cause the engine to cut out.
• Ensure that the spark plug lead is securely connected to the spark plug.
• Press the “PRIMER” device button (Figure 4) 3 times to prime the carburettor (for models HP454, SP454 and
HP45).
• Turn on the fuel tap which is located beside the air lter (close up in Figure 3 for model HP45H)