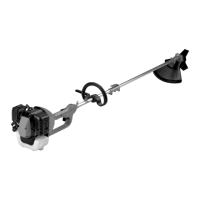
METAL DISKS
The 4-pointed disks are suitable for cutting resi-
stant grass over wide areas. To cut grass, use the
brush cutter as you would a lawnmower: cut the
grass by moving the brush cutter from right to left,
then bring it back to the right, keeping it out of the
vegetation, and so on. Mow the grass with circular
sweeping movements of about 60° - 90° (Fig. 15).
The 3-pointed disk is suitable for cutting branches
and small trees with a diameter of 2 cm.
In this case, start cutting the vegetation from above
and bring the cutting head downwards in order to
cut the branches into little pieces (Fig. 16)
WARNING
Using metal tools runs the risk of recoil when
the equipment comes into contact with solid
objects (trunks, branches, stones). If the equip-
ment does bounce back, it will be difficult to
control and may seriously injure the operator
and damage the machine.
INSTRUCTIONS FOR MAINTENANCE
REPLACING THE NYLON LINE
1. Turn the knob (A) clockwise and remove it (Fig.
17A).
2. Remove the spool (B) and the spring (C) from
the shaft (D).
3. Remove the remains of the nylon line (H).
4. Fold the line 2mm in diameter and 4.5 m in
length in half. Make a loop in the centre and
thread it through the slot in the separator disk
(Fig.17B).
5. Hold the line taut and wind it clockwise as
shown in figure (Fig.17C) keeping the two
halves separated by the central separator disk.
Leave about 15 cm free at the ends.
6. Block each end of the line in the slot (F) on the
opposite ends of the spool (Fig.17D).
7. Place the spring (C) on the shaft (D). Fit the
ends of the nylon line into the bushings (G) of
the body (E) of the head (Fig.17E).
8. Fit the spool into the seat of the body of the
head (E) until the reel of line is in line with the
bushings (G). Make sure the spring is placed in
the spool.
9. As soon as the spool is in place, exert pres-
sure on the spool to compress the spring. Pull
both ends of the line (H) sharply to release the
line from the slot (Fig.17F).
10. Continue to exert pressure until the knob can
be tightened (anti-clockwise) on the shaft.
Clamp the knob firmly by hand, without using
tools (Fig.17G).
11. The line must project by about 13 cm in order
to minimize the load during start-up and warm-
up (Fig.9A).
SHARPENING 3- OR 4-POINTED DISKS
Sharpen with a suitable flat file (Fig. 18).
Figure19A and 19B show:
A ) The wrong way to sharpen
B) Sharpening limits
C) Wrong or unequal angles
All the points have to be sharpened in the same
way.
Both sides of the 3- and 4-pointed disks can be
used. When one side is worn, the disk can be tur-
ned over in order to use the other side.
WARNING
Remove the spark plug cap before sharpening.
Put on a pair of gloves before sharpening to avoid
cutting yourself. It is important to ensure the machi-
ne is correctly balanced even after sharpening.
The metal disk must never be repaired: the disk
must be replaced as soon as you notice any brea-
kage or if the sharpening limit has been exceeded.
AIR FILTER
PRECAUTIONS: Never operate without the air
filter. The air filter must be kept clean. If it is
damaged or worn, fit a new filter.
To clean the Filter:
1. Press the tab (A), holding the base of the air fil-
ter guard in place, remove the cover (B) and
the filter media (C) from the base of the filter
(Fig. 20A and 20B).
2. Wash the filter media with soap and water. DO
NOT USE PETROL!
3. Allow the filter to dry in the air.
4. Refit the filter.
NOTE: Replace the filter if worn, torn, damaged or
if it cannot be cleaned.
FUEL CAP / FUEL FILTER
PRECAUTIONS: Before starting these opera-
tions, remove the fuel from the machine and
store it in a suitable container. There may be
pressure in the tank; open the cap slowly to
 Loading...