- 3 -
Hardware Installation Procedure
Follow these steps to prepare the module and evaluation board for
testing and application development.
Plug the NE-4100 module into the sockets on the top of the
evaluation board.
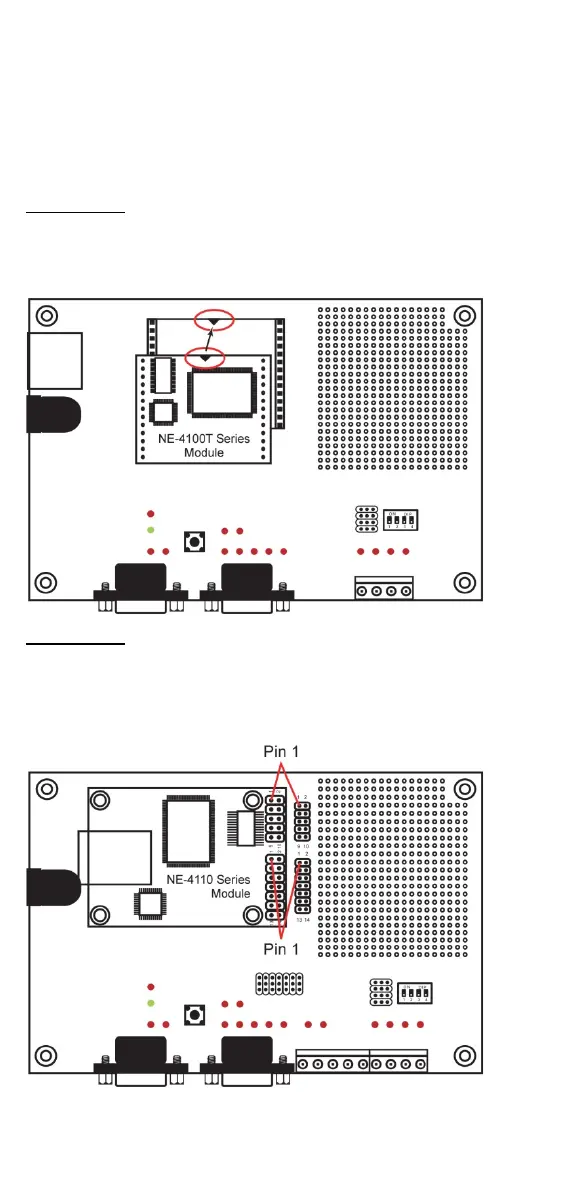
NE-4100-ST:
After attaching the module to the evaluation board, the triangles on the
module and evaluation board should line up.
NE-4100-ST Starter Kit
NE-4110-ST:
The module and evaluation board have two jumper arrays, each with a
pin labeled 1. Be sure to connect the correct Pin 1 on the module to the
correct Pin 1 on the evaluation board.
NE-4110-ST Starter Kit

 Loading...